
Process Fields
Process Fields store information about the document during a workflow process, such as data extracted by OCR, data entered in a GlobalForm, system data like the current date, process data for routing, or manual index data added during validation.
The information can be carried over when the document is imported into GlobalSearch. This is beneficial for not having to manually enter in index data to fields within GlobalSearch, but can also provide consistency in the index data itself.
Creating a New Process Field
Navigate to Fields and select the Add New Button ( 
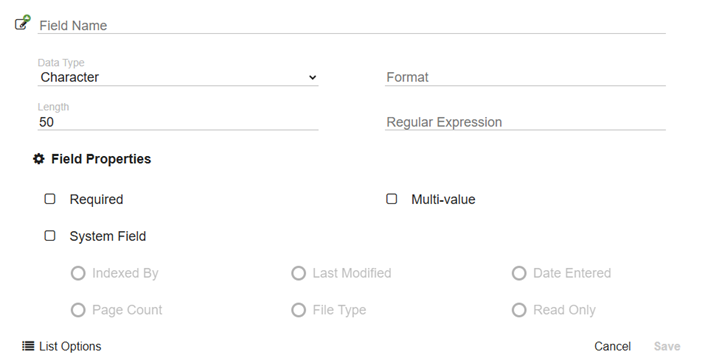
Field Components
Name
Provide a Name for the new Process Fields. Provide a unique Field Name. Naming a specific or general field name should be dependent on its intended use.
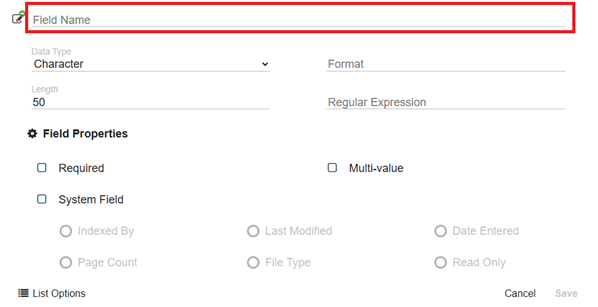
Using the field name "Date" is not very informative, but can easily be reused. However, "Hire Date" is very specific, so that you know exactly what the date is, but it is not as reusable.
Data Type
Select the Data Type. Data types are used for enforcing the type of data entered into a field.
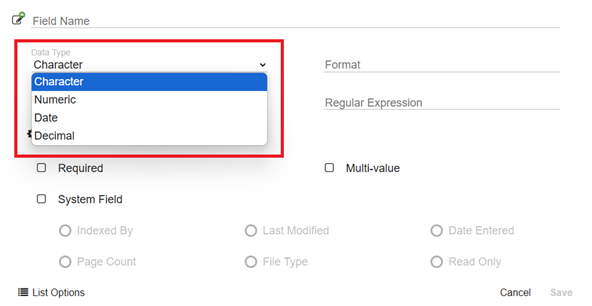
This is crucial when using a value in calculations such as summing line item amounts, performing date math, and when searching using ranges or limits.
There are four data types:
-
Character: The Character data type includes letters, numbers, and characters. Use this data type for alphanumeric data entry, such as names or for numbers which are a “string of digits,” such as a PO number or Social Security Number. You can change from any other data type to Character. You cannot change from Character to another data type.
Keep in mind that changing the data type will likely affect how the data sorts. For example, numbers that use the Character data type sort differently than with a numeric sort. 1, 2, 10, 11, 12, 2, 20, 21, 22 will sort into 1, 10, 11, 12, 20, 21. For a Character Field, use the pound sign (#) to restrict the entry to digits, although it does not control the number of digits entered.
The length of a Character Field defaults to 50 characters. You can increase the maximum length up to 8000 characters.
-
Numeric: Numeric data types can only be integers (whole numbers, no fractions). The appearance of Numeric Fields can be controlled with the Format box. (Refer to Values for Formatting Index Fields for details.) The Numeric data type supports values from -2,147,483,648 to 2,147,483,647.
-
Date: Use the Date data type for date, time, or both date and time Fields. The appearance of Date Fields can be controlled with Formats. (Refer to Values for Formatting Index Fields for details.)
-
Decimal: The Decimal data type can only include integers or decimals. Use for this data type for Fields denoting money. The appearance of Decimal Fields can be controlled with Formats. (Refer to Values for Formatting Index Fields for details.)
Numbers can be enter and stored with as many decimal places as the maximum set length allows. However, the Format setting will control how many decimal places will display. The value that is displayed will be rounded up or down if the Format supports fewer decimal places than the data that was entered. The Decimal data type supports values from -1.79E+308 to -2.23E-308, 0 and 2.23E-308 to 1.79E+308.
Possible Data Loss
It is possible to edit a Character Field to make it shorter, but if you make the Field shorter than any current data in the Field you will risk losing data.
GlobalCapture allows you to enter in a length shorter than any current data and then, when you open up existing documents with values longer than the new length, it will not let you save the document with any new data until you have altered the Field value and made the data the minimum number of characters specified in the Index Field Length setting.
Format
Choose your Format. Format displays a field with a specific format or layout. Formats are useful for making values appear in a uniform format for ease of reading.
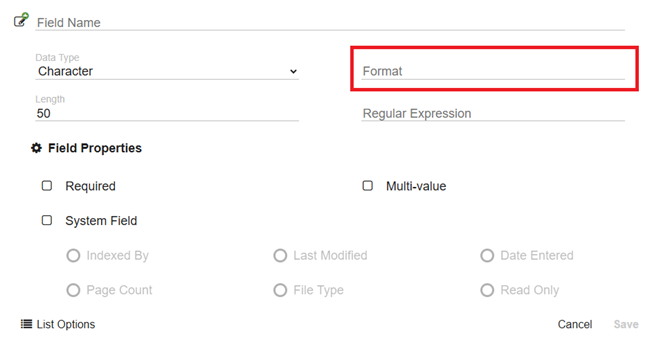
Refer to our knowledge base article, "GlobalSearch and GlobalCapture Date/Time & Currency Formatting" for more information on format patterns.
Length
Set your Length. Length limits the maximum number of characters that can be entered into a field. Any excess characters will error, noting an "invalid length" error.
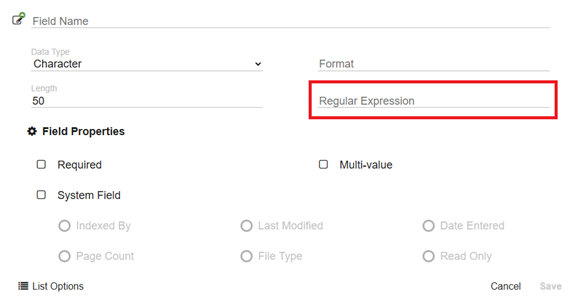
Regular Expression
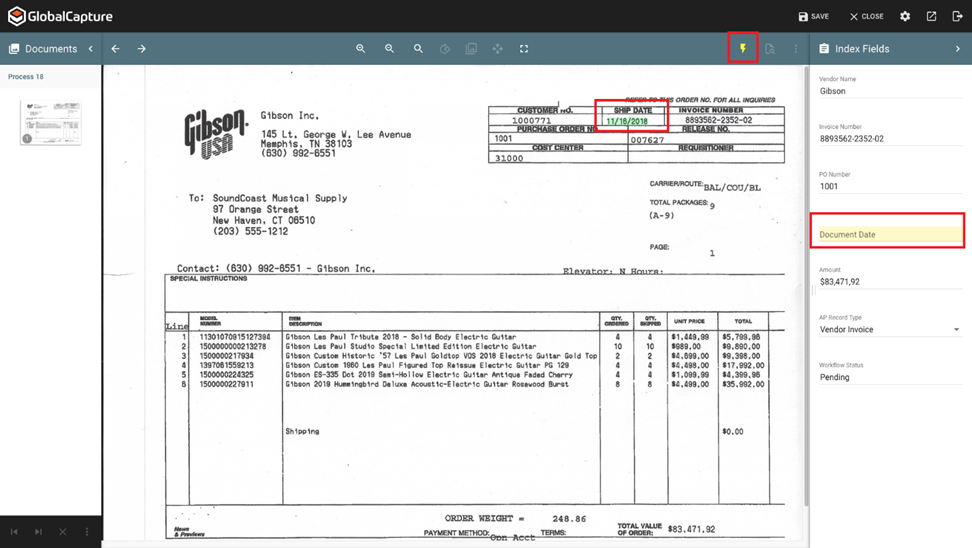
Regular Expression (RegEx) allows you to set a special text string to describe the pattern of data you are looking for when using KeyFree Indexing. When KeyFree Indexing is enabled and a field with a Regular Expression is selected, all data on a document that matches that pattern will be highlighted, making indexing more efficient.
Field Properties
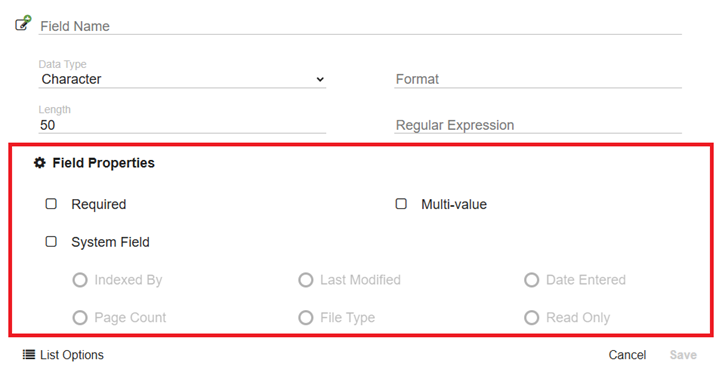
The Field Properties allow us to further customize how a field behaves.
Required
Enable the Required option to force the field to be populated when the document is indexed.
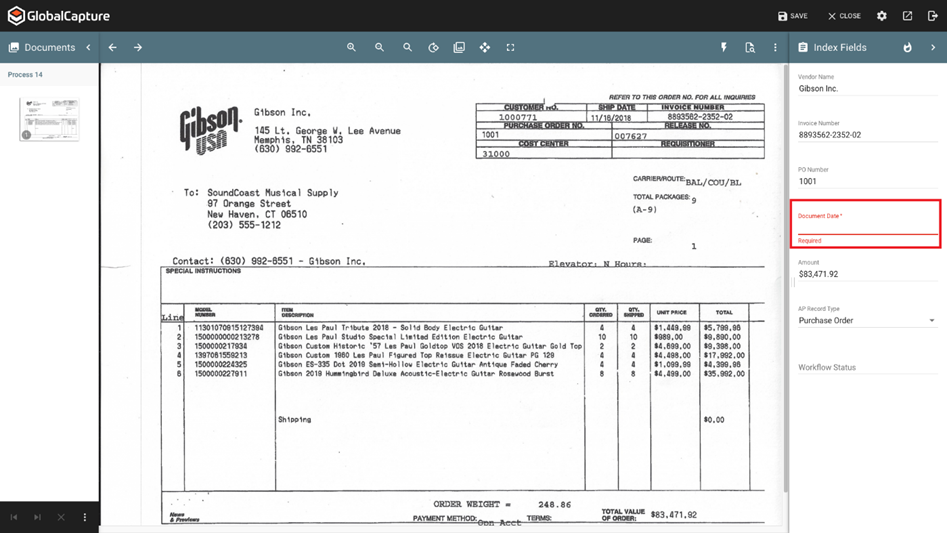
Required fields are indicated with an asterisk and must be completed before a document can be moved along the process.
Multi -value
Enabling Multi-value allows users to enter a list of values, each stored as a distinct data point.
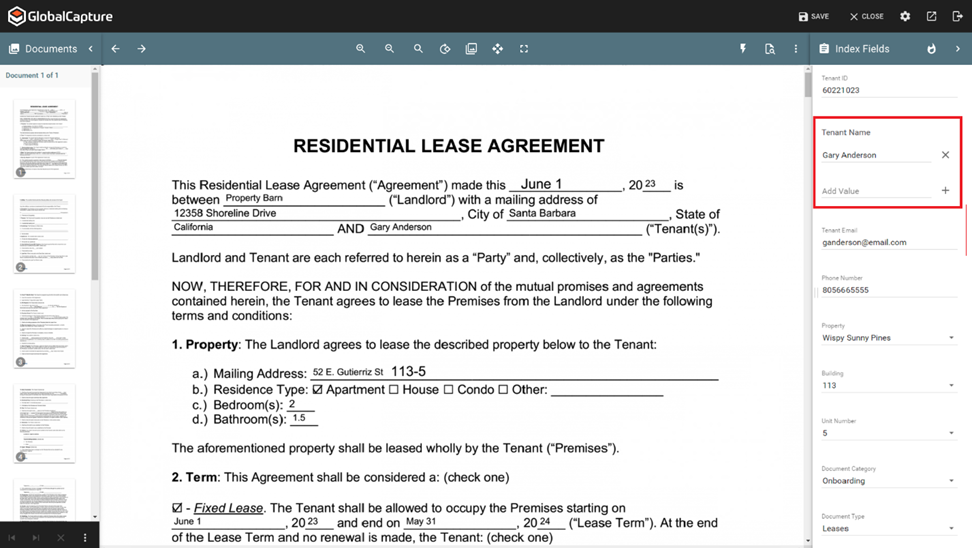
This is useful in Property Management where you might need to list multiple tenants in a Tenant Name field or in Medical where you might need to list multiple medications in a Medications field.
System Fields
System Fields are Fields whose value is entered automatically for the user. The System Fields settings are available or grayed out, depending on the data type selected. For example, a Field called “Last Modified By” configured with the Last Modified System Field would automatically display the username of the last person to modify the document in the Validation Station.
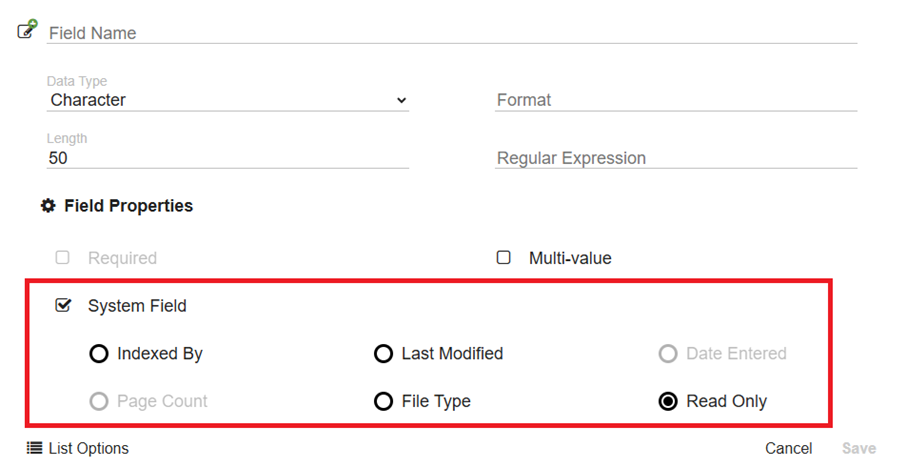
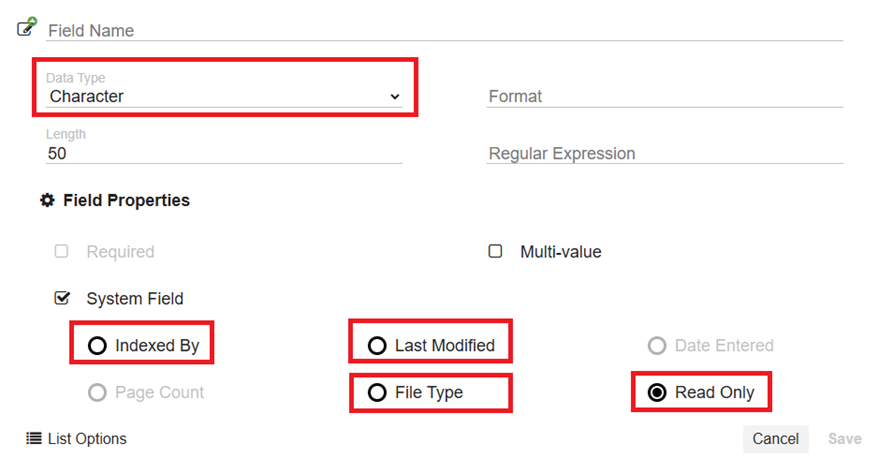
The available System Fields are based on the Data Type selected.
-
Character: Indexed By, Last Modified, File Type, Read Only
-
Numeric: Page Count, Read Only
-
Date: Last Modified, Date Entered, Read Only
-
Decimal: Read Only
-
Indexed By: Captures the current username. Available when the Character data type is selected, this records the username or service logon identity that created the record.
-
Last Modified: Captures the date or the user when the record was last saved. When the Character data type is selected, this records the username or service logon identity for last saved changes to the document. When the Date data type is selected, this records the date and/or time when the document was last changed and saved.
-
Date Entered: Records the date and/or time when the record was created in the database. It is available when the Date data type is selected.
-
Page Count: Records the number of pages in the document when the record was last saved. Available when the Numeric data type is selected.
-
File Type: Available when the Character data type is selected, this records the extension of the source file stored in the Windows folder.
-
Read Only: The default setting, available for any data type, this prevents a user from entering data into the Field, or modifying existing data in the Field. The Field is therefore reserved for use by Workflows.
List Options
Select List Options to assign a list to your process field. Use Field Lists (also known as “pick lists”) to help users by offering a list of choices for indexing a document, instead of typing data into a field. The List Options dialog allows you to choose three list states for a field; Normal Field, Standard Pick List, and Dynamic Pick List.
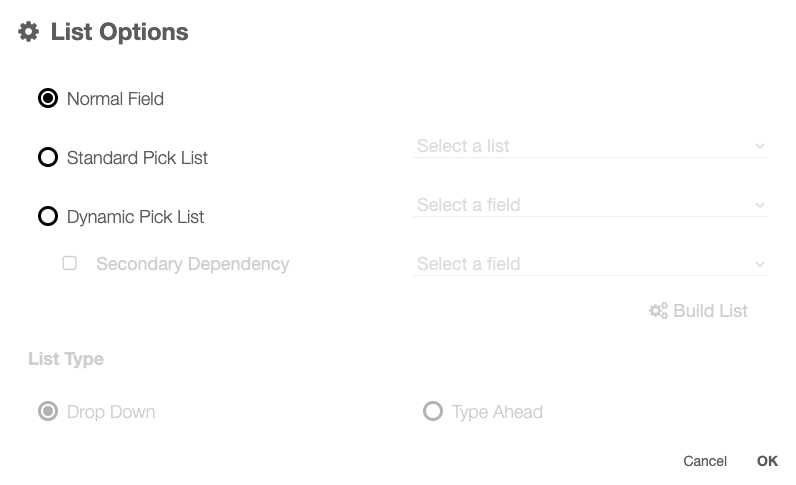
Normal Field is a Process Field without a List and is the default setting.
Standard Pick Lists
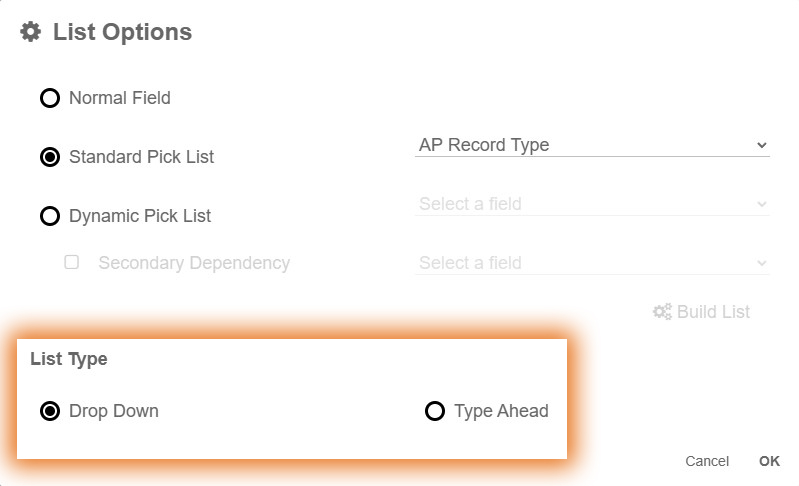
A Standard Pick List is a list of choices for a Field where users may select a value. It can be set as either a Drop Down list or Type Ahead (autocomplete) list.
-
Drop Down List: provides the user with a static list of values to choose from.
-
Type Ahead List: provides a suggested list of values as data is typed into a particular Field. A type-ahead pick list field is particularly useful for data values which are frequently misspelled, long, complex, or otherwise time-consuming to type.
Type Ahead Lists allow the user to enter data that may not appear in the list. This can have a negative impact on searching and releasing. User entered values DO NOT become part of the list.
You can create a Standard Pick List by creating a new field, but also by editing a current field. To modify an existing field, select the ellipsis beside the field you wish to edit.
It is important to note that any data currently in a process field being modified will need to be replaced when the related documents are open.
Dynamic Pick Lists
A Dynamic Pick List is a conditional pick list, which allow you to filter drop-down fields in a pick list based on information selected in a related field. This allows for the value selected in one field to impact the values available in another.
The pick lists used to build Dynamic Pick Lists must be drop-down lists and the Dynamic Pick List cannot be a Multi-Value List.
For example: Use a Dynamic Pick List to first select a vehicle make from a list of vehicle manufacturers; it will then show only makes based on the make of car selected.
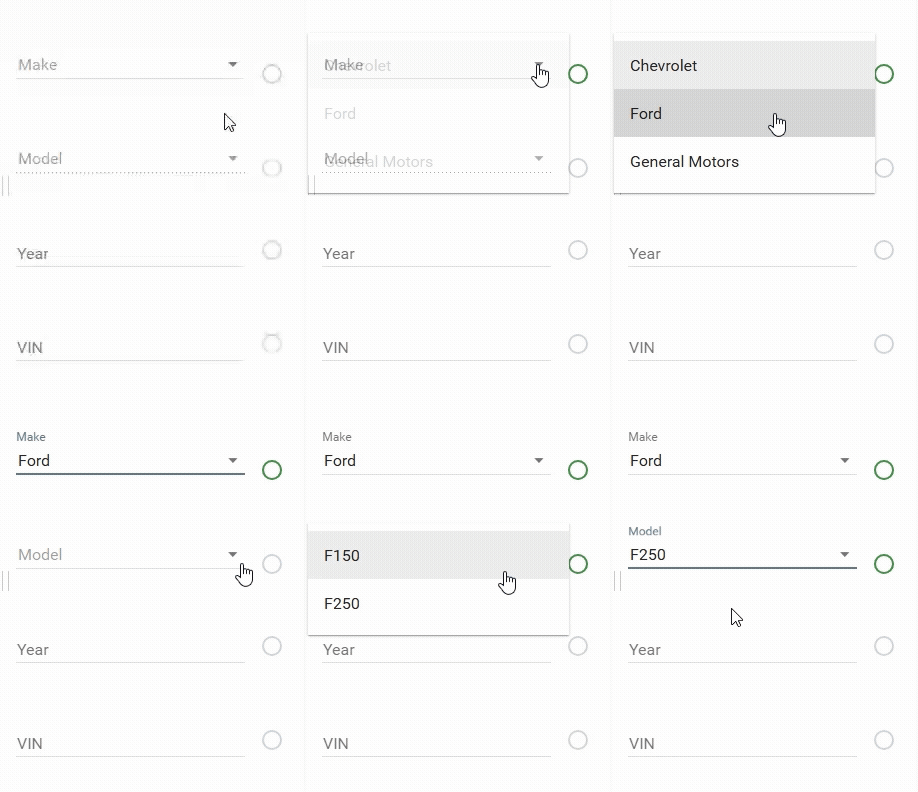
There are two levels of dependency that can be specified for a Dynamic Pick List.
-
Primary Dependency is required and contains a list of only regular Field List values.
-
Secondary Dependency is optional and may have conditional Fields besides regular Field List values.
The related Lists and their values used can be unique or can be reused.
It is not required that every Primary Dependency have a Secondary Dependency or that each Primary Dependency have a unique Secondary Dependency.
The Lists and their values used can be different (like car models from different dealers) or can be reused (like the same colors for this dealer’s cars and also that dealer’s cars).
Configuration
When configuring dynamic pick lists, you will need to:
-
Create all the necessary lists and give the lists precise and accurate names.
-
Create the Fields.
-
Create associations between the values in each field to the list to be displayed. This is referred to as list mapping.
While not difficult, creating dynamic pick lists requires some planning and proper naming of your lists to make list mapping easy. Visit our knowledge base article on Creating Lists to learn more.
Creating a Dynamic Pick List
Fields
Make (Primary Field), Model (First Dependency), Trim (Secondary Dependency)
Lists
A list of car Makes, A list of car Models for each Make, A list of Trim levels for each Model.
Notes:
-
Lists can be reused. Not every Make needs to have a unique Model list.
-
First and Second dependencies are not required. If no dependency for a list is mapped, no list will be displayed and no further selection can be made.
|
Make List |
Ford Models |
Chevy Models |
GM Models |
Ford SUV Trims |
Ford Truck Trims |
Chevy SUV Trims |
Chevy Truck Trims |
GM Trims |
|---|---|---|---|---|---|---|---|---|
|
Ford Chevy GM |
Escape Explorer F150 |
Equinox Tahoe Silverado |
Terrain Yukon Sierra |
Base XLT Limited |
XL Lariat Raptor |
LS LT LTZ |
LT LTZ High Country |
SLE SLT Denali |
Primary Field
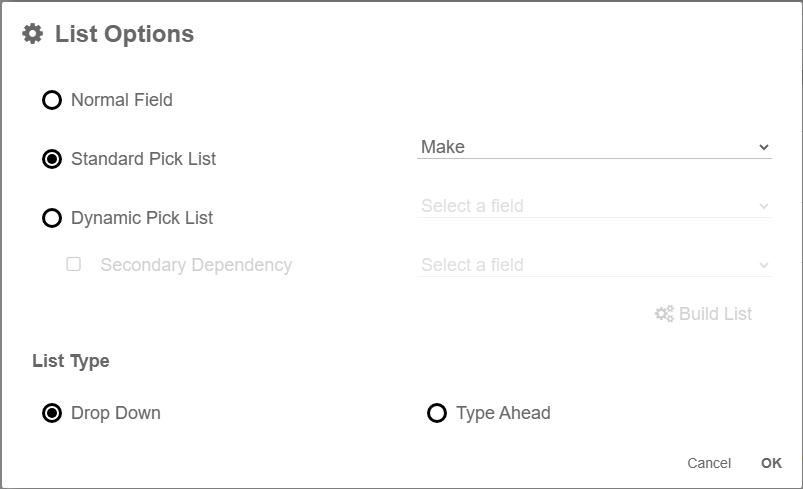
The primary field is the field that will initiate the dependency lists. This field is just a standard pick list field.
-
Create a new field.
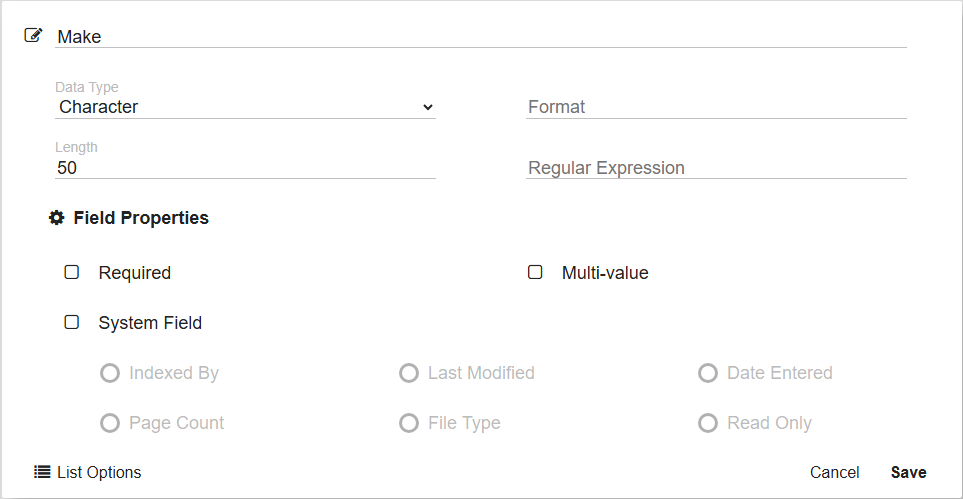
-
Select List Options and choose Standard Pick List.
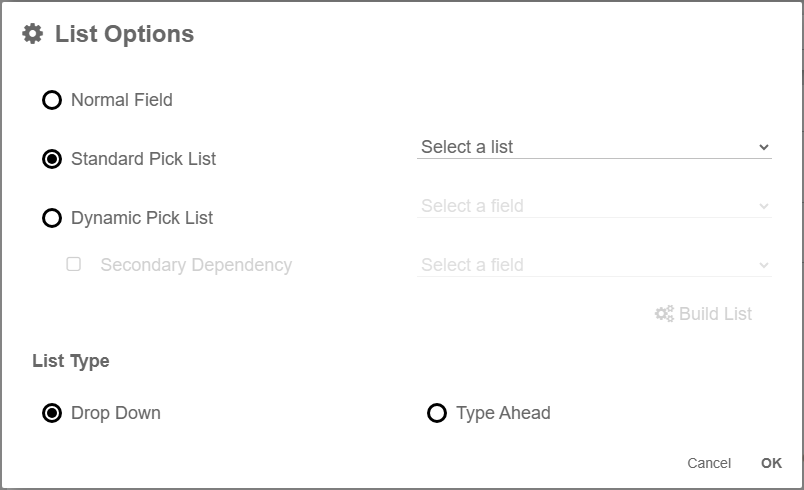
-
Select the appropriate List from the Select a List menu.
-
Click Ok.
-
Save your field.
First Dependency
This field will be inactive until a value in the Primary Field is selected. The values in this list will be driven by the selection in the primary field.
-
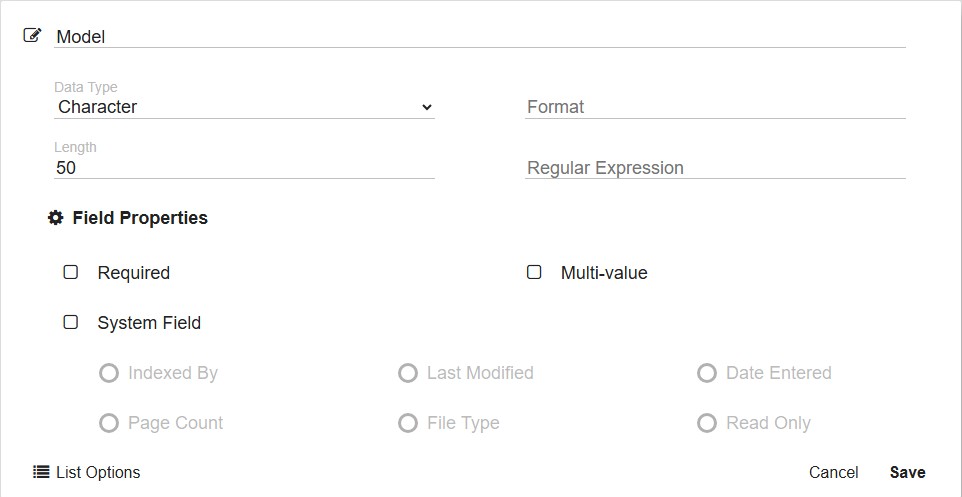
Create a new field.
-
Select List Options.
-
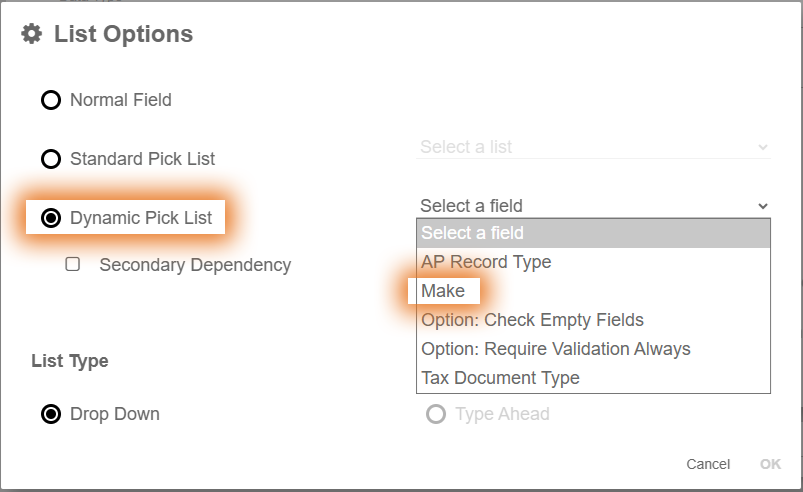
Select Dynamic Pick List.
-
Select the Primary Field from the Select a Field drop down.
-
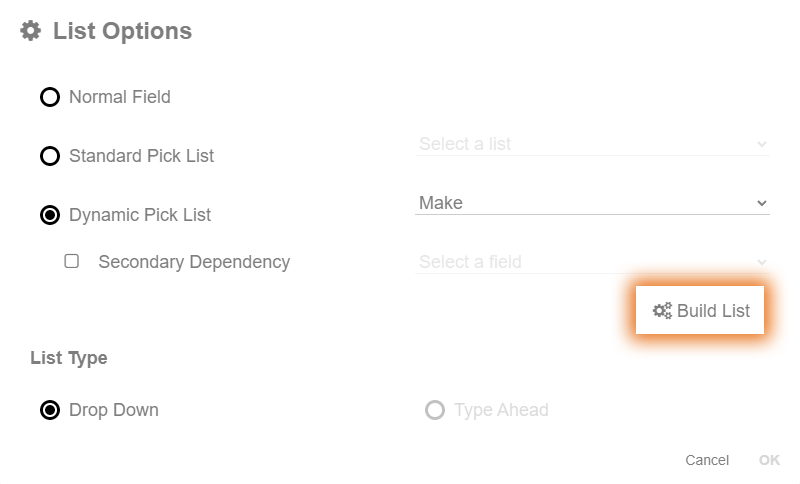
Select Build List.
-
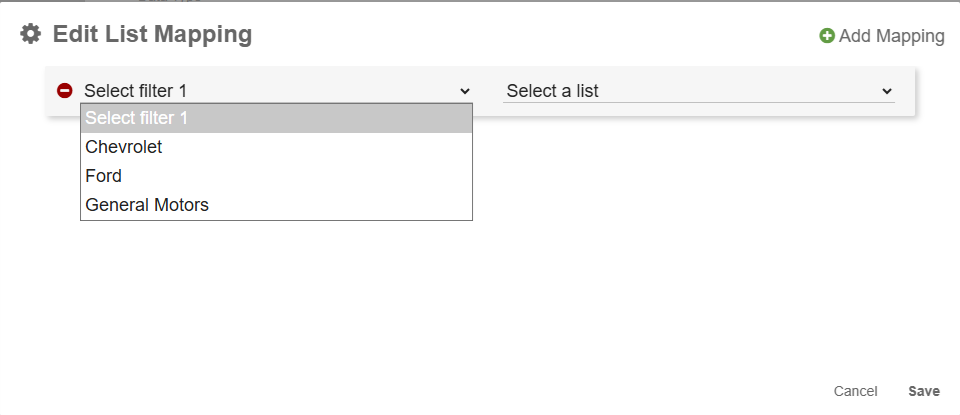
Click Add Mapping.
-
The column on the left (Select filter 1) will be the list of values in the primary field. The column on the right (Select a list) will be the name of the list that appears in the First Dependency field when the corresponding value is selected in the primary field.
-
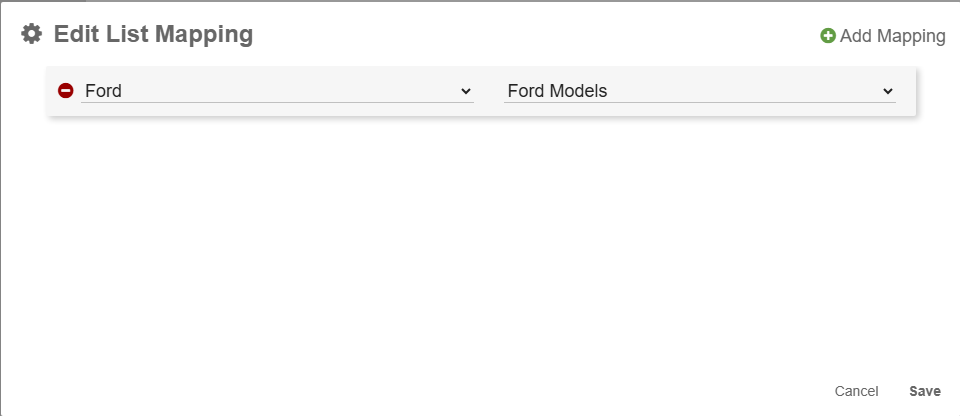
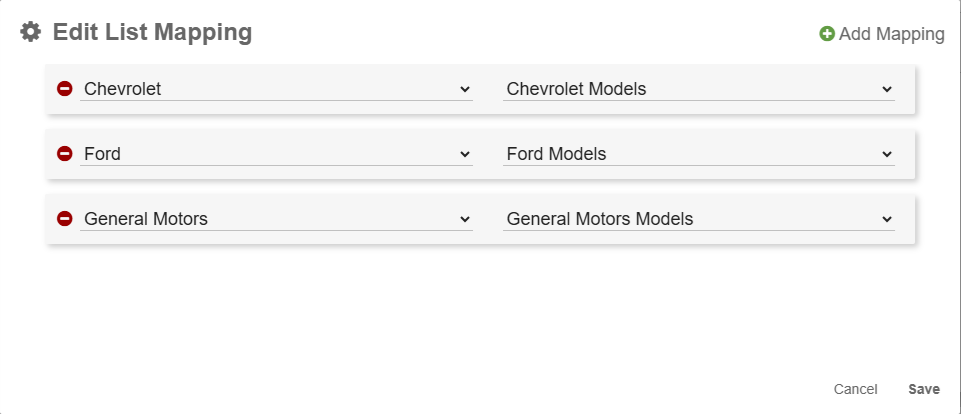
Continue to click Add Mapping to map each value in the primary list to the list that will appear in the First Dependency field. If no mapping is provided for any value in the primary list, if that value is selected, the first dependency will remain inactive.
-
Click Save.
-
Click OK.
Secondary Dependency
This field will be inactive until a value in the First Dependency field is selected. The values in this list will be driven by the selection in the First Dependency field.
-
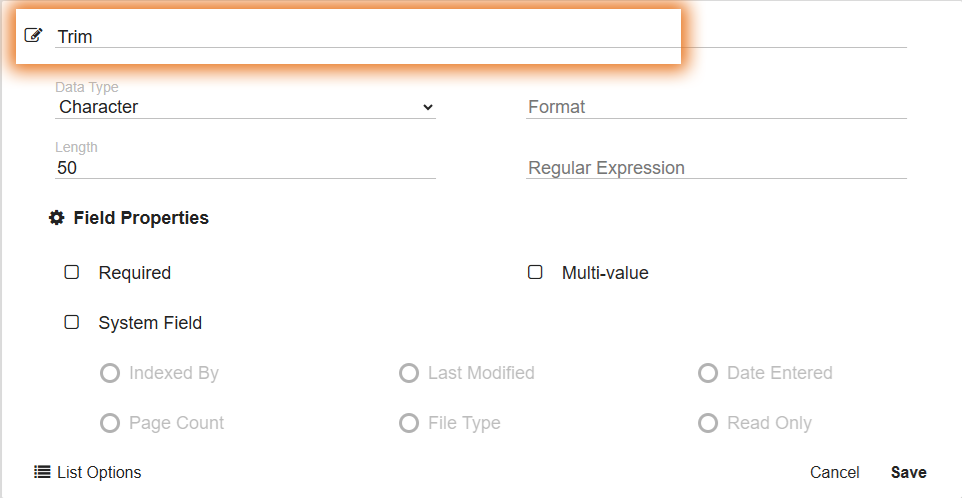
Create a new field.
-
Select List Options.
-
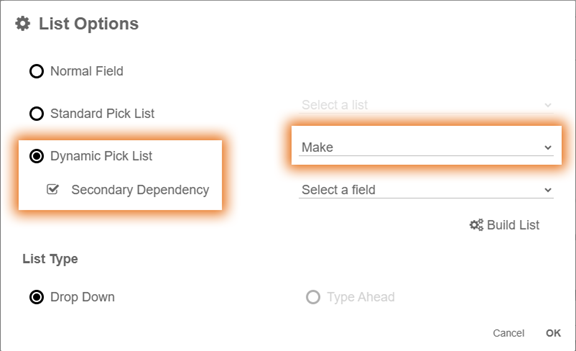
Select Dynamic Pick List.
-
Select the Primary Field from the Select a Field drop down. This must be the same primary field you selected when you configured the first dependency.
-
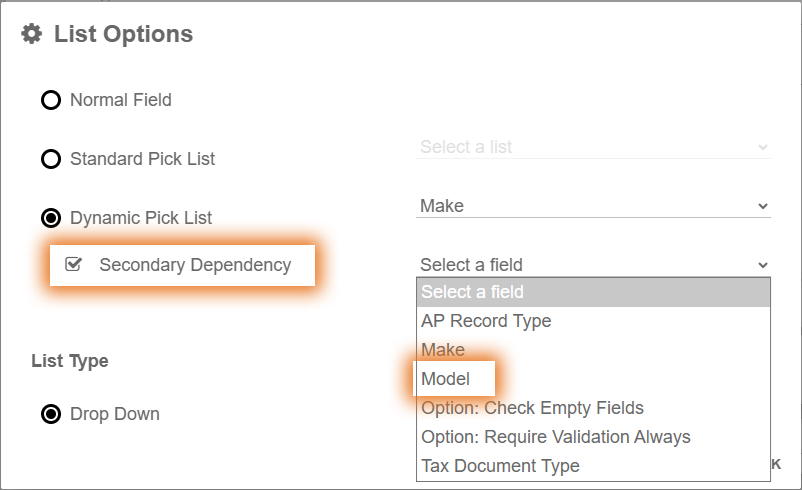
Enable Secondary Dependency.
-
Select the Primary Dependency field from the Select a Field drop down list.
-
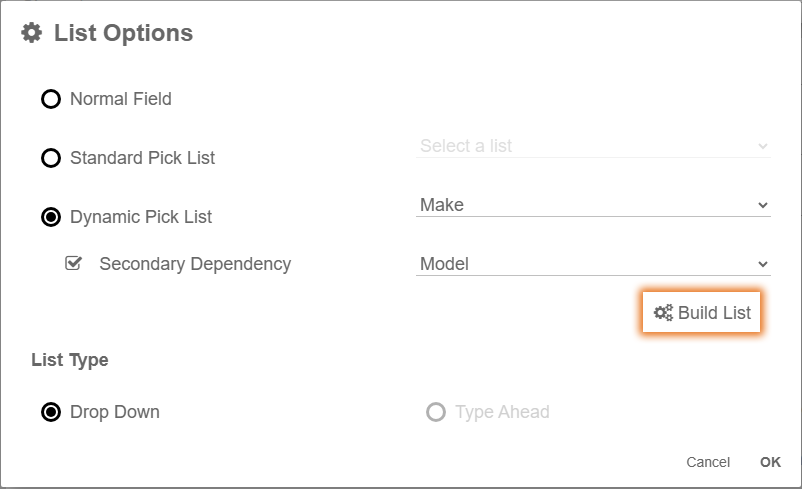
Select Build List.
-
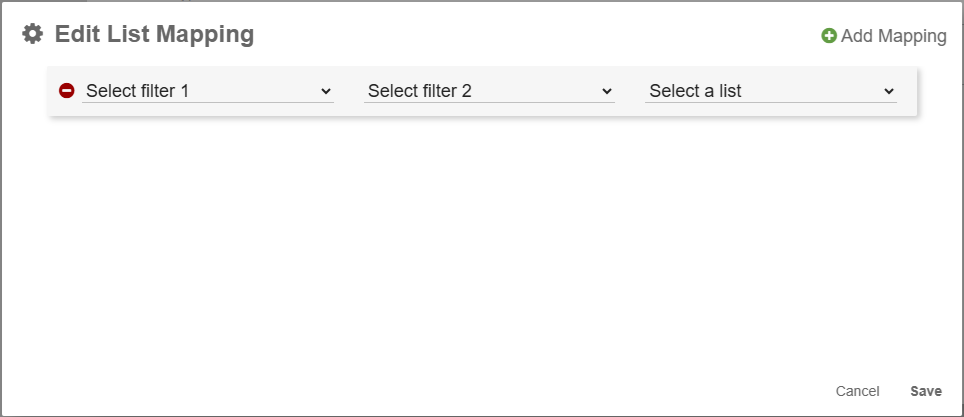
Click Add Mapping.
-
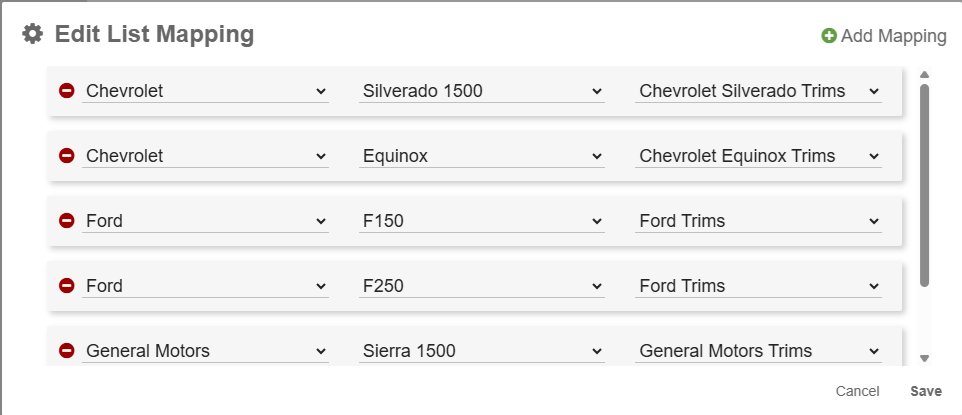
The column on the left (Select filter 1) will be the list of values in the Primary Field. The column in the middle (Select filter 2) will be the list of values in the First Dependency that appear when the value in the Primary Field is selected. The column on the right (Select a list) will be the name of the list that appears in the Secondary Dependency field when the corresponding value is selected in the First Dependency field.
-
Continue to click Add Mapping to map each value in the First Dependency list to the list that will appear in the Secondary Dependency field. If no mapping is provided for any value in the First Dependency list, if that value is selected, the Secondary Dependency will remain inactive.
-
Click Save.
-
Click OK.
Add your fields to the desired archive or table field. It is best practice to keep the field grouped in order: Primary Field, First Dependency, Secondary Dependency. This will make it easier for your users.
Setting/Editing Default Values
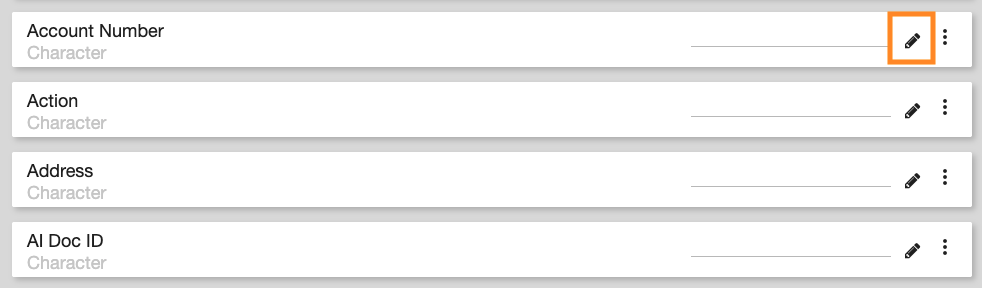
To set a default value, select the Edit Default Values ( 

Enter a value to set at the default value and click Save ( 
To Remove a default value, select the Edit Default Values (