
Build a form by giving it a title, dragging components onto the design surface, and saving.
Create the form
-
On the designer home page, select New Form in the Forms section.
-
Enter a Title. Users see it at the top of the form, and you use it to find the form later.
-
Drag components from the toolbox on the left onto the form. Select a component to change its settings.
-
Select Create Form to save it. After the first save, the button changes to Save Form. You can also press Ctrl+S.
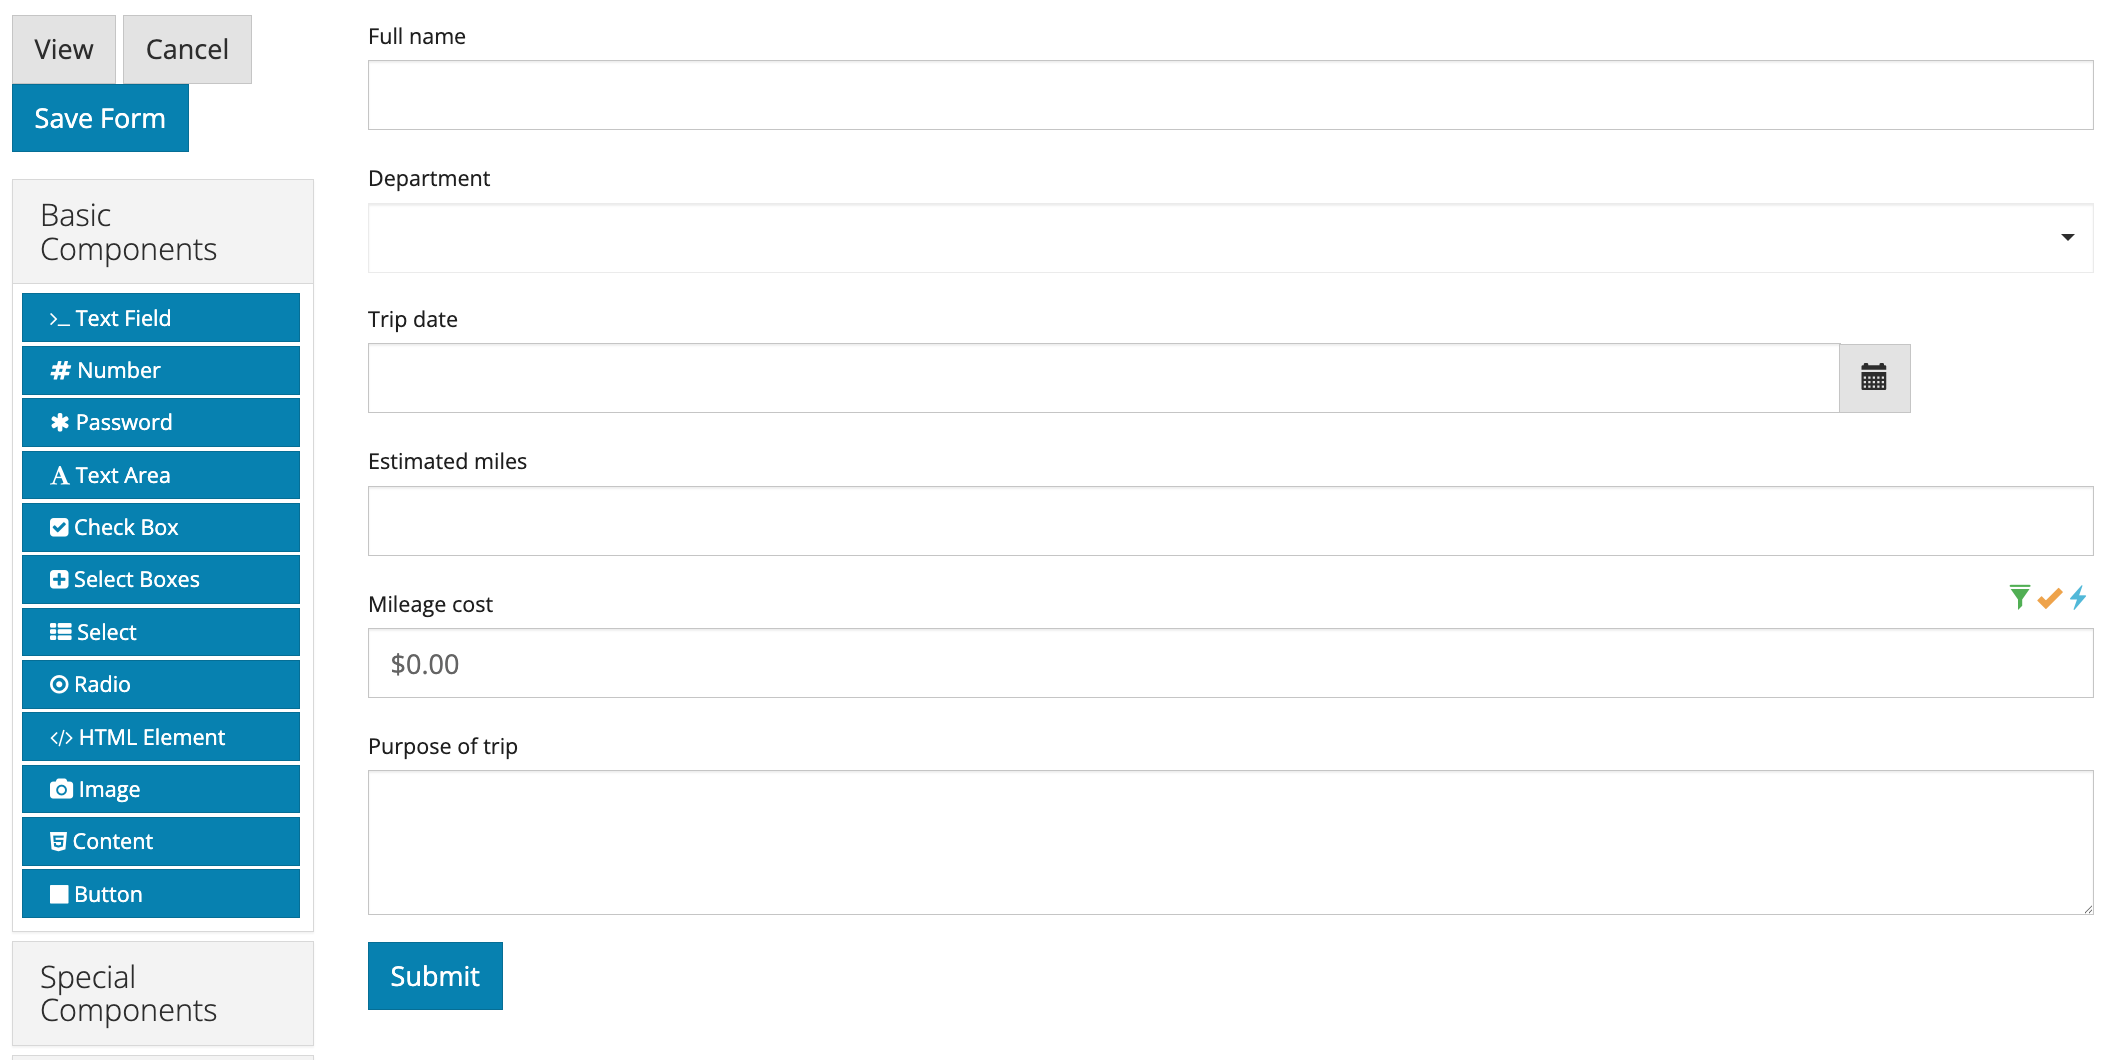
Single page or wizard
Use Display as to choose between one long page (Form) and a step-by-step Wizard with Next and Previous buttons. Wizards suit long forms. See Wizard Forms.
Let people use the form
By default, only signed-in users can submit a form. To let anyone submit it without signing in:
-
Save the form, then open its Access tab.
-
In Create Own Submissions, add the Anonymous role.
-
Select Save Changes.
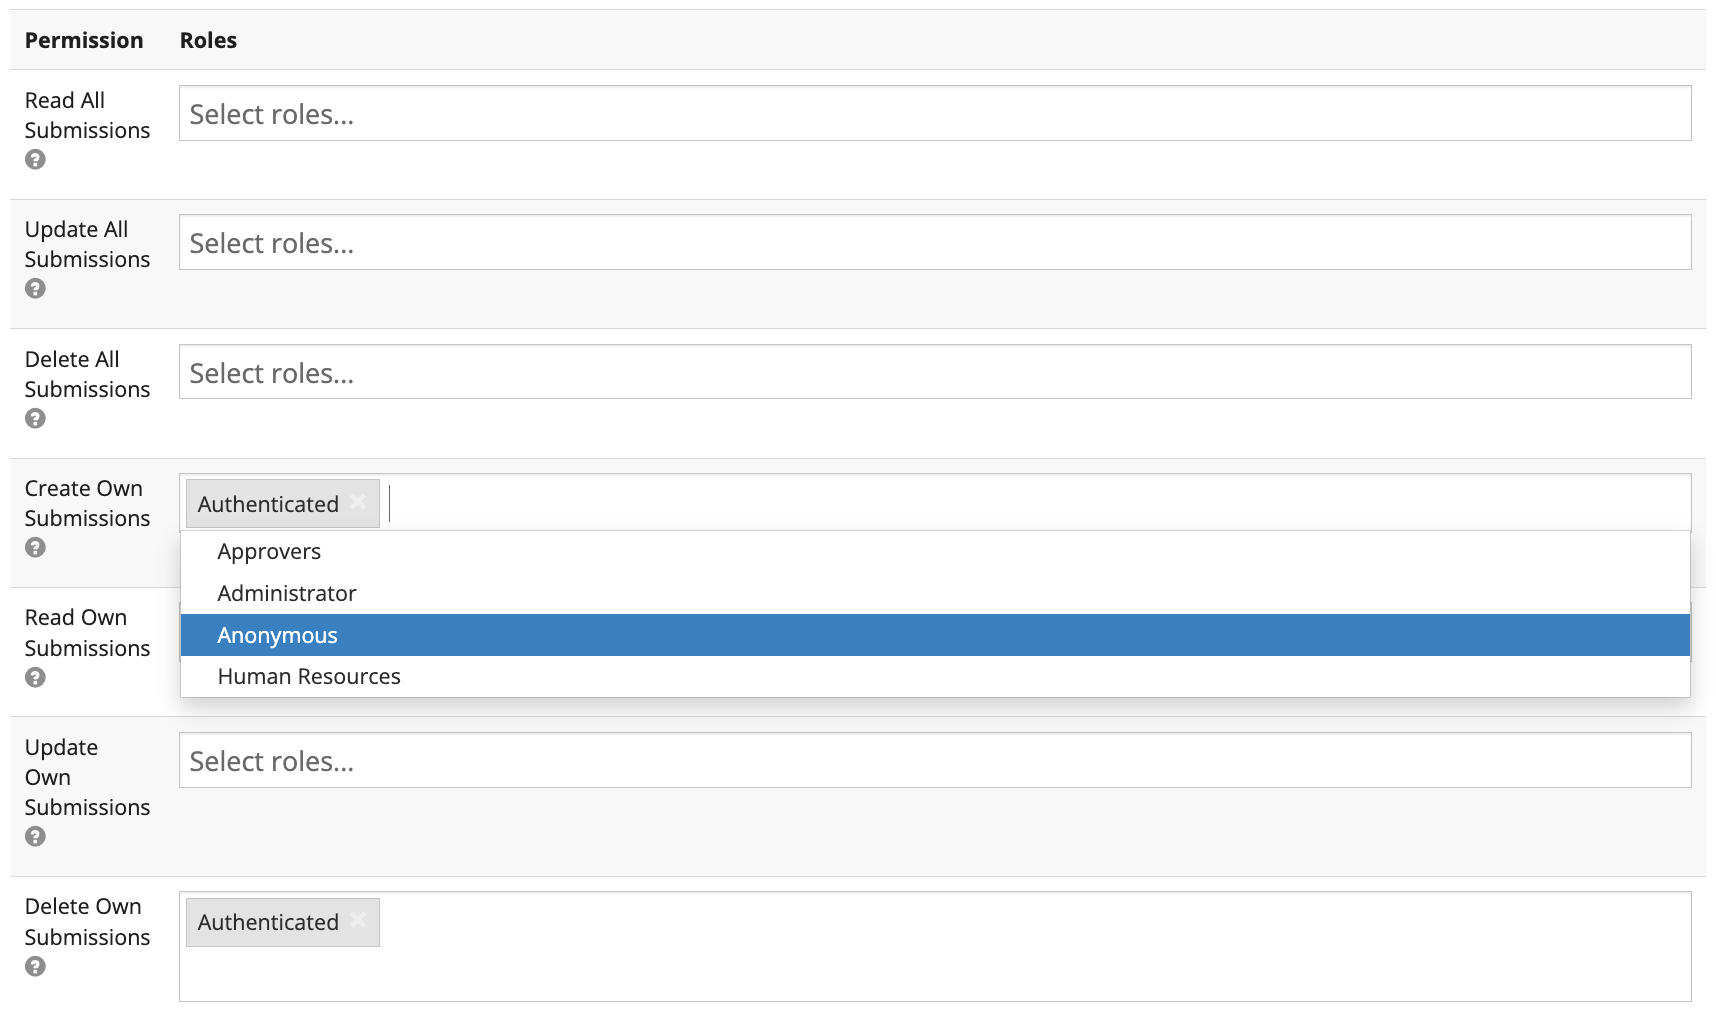
See User Permissions for the other permissions.
Naming tips
-
Choose a clear title and name before you share the form. The builder warns you if you rename a form, because links and integrations, such as GlobalCapture mappings and lookups, may use the name.
-
Give components meaningful API keys (on each component's API tab), for example
firstName. Keys are used in rules, mappings and SQL, and changing them later breaks those links.