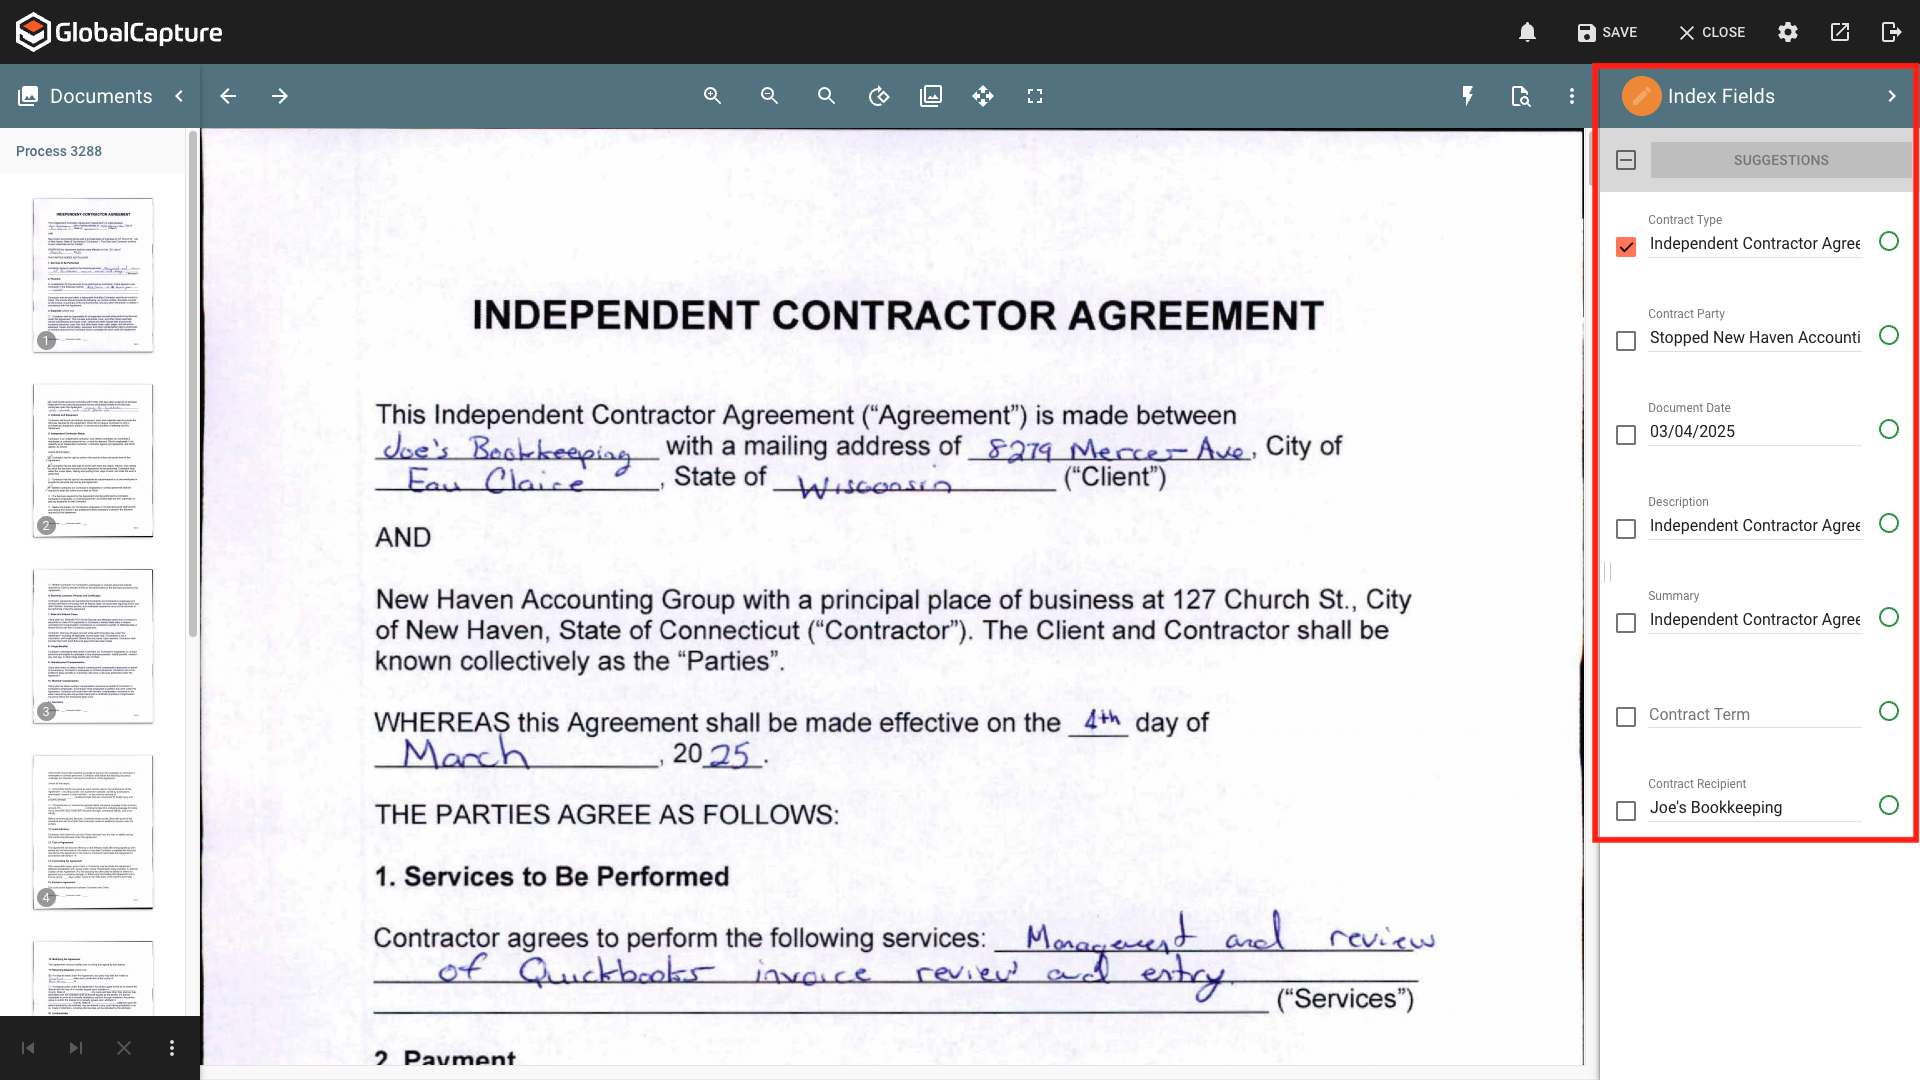
The GlobalCapture Toolbar in the Upload Document Viewer differs slightly from other the other document viewer toolbars. From here, you can change the workflow to which you are scanning, upload new documents, trigger a new scan, etc.
Workflow ( ) - Displays the Select Destination dialog where you can select a new workflow to process documents.
Make sure you Save your current process before clicking Workflow, otherwise the current process will be lost.
New Upload ( ) - Opens a file explorer window allowing you to add another file to the current process. It will move through the same workflow as the initial upload/scan. The uploaded document is added as a separate document. You can view the added document in the Thumbnail Pane.
New Scan ( ) - Triggers the desktop scanner configured in the Scan settings. It will move through the same workflow as the initial upload/scan. The uploaded document is added as a separate document. You can view the added document in the Thumbnail Pane.
Save ( ) - Sends the document throught the selected workflow process and removes the document from the Thumbnail Pane.
Settings ( ) - Open the user setting popup to customize your experience. Setting will vary depending on the area of GlobalCapture in which you are working.
Navigate ( ) - Click to expand the GlobalCapture navigation menu. Navigate to Validation, Scan, Design, or Manager. (Availability will vary based on permissions.)
Logout ( ) - Signout of GlobalCapture.
User Settings
Anytime a user setting is adjusted, the page will need to be refreshed for those changes to take effect.
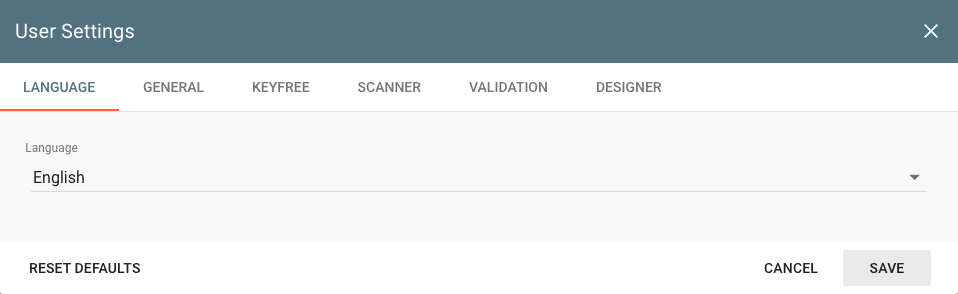
Language
Language Tab
Adjust the language used in the GlobalCapture menus. Choose the language from the list of supported languages.
Changing the language setting has no impact on the index field name or their data. Index field names and data will always remain in the language in which they are entered.
General
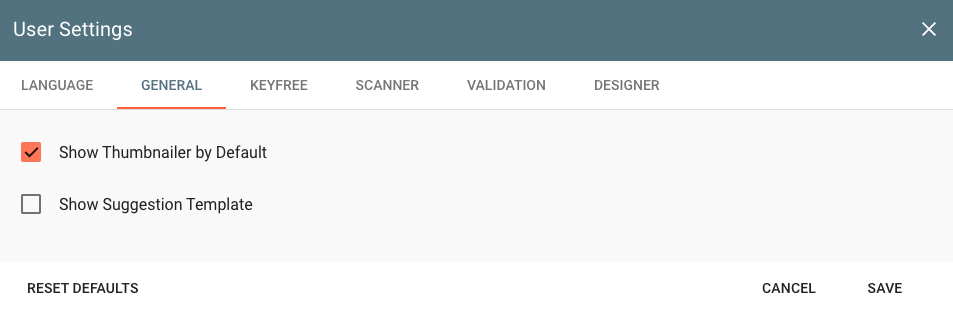
General Tab
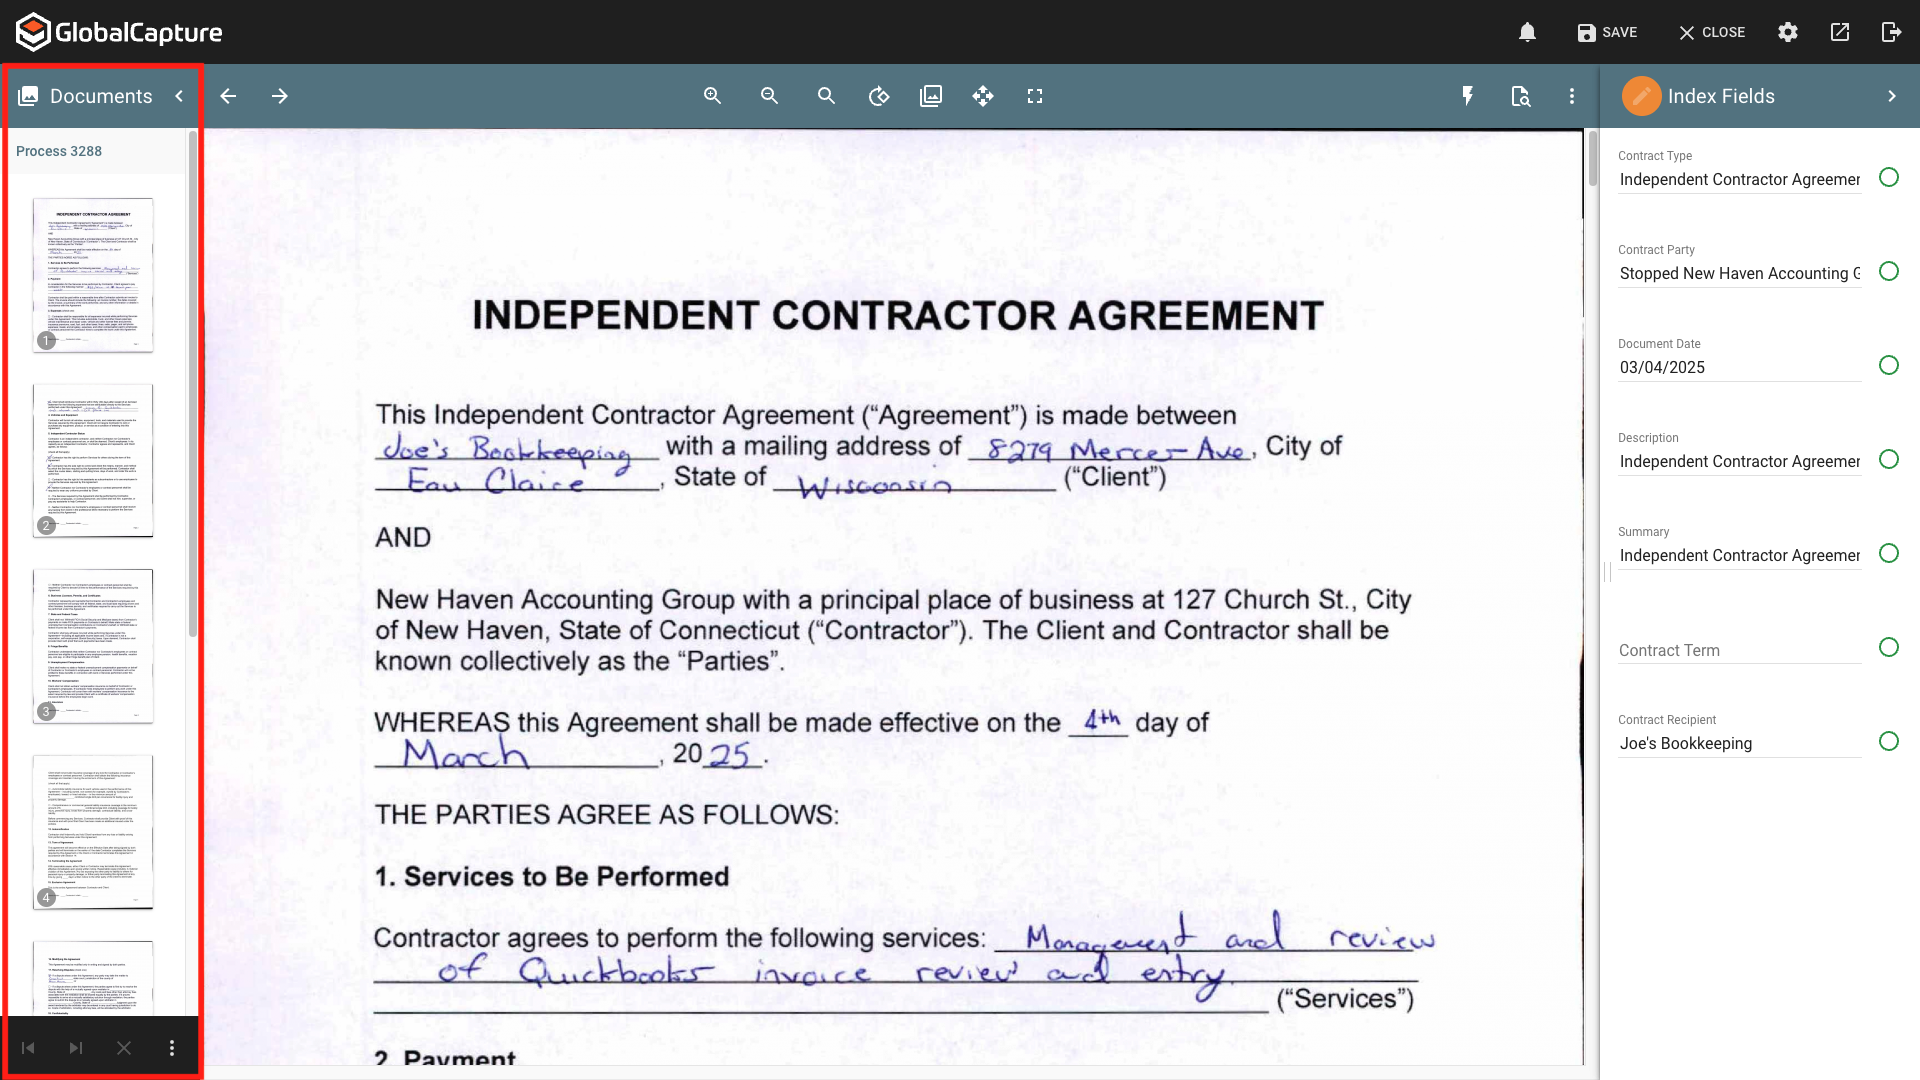
Show Thumbnailer by Default - The Thumbnailer is the pane located on the left. This displays a thumbnail view of all the pages of the document(s) that are open in the Document Viewer and provides additional options to Select, Delete, and Burst pages. When Enabled, this pane will display open when opening the Document Viewer.
Thumbnailer Pane
Show Suggestion Template - When enabled, data from the document can be saved to a suggestions list to be reused when indexing documents in the future.
Extraction Profile - Select an Extraction Profile from the list of available profiles to apply the selected profile when KeyFree is run. If no profile is selected, the default profile will be used.
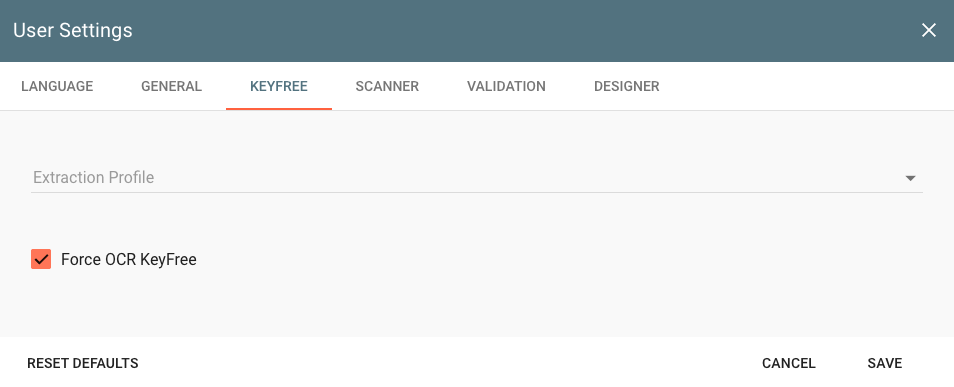
Force OCR KeyFree - Determines if OCR runs immediately when selecting the KeyFree ( ) icon. When enabled, OCR will run immediately when KeyFree is clicked and the KeyFree icon will turn yellow. When disabled, KeyFree will use the existing text layer for the document, if one is available, for data extraction. The KeyFree icon turns blue and an OCR ( ) icon appears in the Document Viewer toolbar. If the text layer is not available or inaccurate, GlobalCapture can OCR the document and use the new OCR layer for KeyFree Indexing by clicking the OCR icon.
Scanner
Scanner Tab
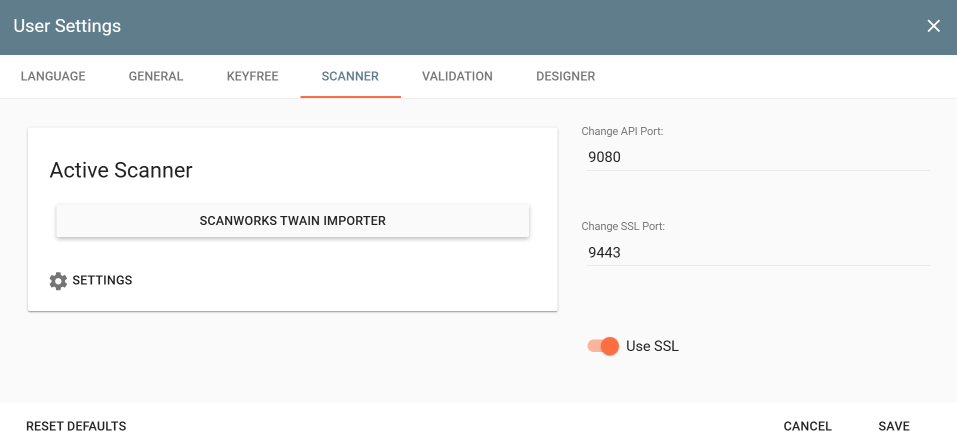
Select the scanner to be used in the Scan Station of GlobalCapture when scanning new documents into a process or when adding pages to an existing document moving through a process, configure your Ports if not using the default (Non SSL - 9080, SSL 9443), and enable or disable SSL.
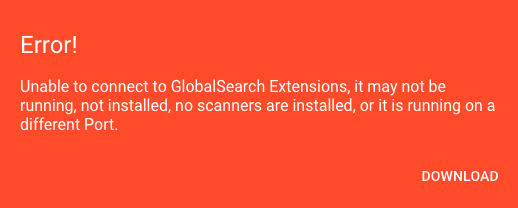
If Extensions is not installed, a Error box appears. Click Download to download and install Extensions.
Extensions Not Installed
Validation
Validation Tab
Zoom to zone functionality improves the data validation process anytime data is automatically extracted by the system. Especially in cases where a data element's location might change with each document (Invoice Number on an Invoice), or in cases where extracted text might appear on any page of a document, it can be helpful to see where in the document data was pulled from. There is no configuration required for zoom to zone behavior. The feature is on by default and works automatically.
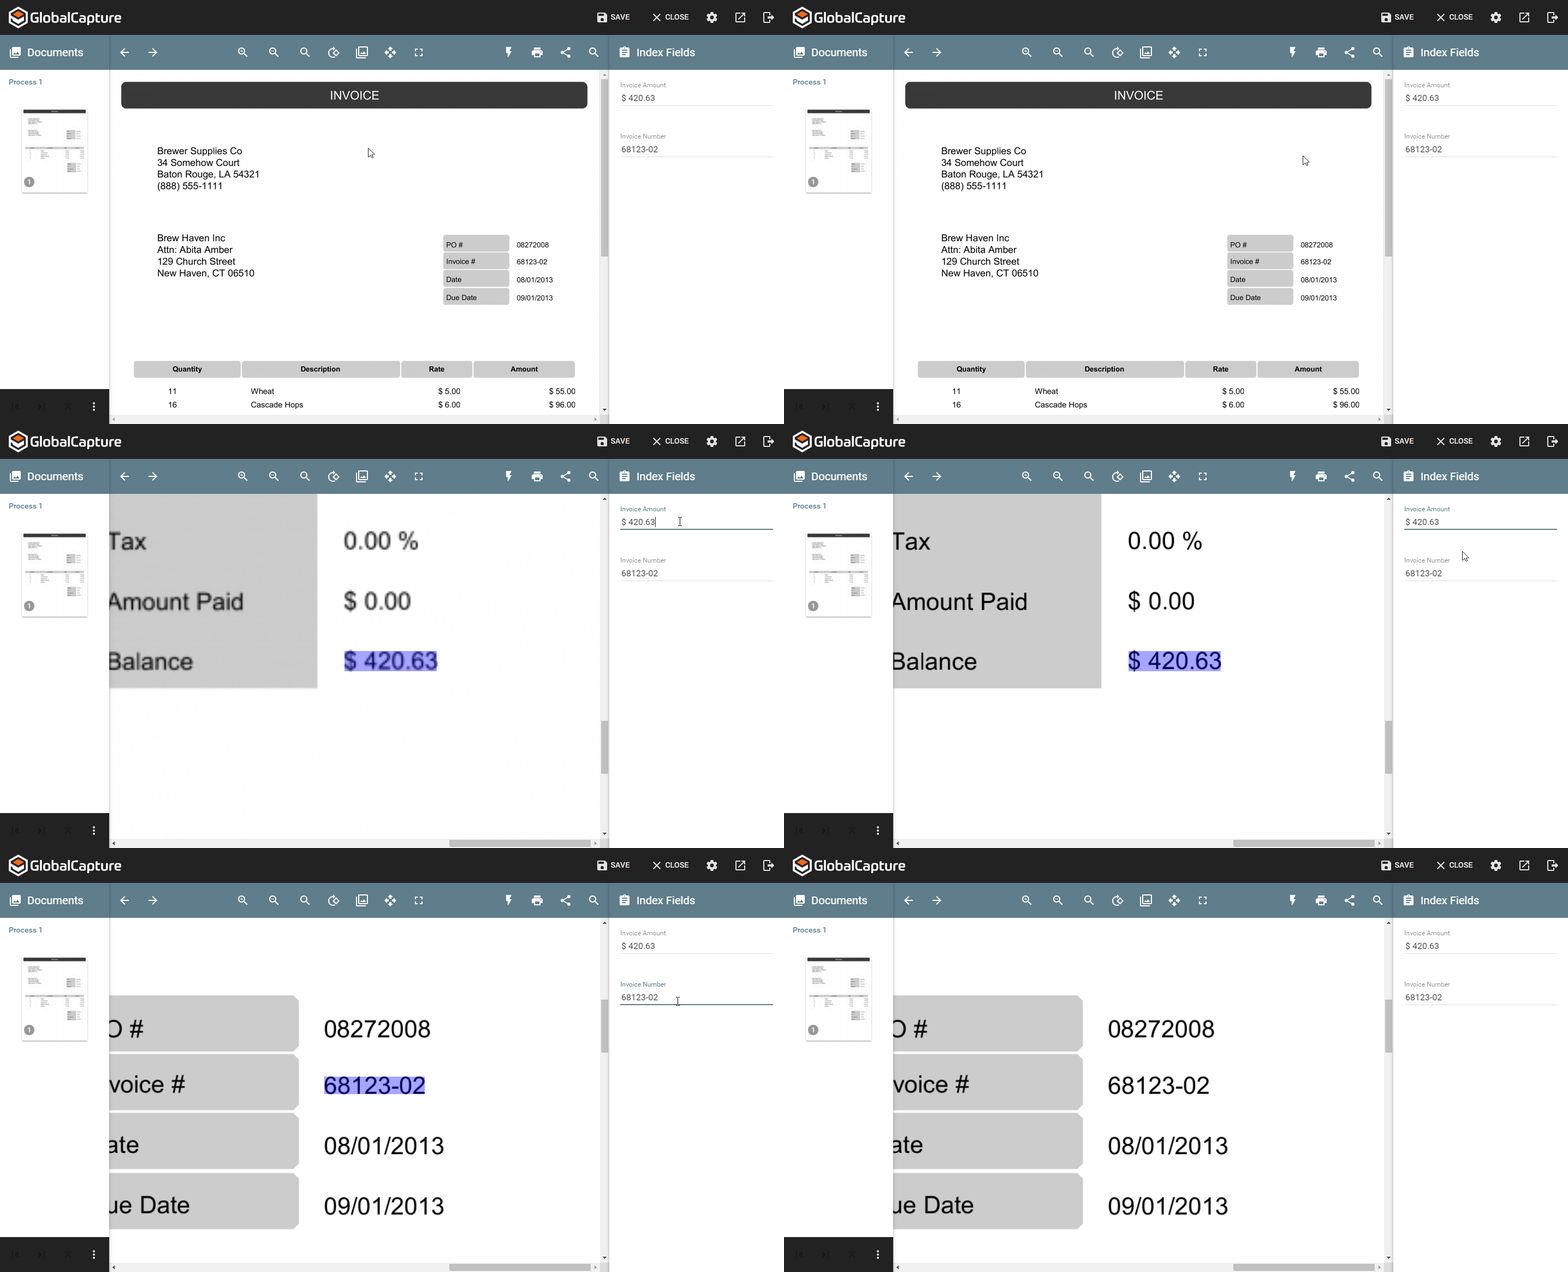
To experience Zoom to Zone features, open a document in validation that has been OCR'd using any Zonal, Unstructured, or Table extraction rules. In the Validation viewer, place the mouse cursor in a field and the viewer will automatically snap you to the text that was extracted as in the example below.
Zoom to Zone works with any field type, including Multi Value and Table Fields. You can zoom to the extract area by clicking, or if the indexer already has mouse focus, by using the Tab key.
Editing Field Data
In unstructured extraction scenarios, it may be beneficial for Zoom to Zone behaviors to be disabled after fields are edited. It is possible to configure the validation viewer to operate in this manner, but it is a system wide setting that would impact all users. System administrators can click here to learn how to disable Zoom to Zone on field changes.
Document transformations, whether performed in the GlobalCapture engine, or by page in the viewer, have the potential to alter or remove extraction highlight data on a process. The following document transformations will completely clear any extraction highlight data: Crop White, Crop Black, Deskew.
Rotating a document will correctly translate extraction data to the proper location on any rotated pages.
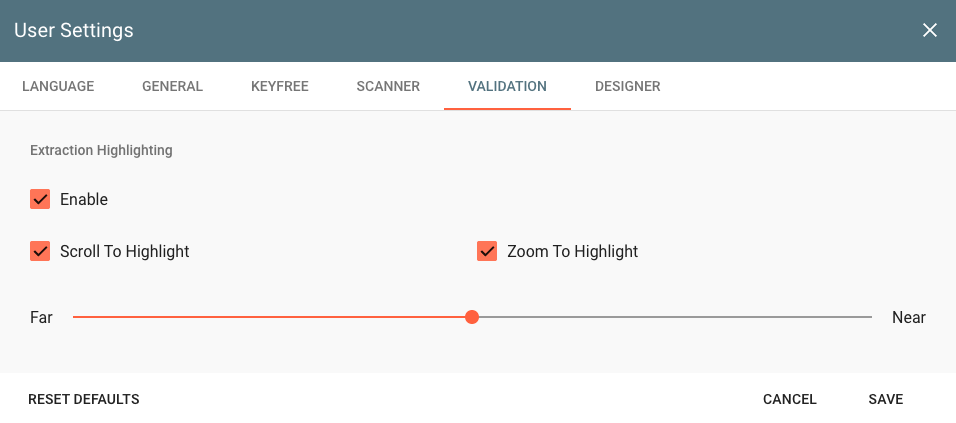
Default behaviors for Zoom to Zone can be modified to suit the user's individual preference. In the settings menu of the Validation Viewer (the Gear icon), select the Validation tab.
Enable - Allows you to turn the feature completely off. By default, Zoom to Zone is enabled for all users. When enabled, anytime a field is selected that has been OCR'd, it will be highlighted.
Scroll To Highlight - This feature causes the viewer to automatically scroll when a field is focused (selected) in the indexer. It is enabled by default. If disabled, highlights will still render visible on the document, but no automatic navigation will occur.
Zoom To Highlight - Available after “Scroll to Highlight” is turned on and enabled by default, this setting causes the viewer to automatically zoom in to an extraction highlight. This zoom scale can be configured with a slider below the “Zoom to Highlight” checkbox. There are five settings between “Far” and “Near”. These five zoom settings will zoom the viewer to where the extraction highlight consumes between 10% and 50% of the viewer area. The default value for this setting lies in the middle of the slider, equal to 30%. Note that the viewer will never zoom out further than the fitting width of the page. Also, in the cases of extremely small extraction highlights, the viewer may not be able to zoom to the desired percentage of real estate. In these cases, the viewer will zoom to the max amount allowable.
Designer
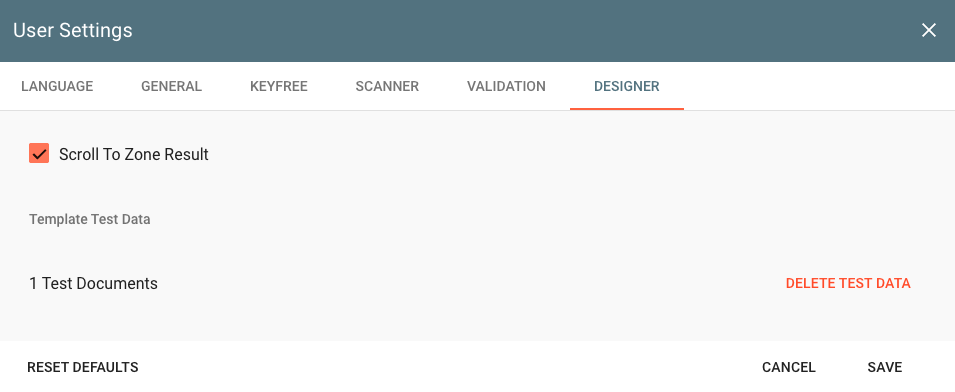
The Designer tab is only relevant to GlobalCapture Administrators and impacts the Template Designer. Validation users will not see any impact in the Document Viewer and should NOT click DELETE TEST DATA unless instructed to do so by your GlobalCapture Administrator.
Scroll To Zone Result - When enabled, if a template zone is selected, the document will scroll to that part of the document. This is useful for finding zones on a page when zones span multiple pages.
DELETE TEST DATA - When Template Validation is enabled on a Validation Action, the information extracted is saved. This data is then used to understand how changes to the template will impact pervious results and allow for prediction of future results. If DELETE TEST DATA is selected, pervious data about zone is deleted.
Exercise caution when deleting test data as this cannot be undone.