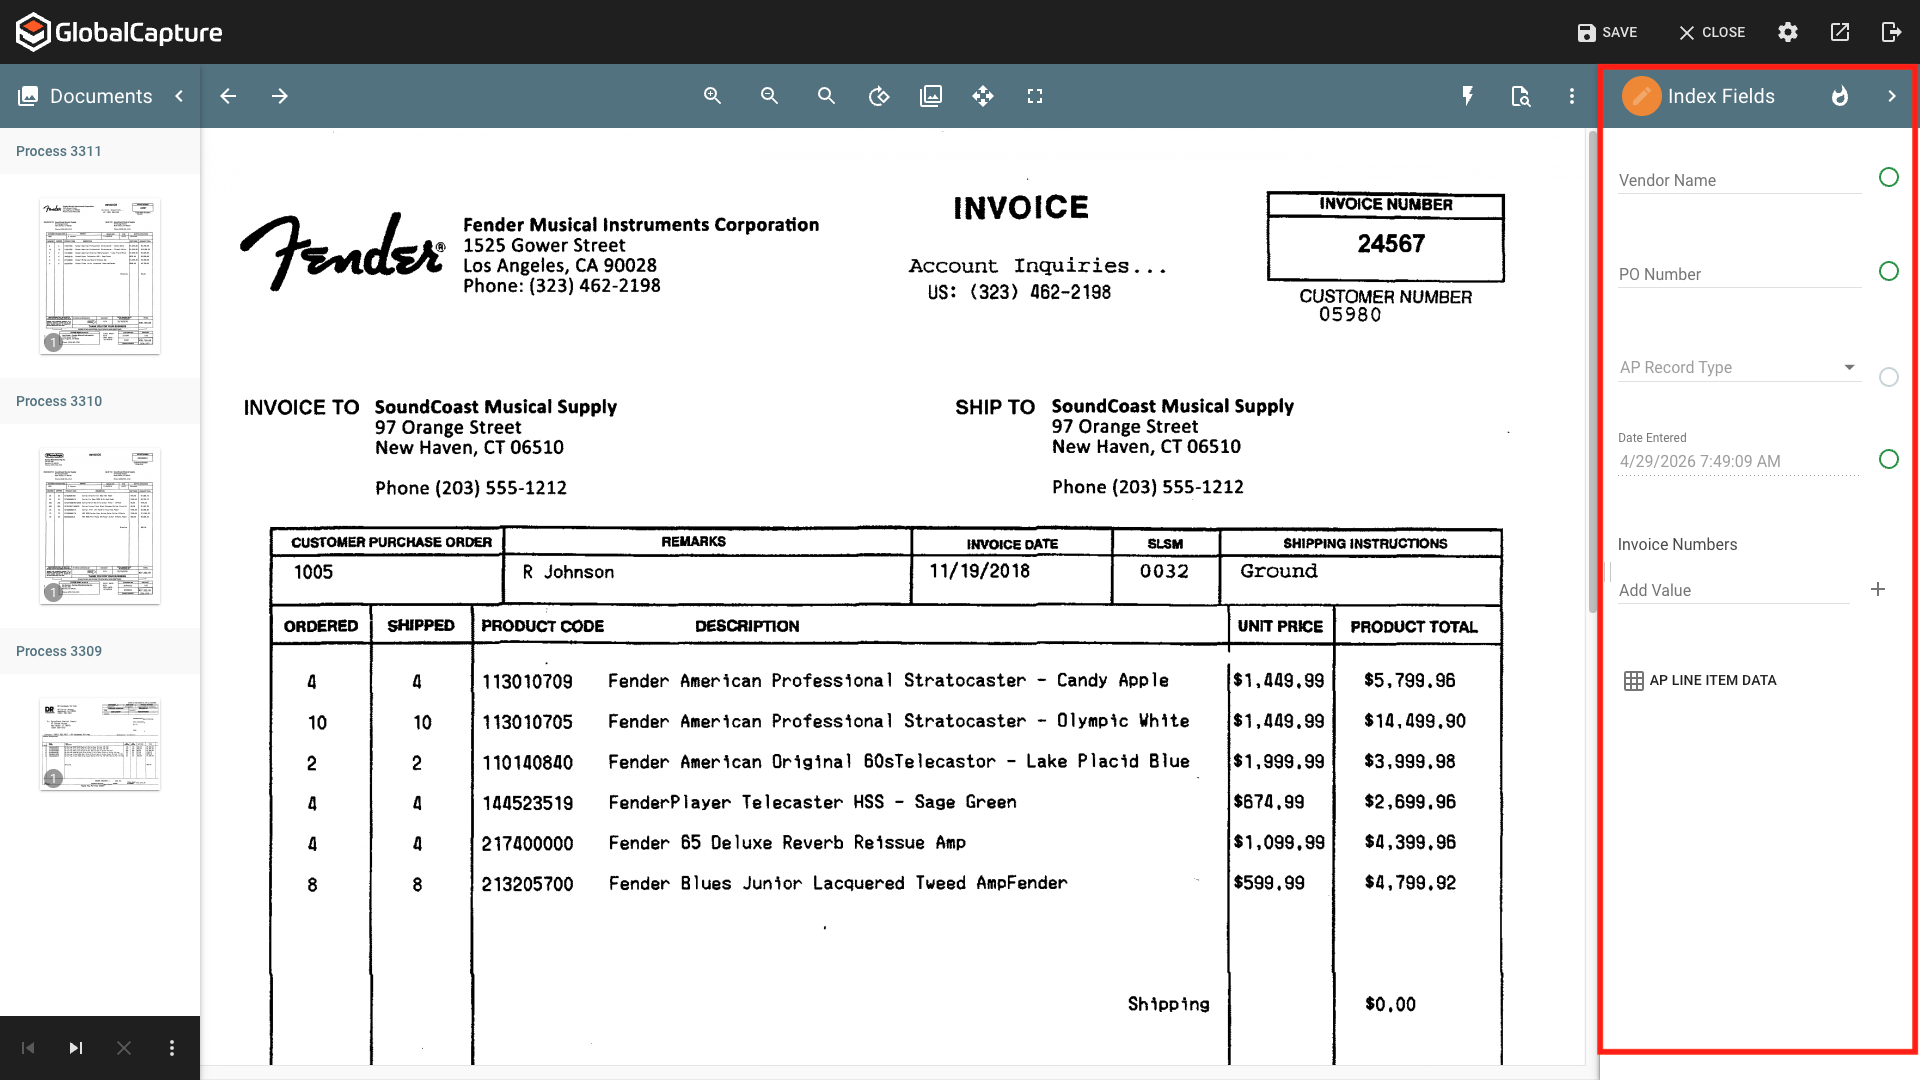
The Index Fields Pane is located on the right and displays the index fields associated with the workflow and any data collected. Here you can add/edit/delete data, apply KeyFree indexing, or use Rapid Adapt Forms Learning to create tempaltes.
Index Field Pane Header
Workflow Status ( 
Rapid Adapt Forms Learning ( 
Collapse ( 
Show Pane ( 

Index Fields
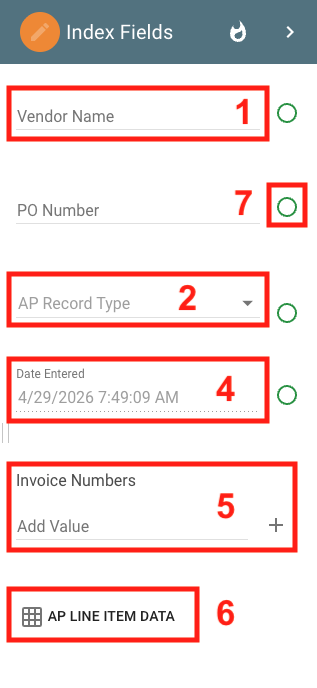
Each of the index fields associated to the workflow is displayed. Any blank fields are displayed with the Index Field Name as placeholder text. Once data is entered, the Index Field name appears above the entered data. If left blank, the placeholder text is NOT submitted as data.
Types of Index Fields
-
Standard Field - A standard field could be of any type (character, date, decimal, numeric) and are indicated with a solid line. Enter any data the conforms to the field type. A messsage will display if the data is invalid based on the type of field or administrator configuraton.
-
Dropdown List Field - Indicated with a down arrow (

-
Type Ahead List Field - Looks like a standard field but when you begin entering a value, a pop up of matching values appears. Select from the list or continue to enter your own value. All values are accepted.
-
System Field - A field automatically populated by GlobalCapture. These are indicated with a dotted line and cannot be modified.
-
Multi-Value Field - Indicated by a solid line with a + symbol, enter a value and click the + to add additional values. Each value entered is stored as a distinct value in the database.
-
Table Data - Indicated by a grid (

-
Confidence - The confidence circle displays the level of certainity of the value in the field. Any value manually entered receives a confidence of 100.
Rapid Adapt Forms Learning
Rapid Adapt Forms Learning provides a unique means for expanding extraction rules within existing processes so that productivity is maintained, even when new document formats or exceptions in expected data are found.
Building off the concept of document classification, Rapid Adapt Forms Learning recognizes a document through predefined attributes and applies a corresponding extraction template. When a new document does not match existing extraction rules, validation users can use Rapid Adapt to build a reusable template on the fly.
Using RapidAdapt Forms Learning
When a document reaches a Validation Node with RapidAdapt enable, you can click the flame icon (

Rapid adapt only uses Marker and Positonal Zone and can not be use to extract multi-value or table data. Refer to Template Building for more advanced template creation.
-
Start by selecting one or more markers to uniquely identify the document. Click ADD MARKER and click a word in the document. Markers can only be 1 word each. When you click Add Marker for the first time on a document, there may be a slight delay as the OCR data loads into the browser. It is important that all markers are both unique to the document, and will appear on all subsequent documents. Continue adding Markers, or click Next.
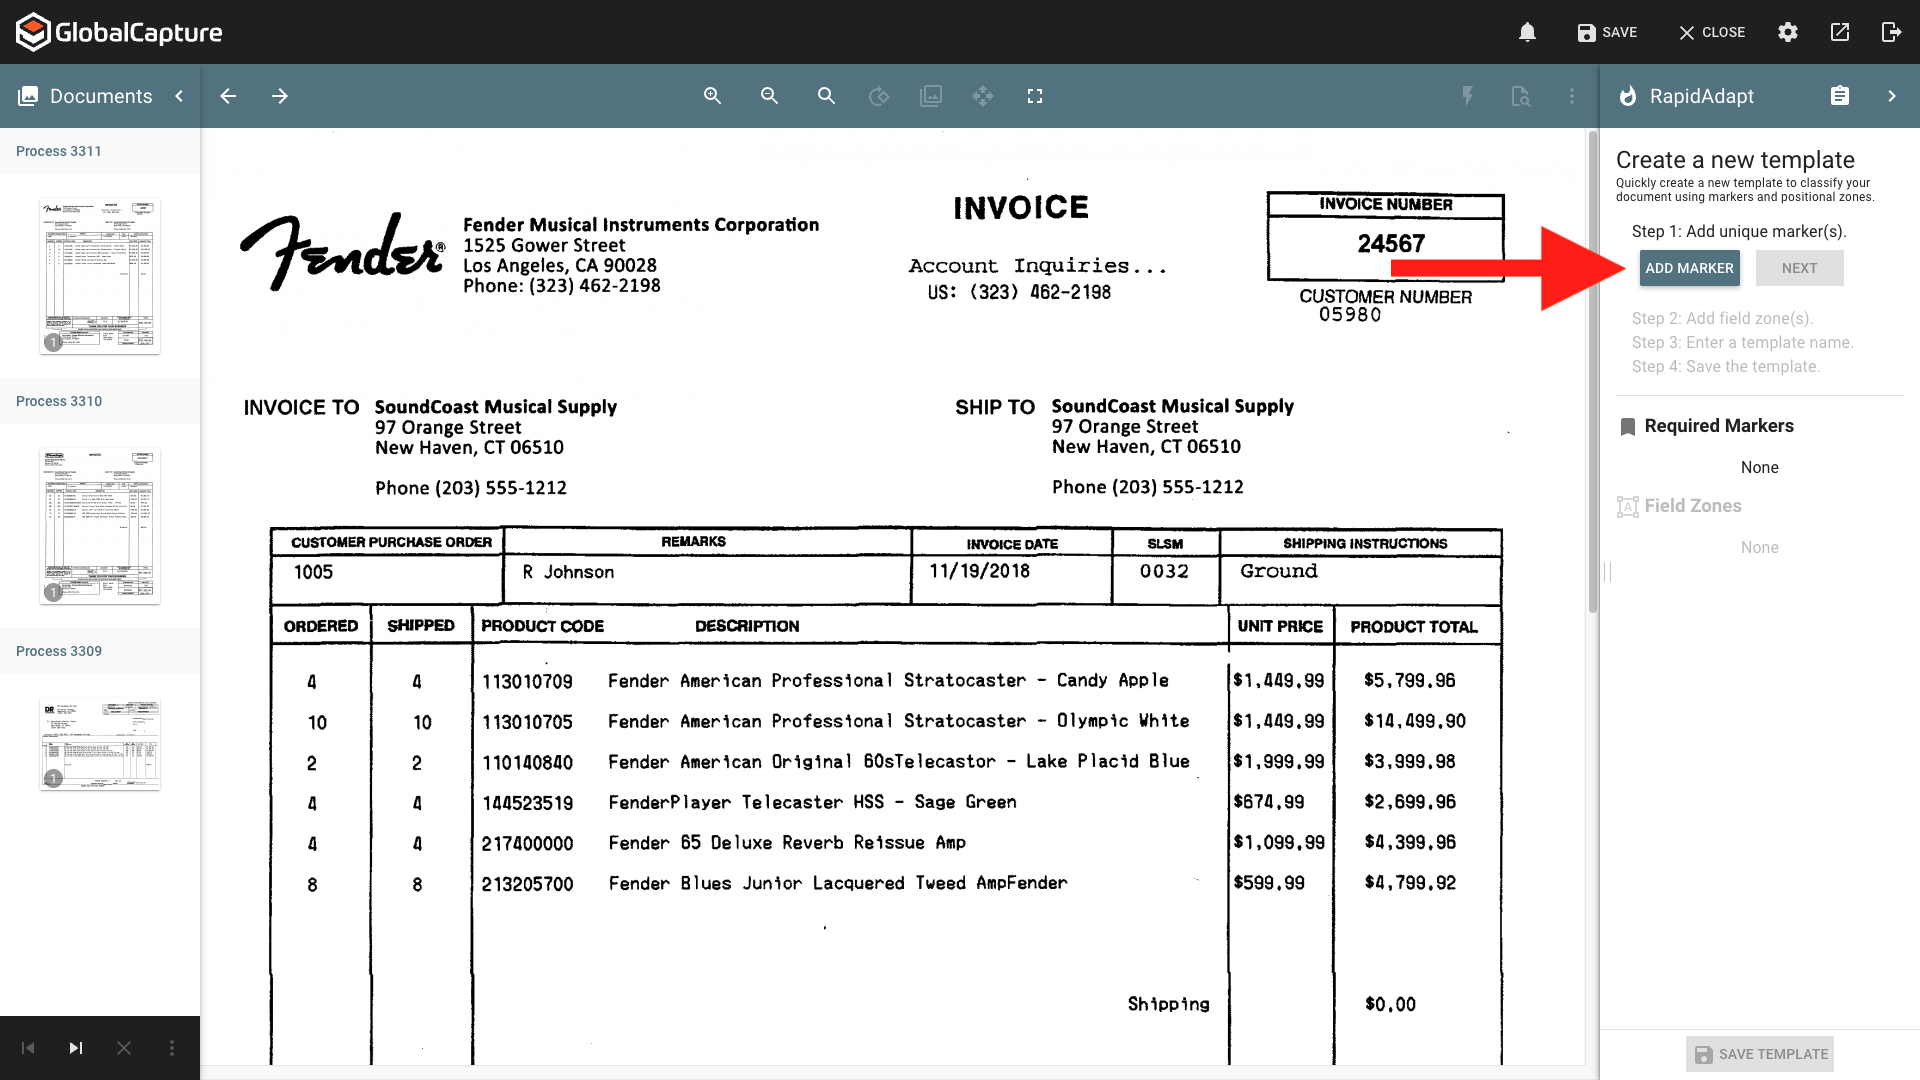
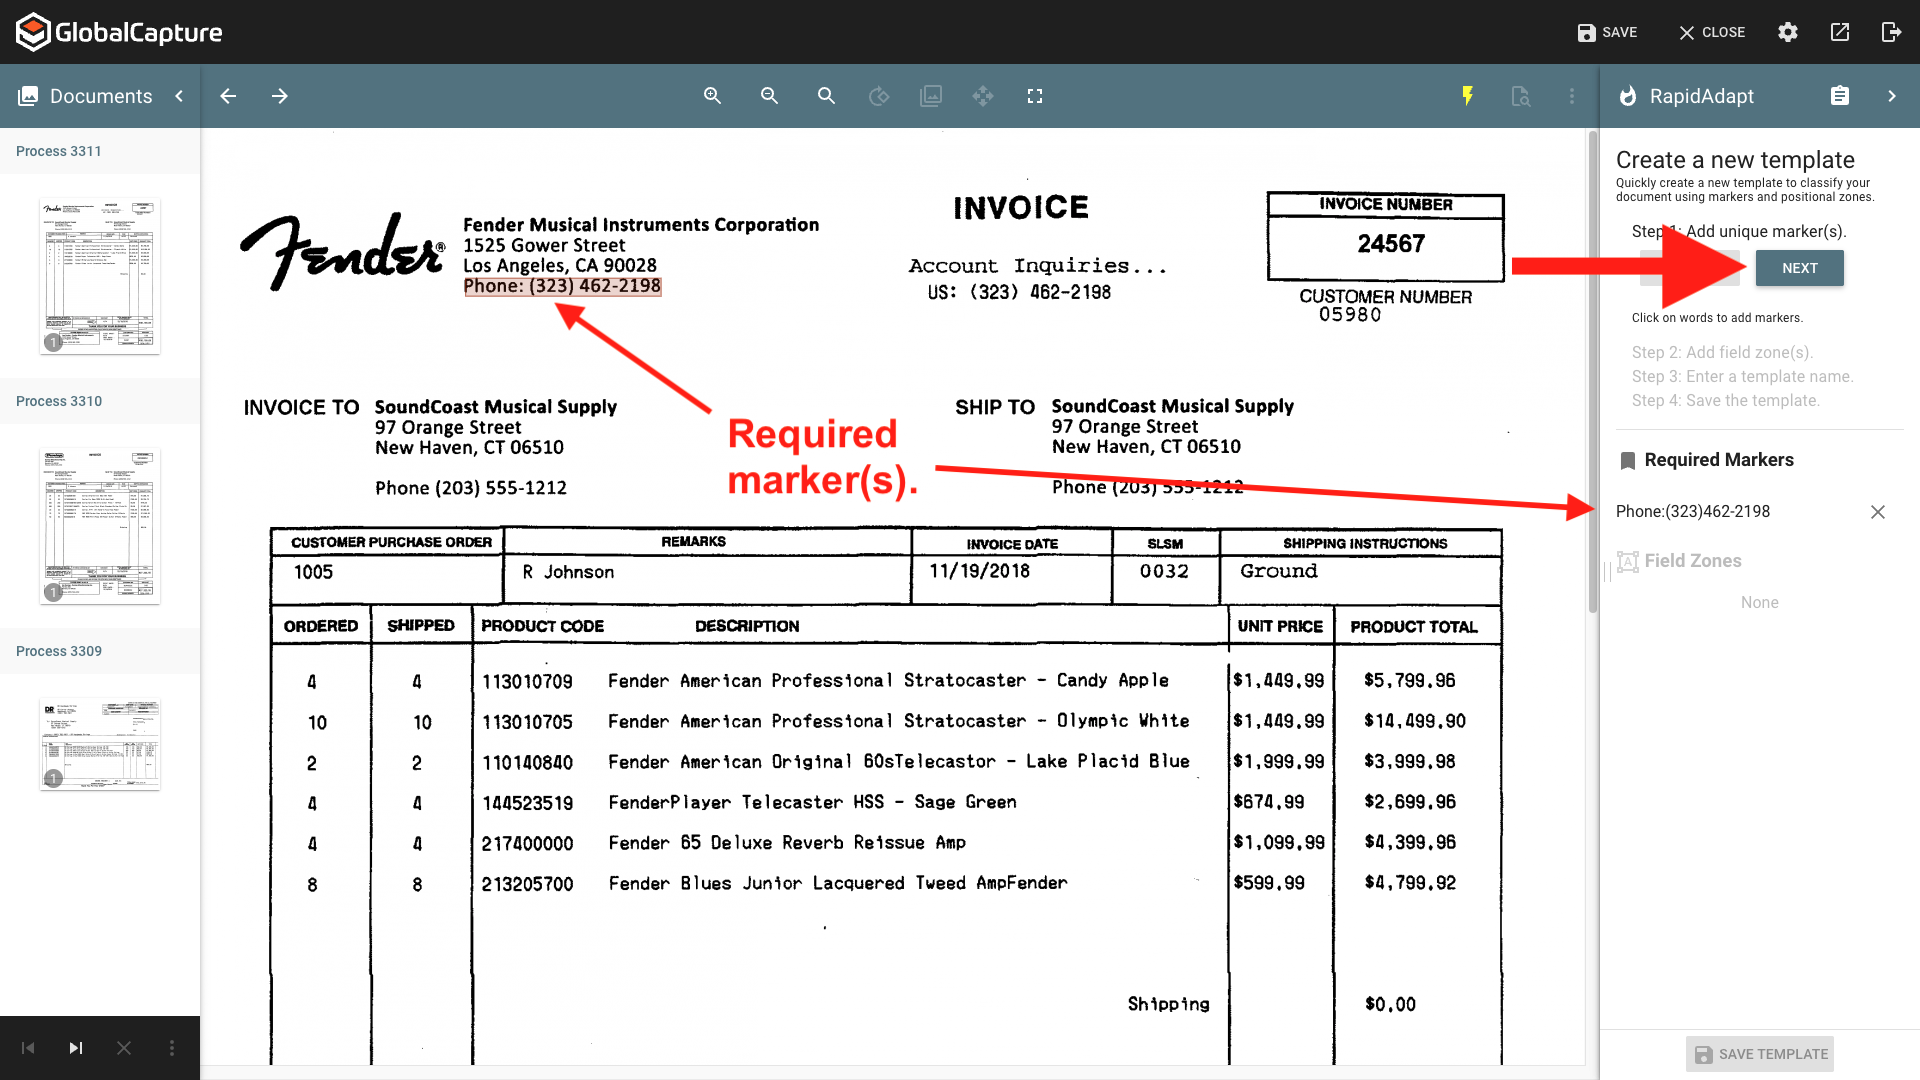
Best practice is to use 1 or 2 unique markers. Examples of good markers are Phone Numbers and Email Addresses as they are unique.
-
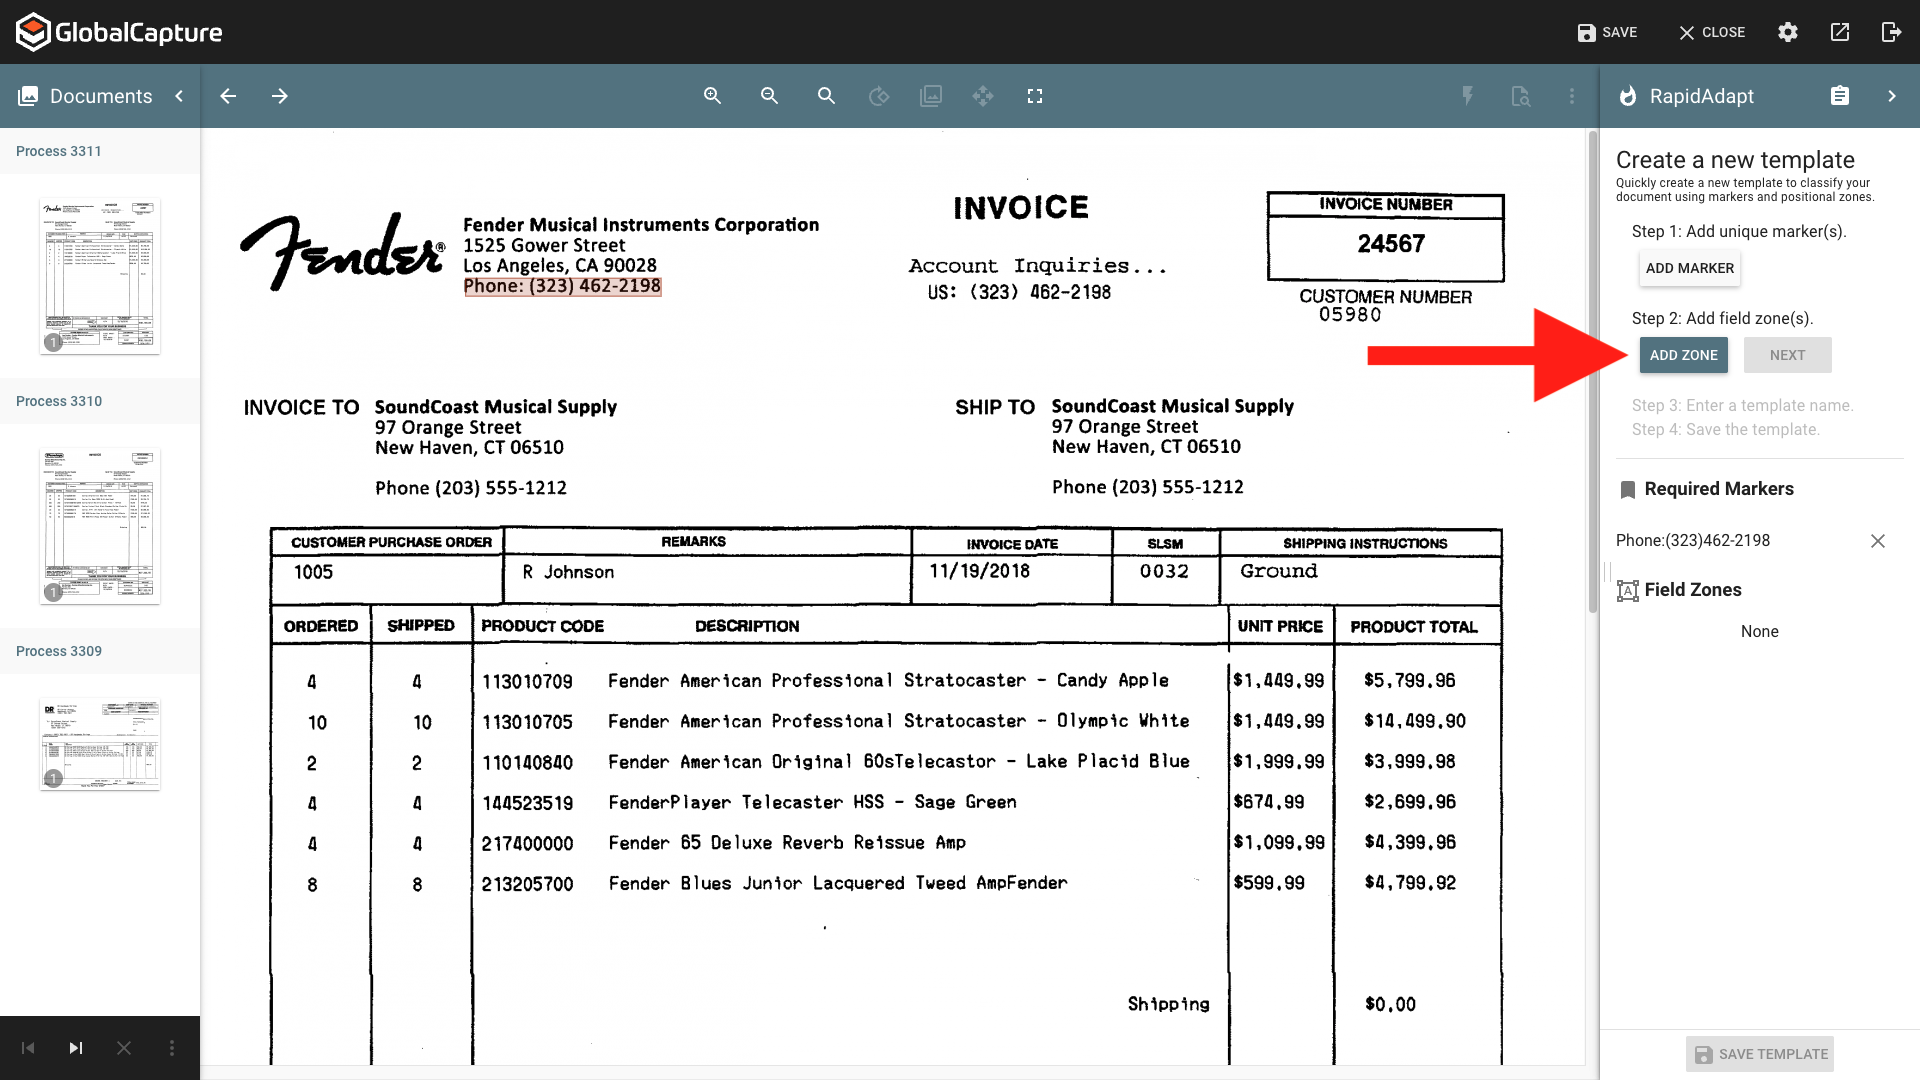
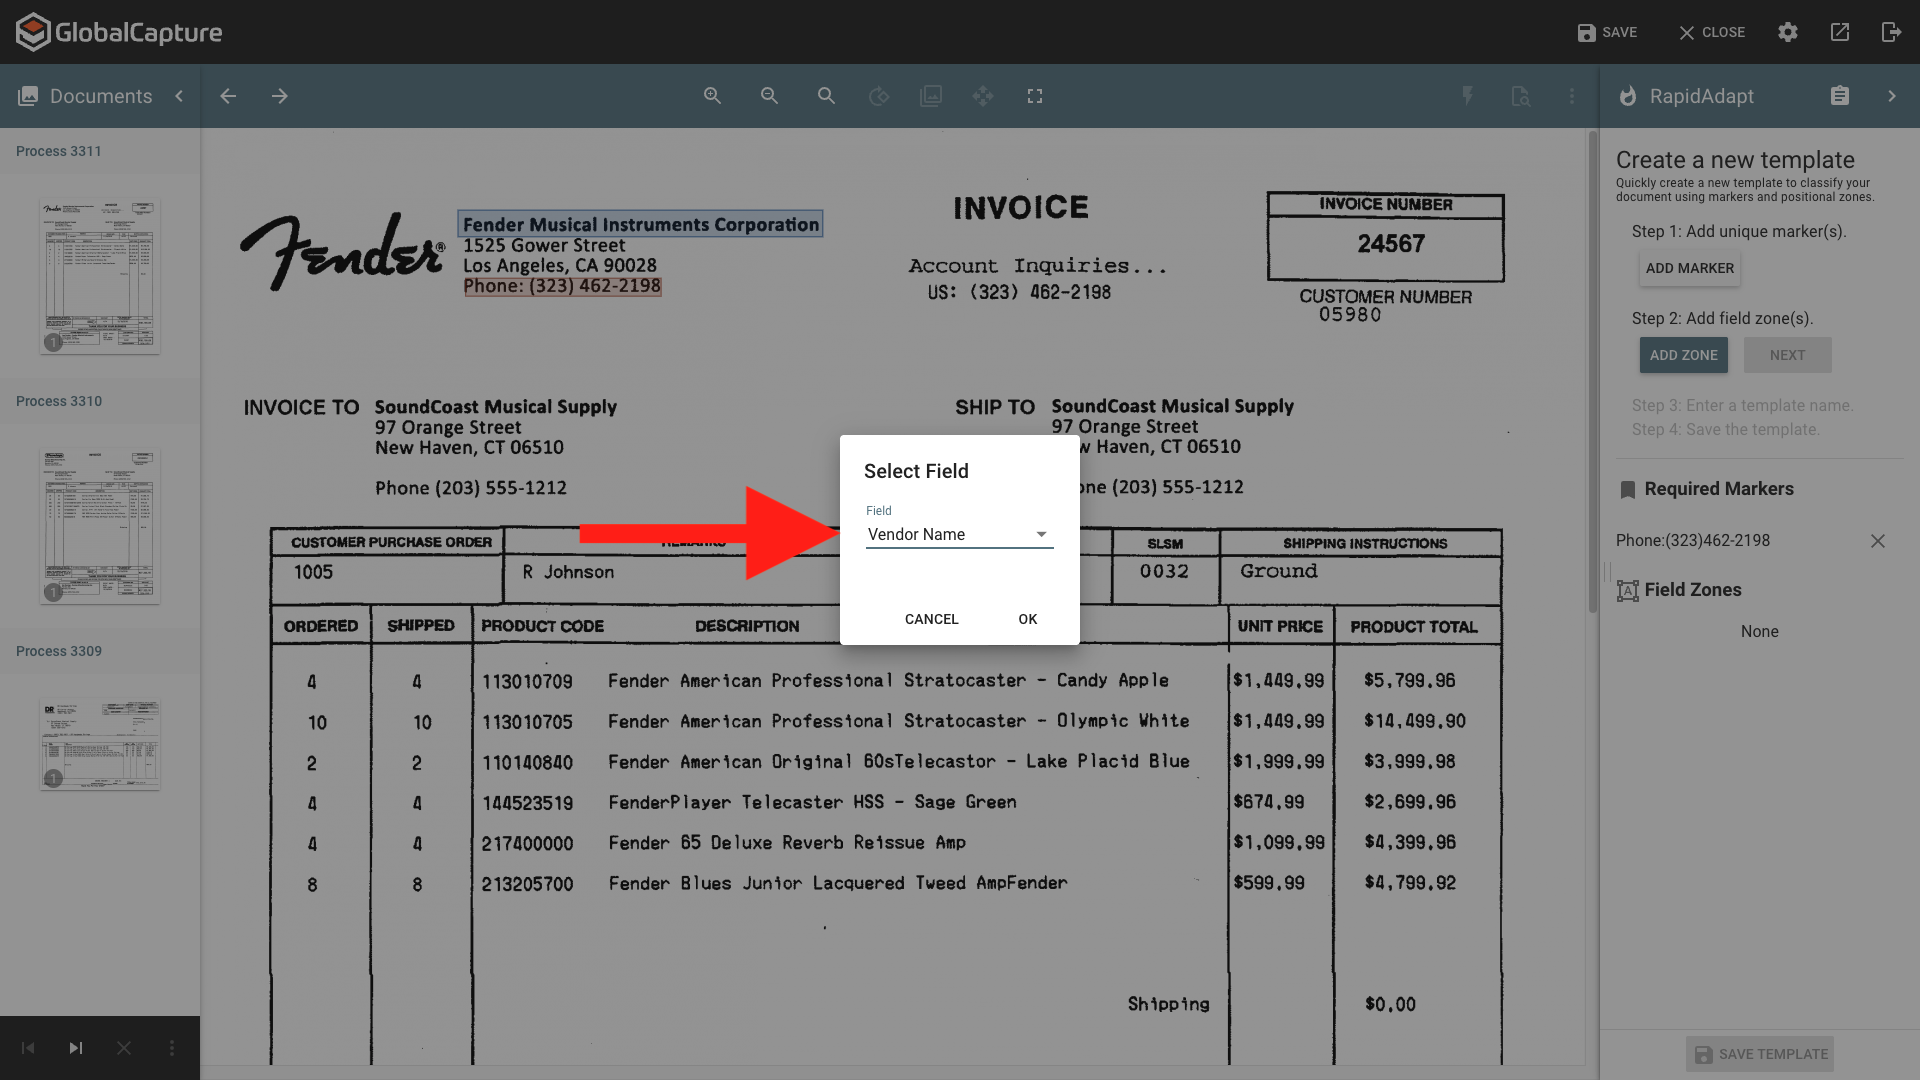
Add zones to extract by clicking ADD ZONE and use the mouse to draw a box around a data point in the document viewer. Once the data is selected, a Select Field pop up will appear. Assign the data to a workflow field. Repeat this process for all fields that should be extracted.
-
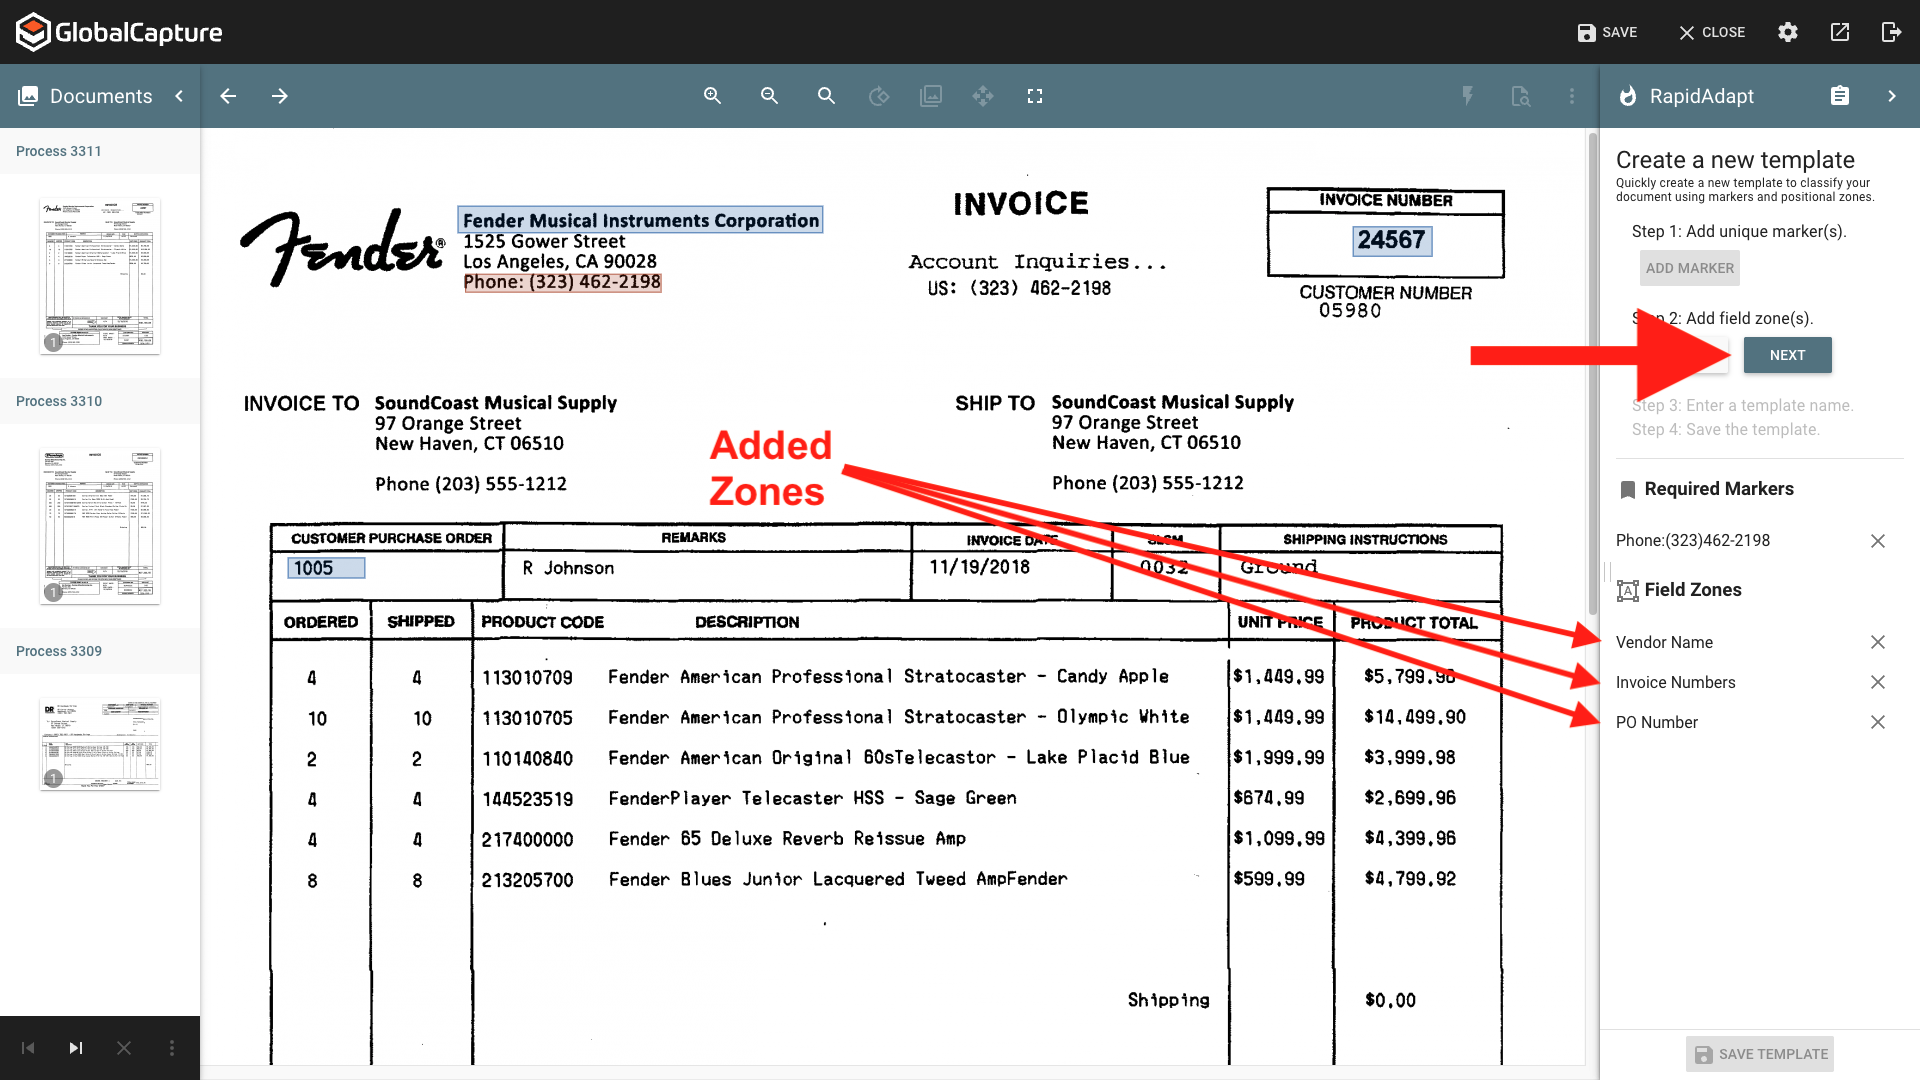
When all fields have been added, click Next to provide a unique name that will correspond to this document. If this were a vendor invoice, you might want to name it with the Vendor's name.
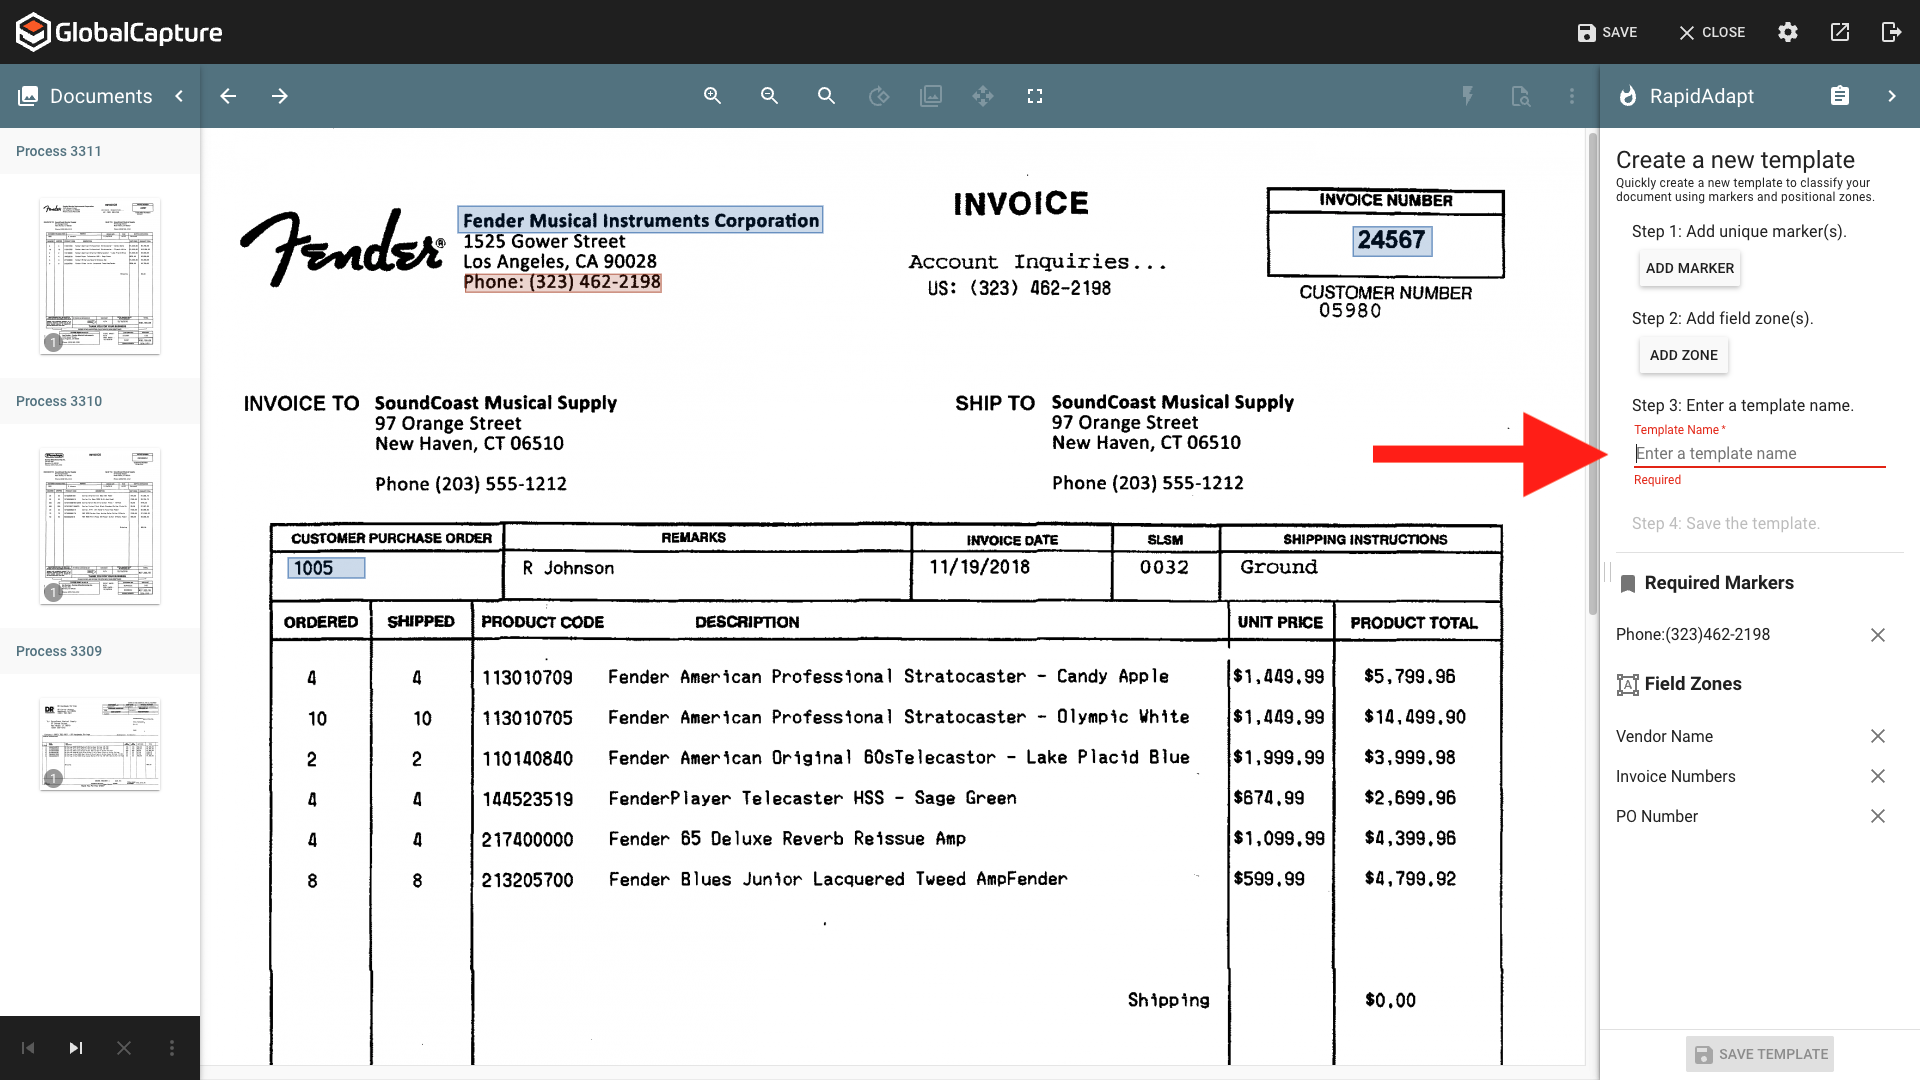
-
When a name is provided, the SAVE TEMPLATE button will be enabled. Click it to commit changes to the system.
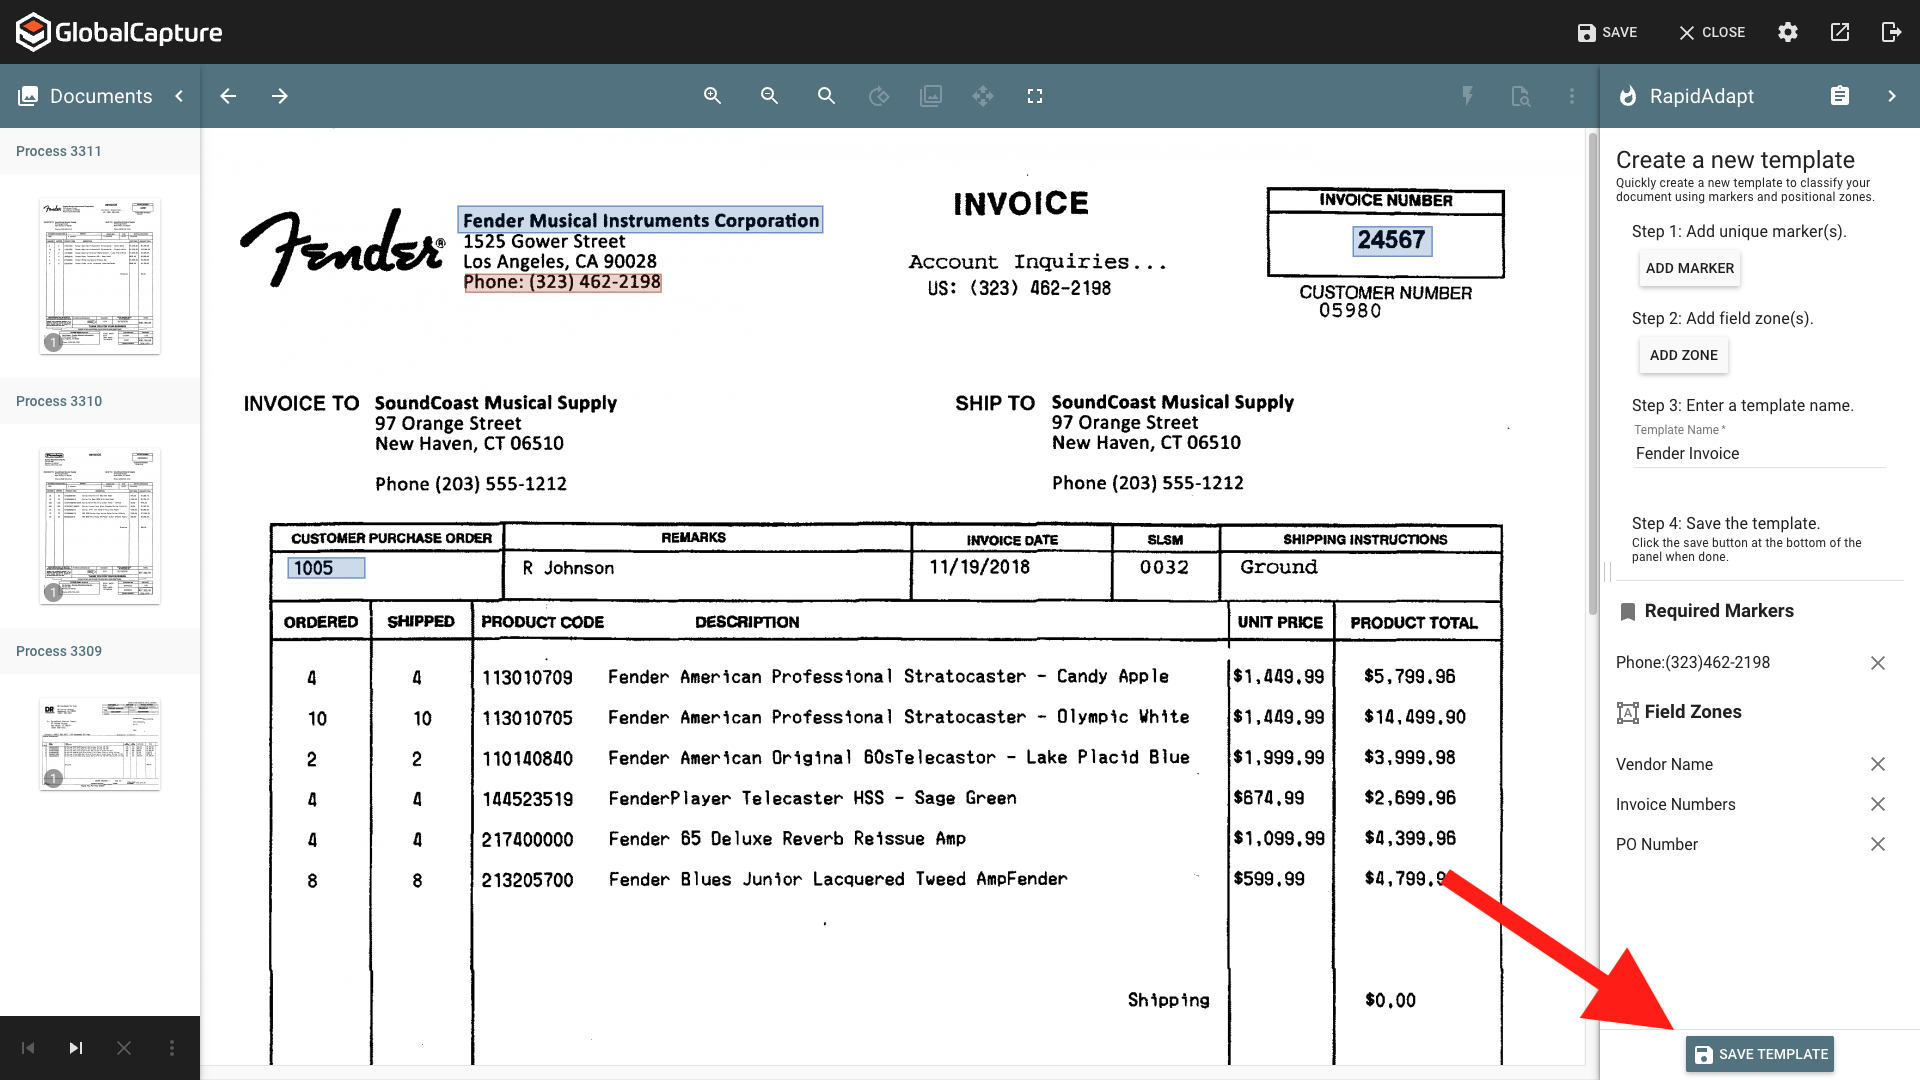
Once the Forms Learning process is complete, you will be back in the standard Validation station. Depending on how the workflow is setup, at this point the document may be manually indexed, or the document may be sent back into the workflow to be extracted automatically by the rules that were just defined. To understand how your specific workflow is configured, reach out to your GlobalCapture Administrator.
If you create a Rapid Adapt template and it doesn’t appear to be working correctly, you should not just continue to create templates for the same document. Contact your GlobalCapture Administrator to ensure the template is being applied to the workflow and make any necessary updates to the template.