Prior to using the node, your Google administrator will need to setup a a Google Cloud project for email access. Once a Client ID and Secret have been generated, you can configure the node in any GlobalCapture workflow requiring it.
This node WILL REPLACE the existing Import node step.
Configure a Google Cloud Project
-
Browse to https://console.cloud.google.com/ and login as your workspace admin user.
-
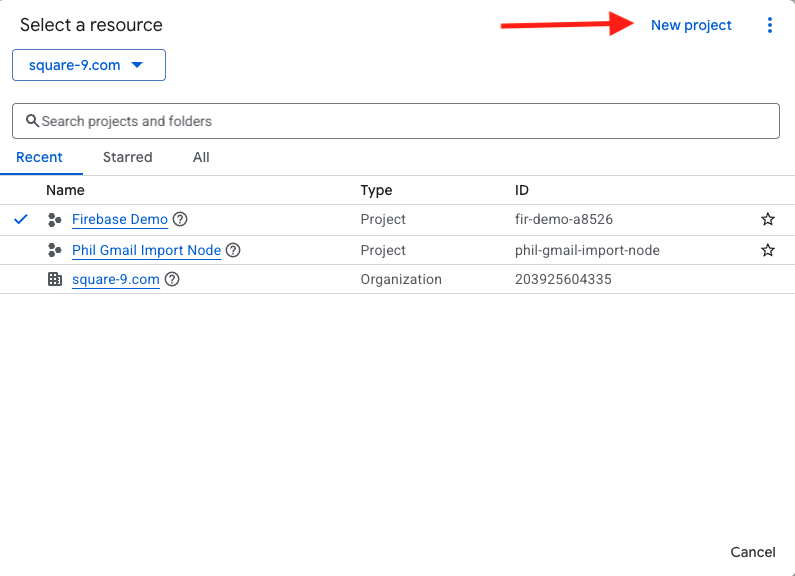
From the project selector in the upper right corner, either select a project to work in, or create a new project.

-
Assign your project a Name such as “GlobalCapture Gmail Import”, select your Organization, and the Parent Resource.
-
Click Create.
-
If not already selected, select your project from the Project Selector.
-
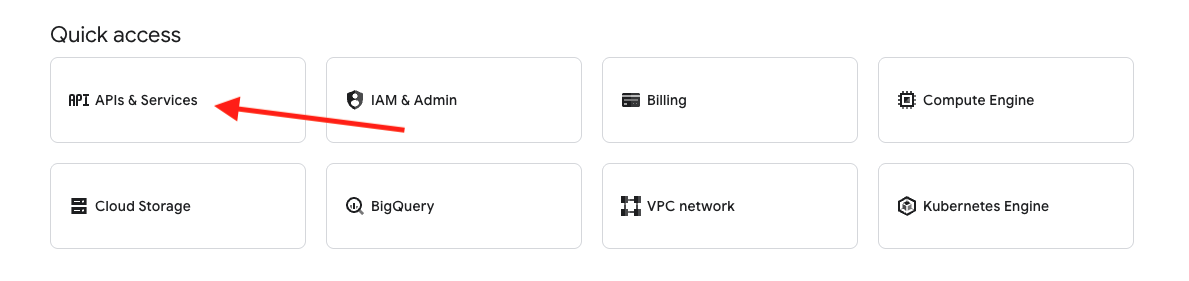
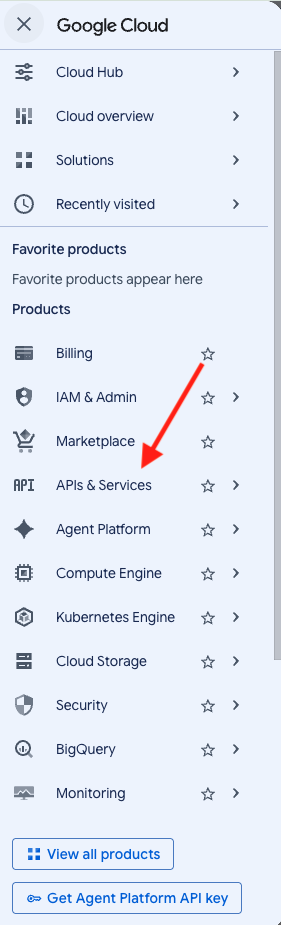
Either from the Navigation Menu (

-
Select the OAuth Consent Screen menu and click Get started.
-
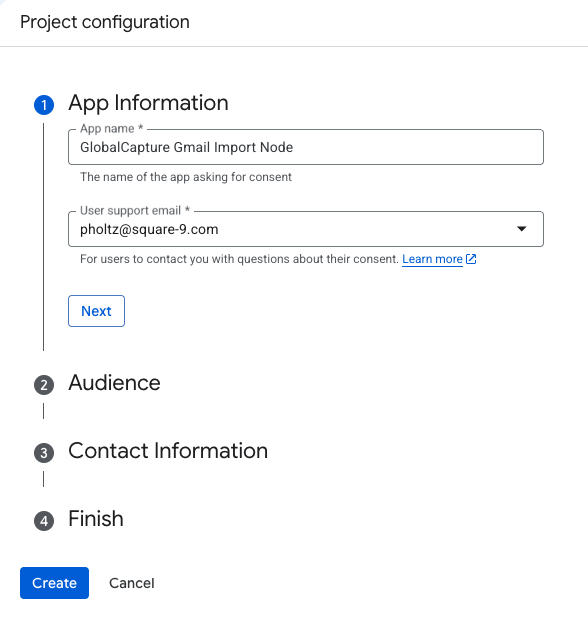
Provide an App Name and a User Support Email. Click Next.
-
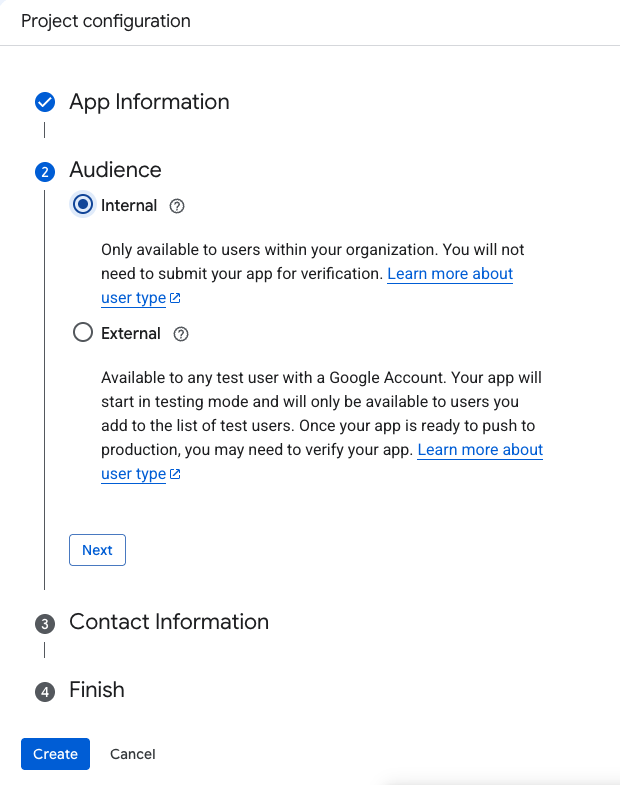
For Audience, select Internal then Next.
-
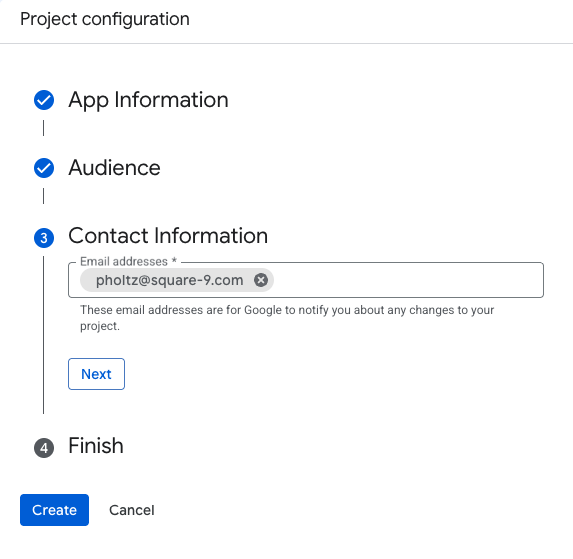
Enter Email Addresses for Google to notify when changes are made to the project. Click Next.
-
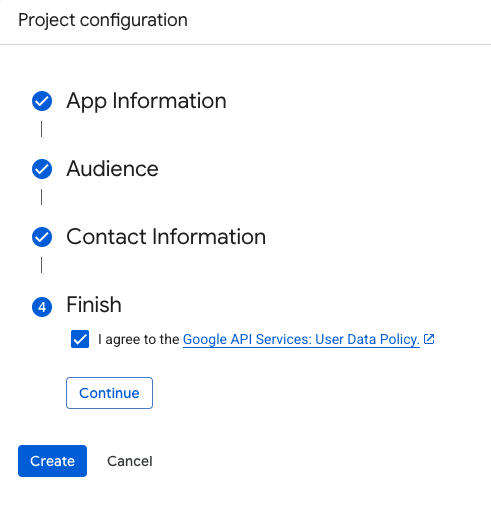
Agree to the Google API Services: User Data Policy and click Continue.
-
Click Create.
-
Copy the Client ID and Client Secret provided. This information will be required when setting up the workflow in GlobalCapture and once the window is closed, the Client Secret will no longer be accessible.