
Prerequisites
-
A publicly accessible Square 9 Identity Manager website with a valid domain name and matching https certificate.
-
Test that the end point works correctly by visiting the endpoint
/scim/v2/ServiceProviderConfig -
Square 9 Identity Manager API key (S9IM).
Setup
-
Login to Azure AD as an Administrator.
-
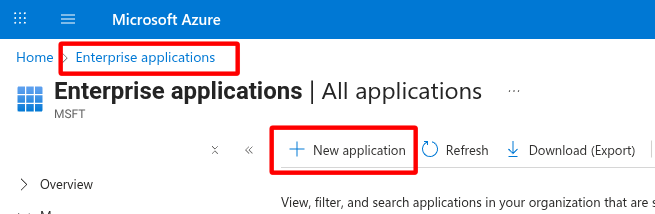
Search for and select Enterprise Applications.
-
Click New application.
-
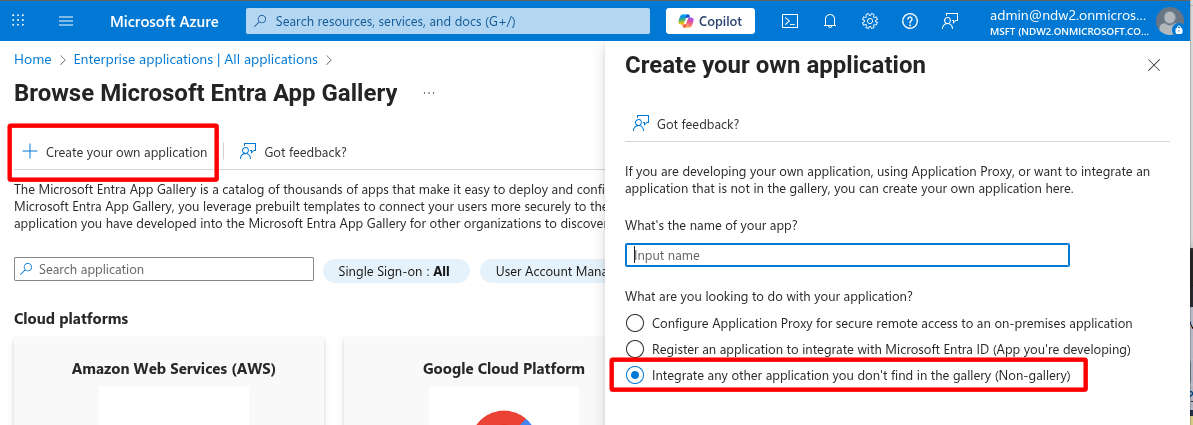
Select Create your own application.
-
Select Integrate any other application you don’t find in the gallery (Non-gallery).
-
-
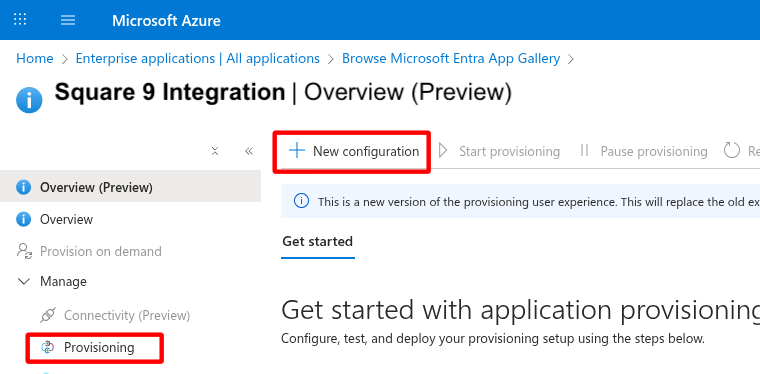
In the Overview → Manage menu, select Provisioning.
-
Choose Automatic.
-
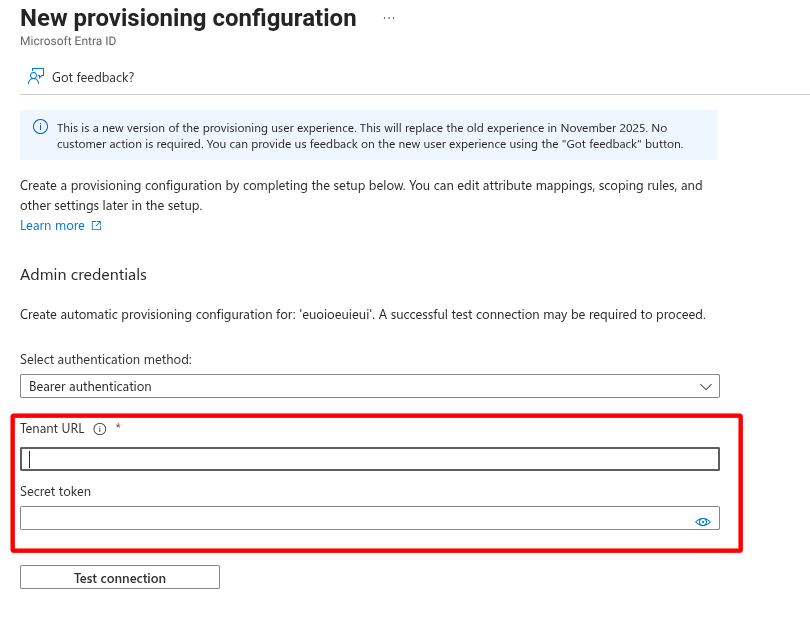
The Tenant URL should be pointing to
https://yourdomain.com/scim/v2
For Square 9 cloud users, the capture- url (https//capture-yourdomain.mysquare9.com/scim/v2) should be leveraged due to how s9im is set up in cloud environments. You should NOT use your GlobalSearch URL.
-
The Secret token is your S9IM API Key.
Azure Attribute Mapping Configuration
-
Access “Attribute Mapping” in the sidebar
-
Remove attributes from the “Users” mapping section until the following are left as depicted in the screenshot below
-
-
-
userPrincipalName
-
displayName
-
givenName
-
mail
-
mailNickname
-
manager
-
surname
-
Switchexpression mapping foractivevalue
-
-
-
Users Attribute Mapping
.webp?cb=34b81efc3a7bae098308861166e778a0)
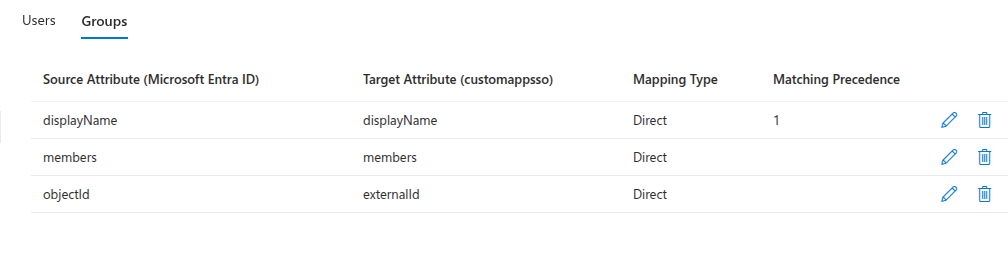
Group Attribute Mapping
No changes are needed to the default Groups attribute mapping, the mapping should appear as depicted below
-
displayName
-
members
-
objectId
Provisioning
If you are using SCIM with Entra AD, there is a relay appliction that needs to be configured. Please contact Square 9 Support for assistance.