Classify Node
This node is available for GlobalCapture only.
Use the Classify Node to perform OCR text-based extraction on the pages of your documents and then attempt to match the extracted data to your GlobalCapture Templates. When no OCR data exists for a document, the Classify Node will perform the requisite OCR steps. Subsequent Classify Nodes will not need to OCR the document pages again unless an operation that can impact a page (Image Cleanup, Validation) occurs. Documents can be compared to one, several, or all of the available Templates, and the first Template which matches the document becomes the active Template. With the status “Classified,” the document can continue in the Workflow. If no existing or specified Template matches, the document would be given the status “Unclassified” and follow a different route through the Workflow.

Classify Node
Classify Node Properties
Node Properties
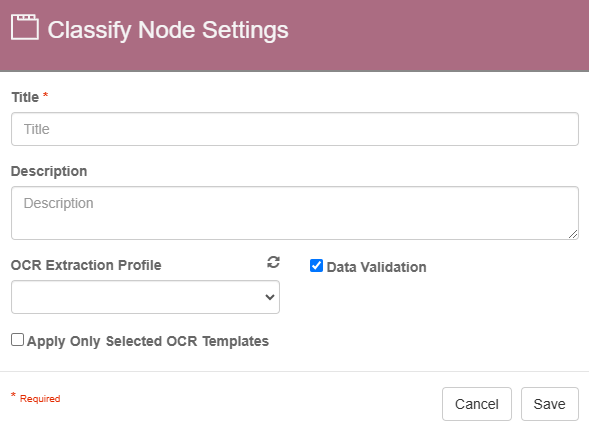
Title
Add a title for this node. Titles are useful when reading the history in the history of a workflow for easier understanding of the overall process.
Description
Provide a synopsis of what this node is doing, or make note of any important details. This is useful for providing additional information such as workflow details and use case information. A good description is helpful when returning to modify the workflow in the future.
OCR Extraction Profile
The OCR Extraction Profiles drop-down allows for users to apply a specific OCR profile. This is useful when specialized OCR rules, such as reading a Dot Matrix text, need to be applied. If no profile is selected, the default profile will be used.
Data Validation
The Data Validation checkbox is enabled by default to enforce Data Type or Length settings for Fields. If it is unchecked and there the data is of invalid Data Type or Length, the batch will error in the Batch Manager, but the Node will still extract data and populate a Field. Errors will stack for every Field for which there is a data-settings mismatch. For more information, see the Data Validation page.
Apply Only Selected OCR Templates
Apply Only Selected OCR Templates allows for selection of which Templates or Template Groups the node will use to perform the OCR Extraction.
If disabled, ALL OCR Templates will be applied in alphabetical order.
If enabled, move Templates and Template Groups from the Available OCR Templates column to the Applied OCR Templates column. Templates are applied in the order they appear in the Applied OCR Templates column.
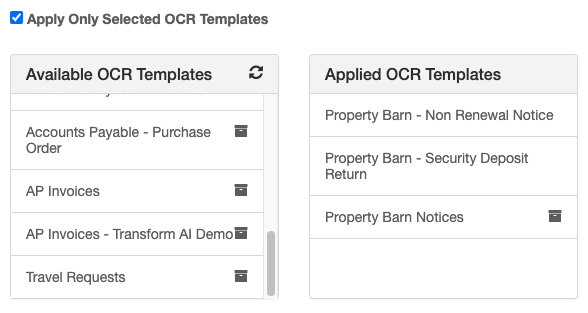
Apply Only Selected OCR Templates Enabled
If using Rapid Adapt, it is recommend you enable Apply Only Selected OCR Templates and use Template Groups.
Select Condition
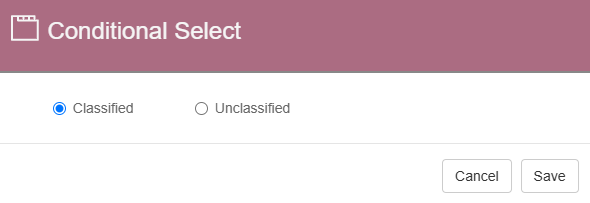
Conditional select for the Classify Node
To assign the workflow path for a document, drag a Connection from the Classify Node to the next Node in the Workflow and, in the Conditional Select dialog that appears.
Use Classified when the document has been identified and a template that matches the document has been selected. Create a process path in the workflow to deal with classified documents, such as routing them for approval validation, releasing to GlobalSearch, etc.
Use Unclassified to handle scenarios where no matching Template was found for the document. Create a process path in the workflow to deal with unclassified documents, such as removing them from the Workflow or sending them to the Validation Station. Then a user with permissions can create a Rapid Adapt Template to classify the new type of document.
Use Cases
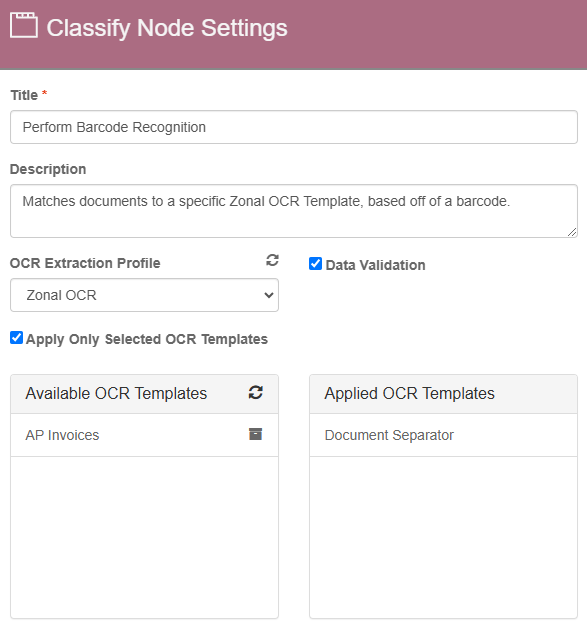
Perform barcode separation using Templates
In this example, I've filled out the Classify node to identify any documents that have a barcode that match a specific Zonal OCR Template. By checking the option to only apply selected OCR templates, this will only try to match documents against the template I’ve chosen.
This is useful properly identifying documents where we can extract the data from the barcode, or use it as a separator to split the document.