Configure PDF Print
The PDF Print extension runs in your Windows® system tray. It loads settings from the s9printConfig.xml file, which is located by default in C:\Users<USERNAME>\AppData\Local\Apps\Square9_Apps\PdfPrinter. All settings can be configured from the PDF Print application's menu. GlobalSearch Extensions must be running to configure the PDF Print settings.
Initial Usage
The icon will not appear in the system tray until PDF Print is used for the first time. The first time you use PDF Print, you can set the default database and archive. This can be changed at any time.
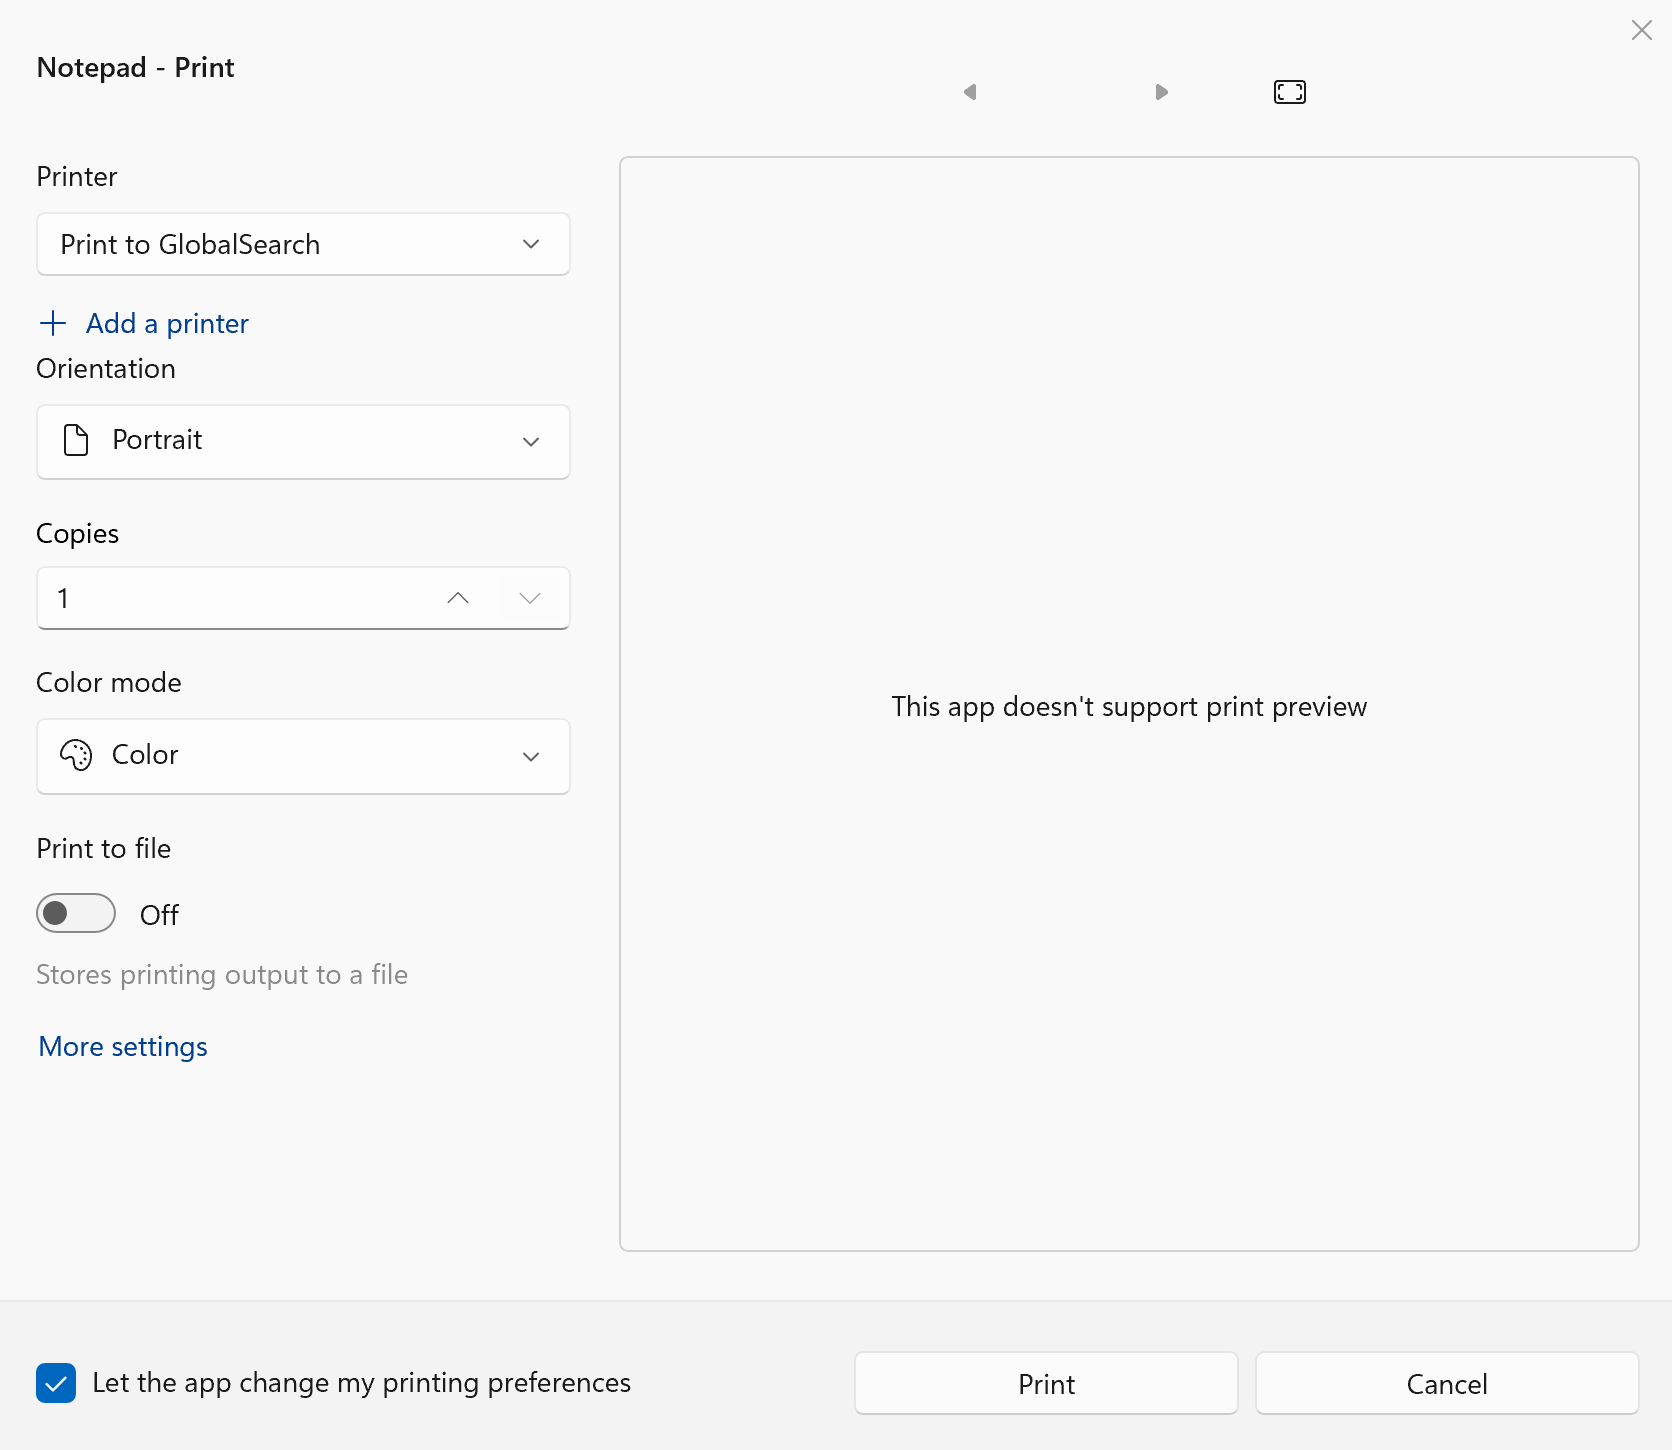
Open an application and select Print to GlobalSearch from the print list and click Print.
Select the Database and Archive to which to send the document.
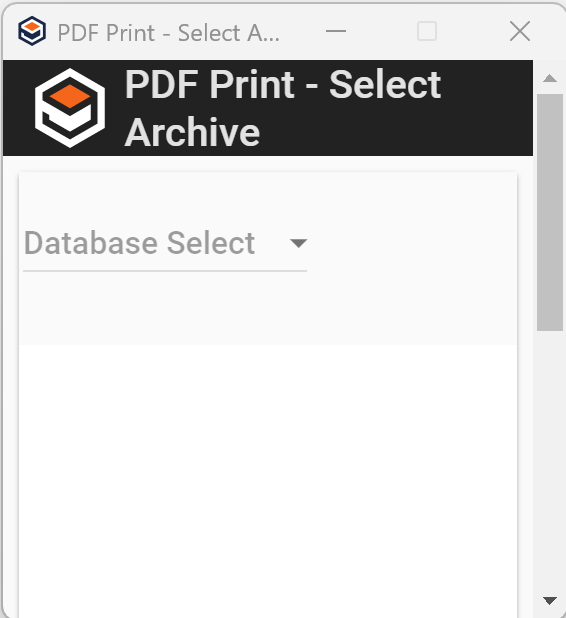
Database Select
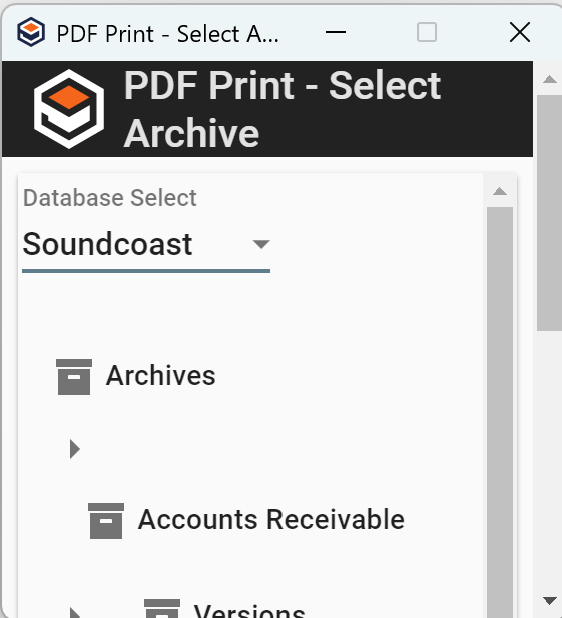
Archive Select
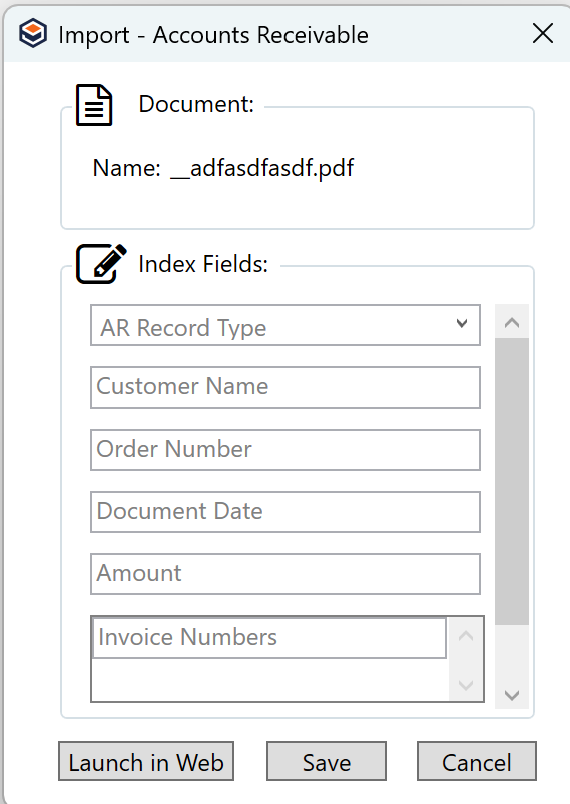
When the indexer appears you can:
Manually enter index data and click Save.
Click Launch in Web to open the document in the GlobalSearch document viewer for indexing.
Click Cancel to cancel the print.
Be aware of any Required fields in the archive as the save will fail if required fields are not populated.
PDF Print Settings
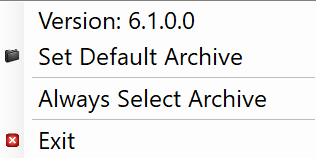
In the Windows system tray, right-click on the PDF Print (![]() ) icon to configure options for the feature. The PDF Print application (and associated icon) will only be available if you have printed using Print to GlobalSearch at least once since the last time you have logged into the computer. If you do not see the PDF Print icon in the system tray, open an application and select Print to GlobalSearch from the print list.
) icon to configure options for the feature. The PDF Print application (and associated icon) will only be available if you have printed using Print to GlobalSearch at least once since the last time you have logged into the computer. If you do not see the PDF Print icon in the system tray, open an application and select Print to GlobalSearch from the print list.
Set Default Archive – Click to open the PDF Print – Set Default Archive dialog box. From there, select your default database and destination Archive. If you only occasionally change target Archives for printing, or you intend on printing a batch of documents to a specific Archive, using this option in conjunction with turning Always Select Archive off can be a real time saver.
Always Select Archive – Enable to set the PDF Print - Select Archive dialog box to appear whenever Print to GlobalSearch is selected in an application. If this option is selected, PDF Print will prompt for a target database and Archive with every print operation. The application will default to the last selected database and Archive chosen. This option is off by default, but should be considered for any user that is not printing to the same location every time.
Exit – Click to exit the PDF Print application. It will be restarted if you Print to GlobalSearch again.