Print to GlobalSearch
With Install and Configure PDF Print, you can import documents into GlobalSearch without leaving your favorite Windows® applications, using a simple print command. When you install the PDF Print extension from the Extensions Manager, the Print to GlobalSearch option appears in your list of printers available to all Window applications.
Print to GlobalSearch is a Windows printer driver that redirects print output from your applications to GlobalSearch. Before using the Print to GlobalSearch printer driver, you will need to enable the PDF Print extension. Open the Extensions Manager and make sure that PDF Print is enabled. There are configurable options that control how the Print to GlobalSearch printer driver prompts you for information when archiving a document. Refer to the Configure PDF Print section to learn what settings are available and how to configure them.
Using Print to GlobalSearch
- Open any application that generates documents or content you would normally print and scan. Print from your application as you normally would. When prompted to choose the printer, be sure to select Print to GlobalSearch and click Print. This will start the PDF Print extension in your Windows system tray, if it is not already running.
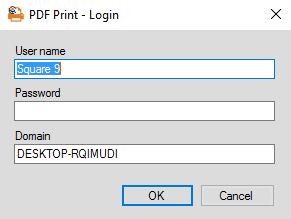
- By default, PDF Print will use your GlobalSearch Extensions stored credentials for authentication. If these credentials are missing, incorrect, or if Use Extensions Login is off in your PDF Print tray menu, enter valid credentials in the PDF Print – Login interface that appears and click OK.

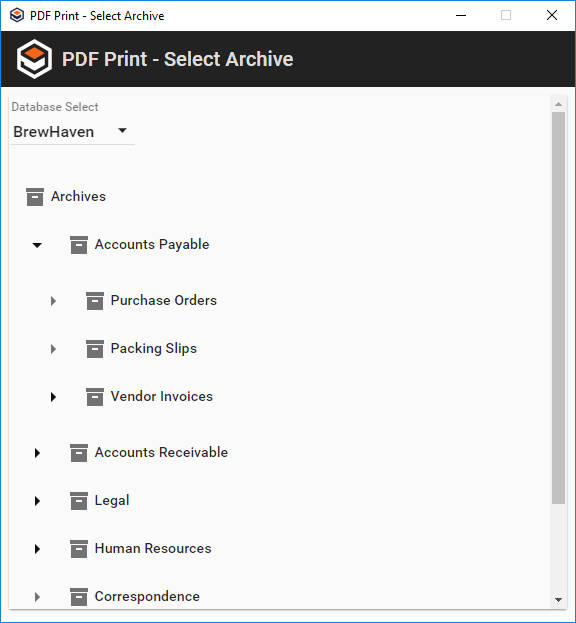
- Select your destination Archive. If you have never used Print to GlobalSearch before, you will be prompted to select a database and Archive. By default, GlobalSearch will save the destination from your first print operation and target that destination with each subsequent print. If you wish to be prompted every time for a destination, these options can be set in the PDF Print menu.

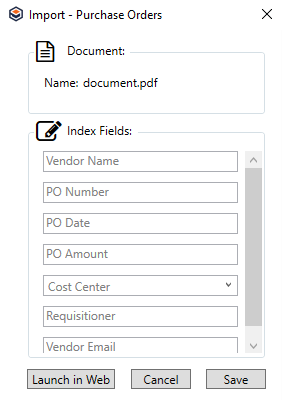
- In the Import - <ArchiveName> dialog box that appears, do one of the following:
- Enter your indexing data and click Save.
- Optionally, to open the document in the Document Viewer, click Launch in Web. From the Document Viewer, you can enter your indexing data. Use this option if you need to visually inspect the document you are printing. You may also wish to use the Launch in Web feature if your workflow involves using Key Free Indexing, which is available in the Web Indexing screen.

