Validate Node
The Validate node is available in GlobalCapture only.
There are many cases where you might want a user to visually validate data, documents, or both in a workflow process. You may want users to visually validate pages for scan quality before OCR, to verify extracted data, or to set up a double-blind data entry process. No matter the reason, use one or more Validate Nodes in a Workflow whenever you need to confirm or modify a document or its data as part of the capture process.
Validate node icon
Validate Nodes are used for:
Validation Actions – One or more custom actions can be taken in a validation step. These actions could require user input or be system driven. Using multi-action Validate Nodes and multiple Validate Nodes in a Workflow GlobalCapture covers even the most complex capture scenarios
How Fields are Viewed – Maximize efficiency and meet compliance goals by displaying only the Fields needed and in the order needed for each step in the validation process.
GlobalForms – Open GlobalForms submissions for editing data, updating data, or completing additional parts of the form before continuing through the process.
Increase Automation – When a new document does not match existing extraction rules, enabling Rapid Adapt allows you to construct reusable templates on the fly. Automatically extracting data the next time the document is encountered.
Node properties
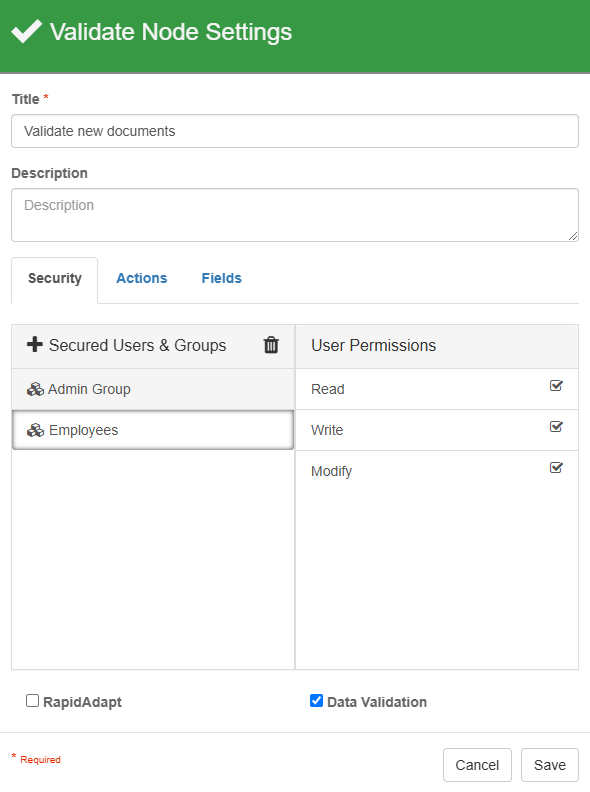
Validate Node Settings
Title
The Title of your node should be brief but descriptive about what action is happening.
Titles are important when revisiting workflows in the future and when migrating workflows. The title of the node will be displayed when resolving conflicts during imports.
Description
The Description of your node should provide notes about this node. This could include information about intended use, types of documents being validated, who is intended to be secured to the node, etc.
Descriptions can be very useful when revisiting workflows in the future.
RapidAdapt
When enabled, you can assign a Template Group for the Rapid Adapt Templates that users might create at the validate step. When using RapidAdapt, always specify a Template Group to ensure the user generated Templates in a process don't mix in with Templates from other processes. It will be much easier to manage your GlobalCapture templates in this way.
GlobalCapture versions prior to 2.1 do not support Template Group assignment for RapidAdapt forms. Customers using RapidAdapt are strongly encouraged to upgrade to take specific advantage of these features.
Data Validation
When enabled, Data Validation requires the data entered into a process field match the field requirements when resubmitted. This setting only applies to GlobalForms. When it is unchecked, data provided by GlobalForms is allowed to be invalid for it's fields. It is always recommended you be sure the data provided conforms to the rules of any target fields to prevent errors downstream in the process. For more information, see the Data Validation page.
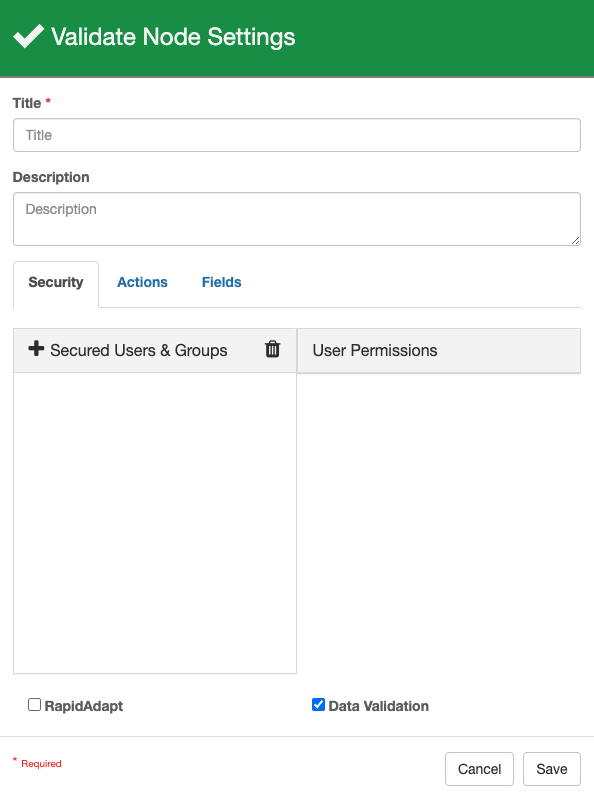
Security Tab
Validation Security should only be used in GlobalCapture 2.4 and earlier. Security should be controlled using GlobalCapture Searches in 3.0 and later. Validation Security is only applied when enabled by the GlobalCapture Search in the Batch Portal.
Upgrading to a version of GlobalCapture with Search Security will not impact your Validate node security setting but Batch Searches will need to be configured to allow Validate Security to be applied.
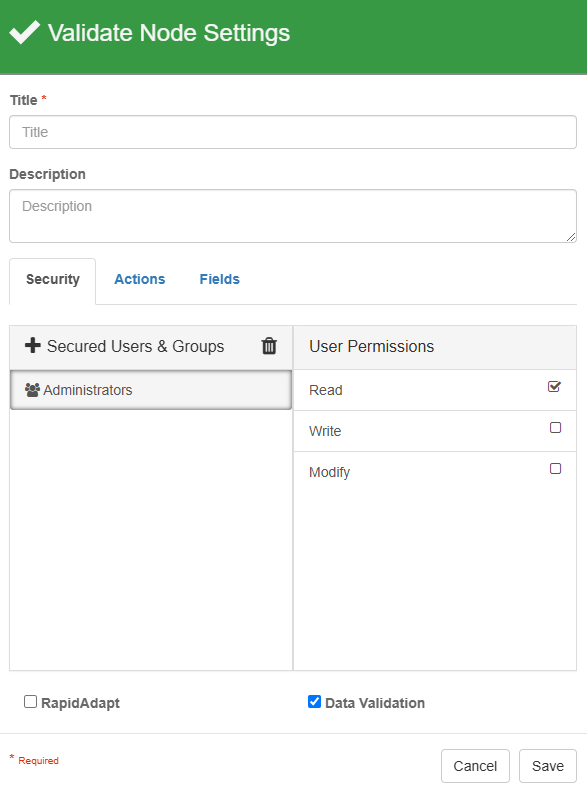
Validate node security tab
Set specific permissions for each Validation Action on a per user/group basis. You can set GlobalCapture Workflow permissions from two places: the Manage Portals interface and individual Validate Nodes. Use the Portals permissions to allow administrative-level permissions for each Portal, including access to Workflows within the Portal. Use the much more granular Validate Node security settings for user permissions for just the one step in the Workflow process. For each validation step, you can assign a combination of Read, Write, and Modify permissions for users.
Important notes:
Those with Portal administrative permissions do not need to be expressly secured to a Validate Node to be granted permissions to it.
Users do not need to be granted Batch Portal permissions to be granted access to documents that need validation. This Batch Portal access, however, is restricted to the batches for which they have been specifically granted Validate Node security. From the Batch Manager they can view and validate documents, including opening them in the Validation Station for closer inspection. However, only Portal administrators are allowed to delete or remove documents from the process.
When you modify user security in the Validate Nodes Settings it is applied to new processes entering the Node, not on-going processes. Any time you modify a Workflow, including when modifying a Validate Node setting, it is a good idea to first Unpublish it to halt any new documents from entering, next check Batch Manager to confirm that any remaining documents have been processed through, and then implement your changes.
Validate Node Security Tab
Use Plus ( ) to add users. This displays a list of users and groups from which to select.
Use Remove ( ) to remove users from the Security Tab.
Under the User Permissions column, we can define whether the user or groups has Read, Write, or Modify permissions to documents in this validation node.
Read Permissions allow for the user/group to be able to view a document in the Validation Station.
Write Permissions allows for the user/group to be able to enter or edit index field data for a document in the Validation Station.
Modify Permissions is for users that have Read permissions and allows for document-level actions to be taken, such as adding or removing pages.
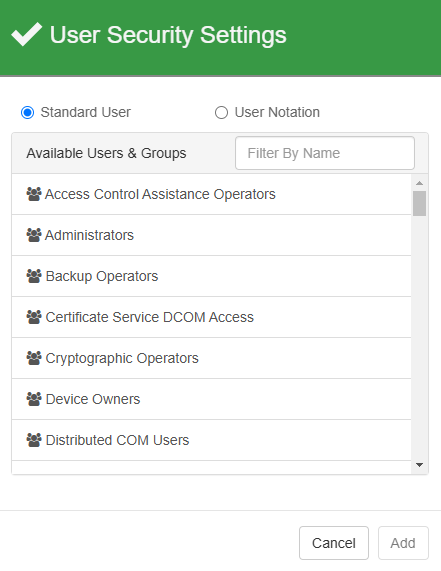
User Security Settings
The User Security Settings appears when you add a user/group.
Click Standard User and select one or more users from the Available Users & Groups list, and then click Add. Use the scrollbar and the filter search box to find specific users or groups
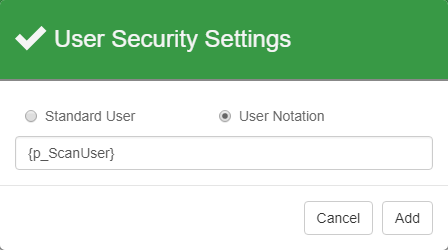
Click User Notation and enter a single brace ( { ), then choose from the list of available Notations. Click Add.
At run time the S9 Notation property can be evaluated to apply specific permissions on an individual process basis. When a Workflow process enters the Validate Node, the S9 Notation value is translated. If values change while the process is still in the Validate Node, however, it will not affect the security already set by the S9 Notation. S9 Notations support users, Square 9 Users and groups of users, in that order. This means that it is possible for a group and a user to both be secured with one User Notations setting, if they have the same name.
Standard User
User Notation
Please note that multiple users found within a MV Field or Table Field column are not supported for User Notation.
Once users or groups have been assigned to the Secured Users & Groups list, choose the document permissions for the Batch Manager and Validation Station. If you select more than one user or group and they have conflicting permissions, it is indicated by a dash. Resolve the conflicted settings and then save the configuration.
GlobalForms Permissions
Actions Tab
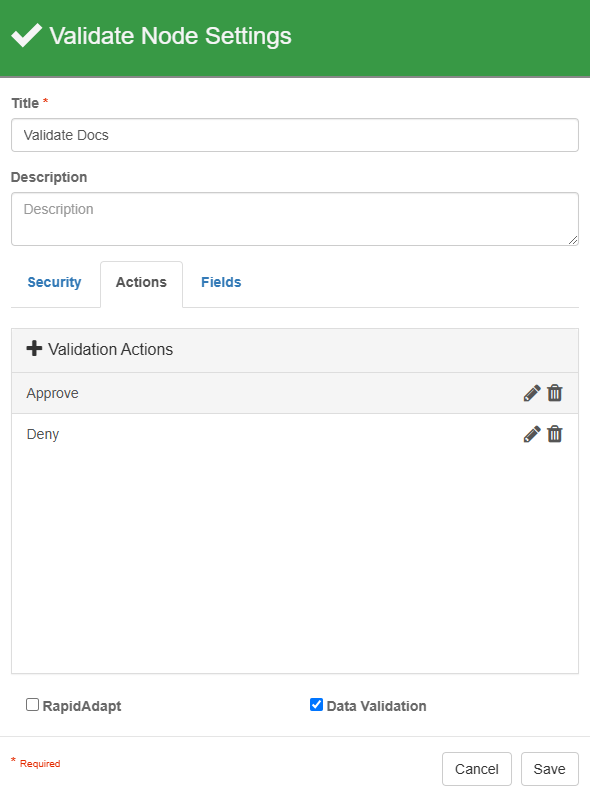
You can set multiple different types of Validation Actions for the Node on the Actions tab. The Actions taken will affect which step the document proceeds to in the process. User Actions require manual responses in the Validation Station. System Actions are triggered by timers, OCR results, or resubmitted web forms. You can also create Actions that are a combination of both User and System Actions, where a user triggers a System Action manually.
Validate node actions tab
Actions settings tab
Validate Node Actions Tab
Use Plus () to add an action. This brings up the Actions Settings Menu where additional settings can be configured.
Use Remove () to remove validation actions from the Actions Tab.
Use Edit ( ) to modify existing validate actions.
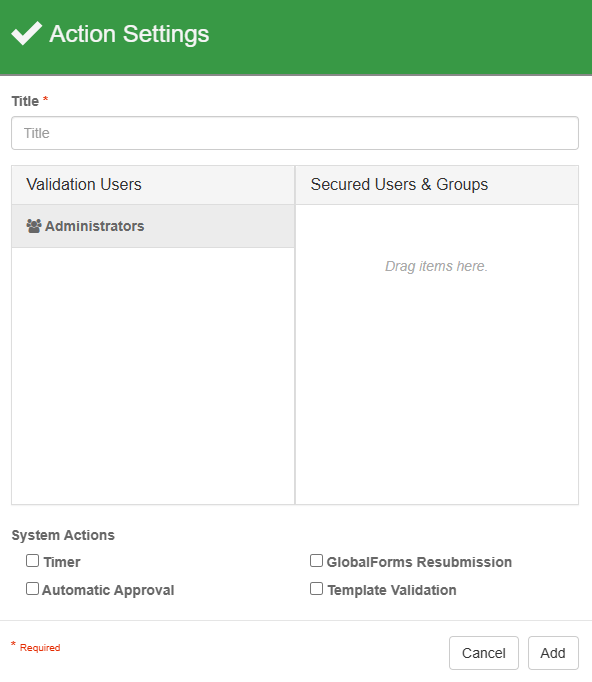
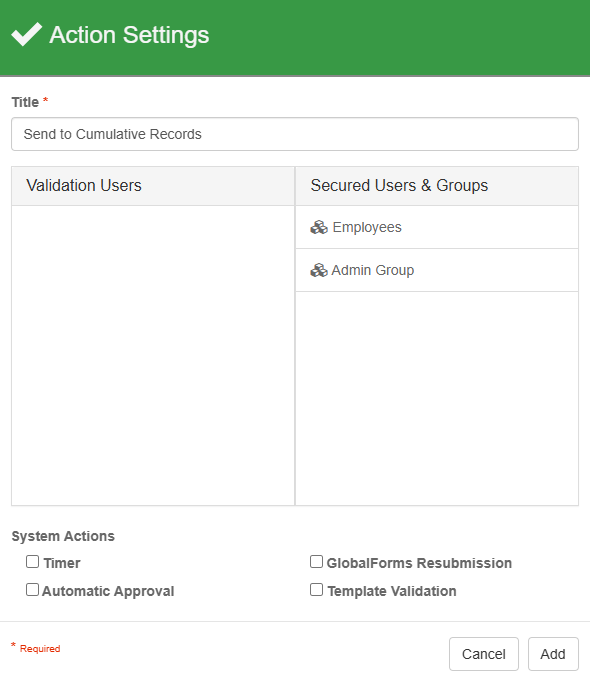
Actions Settings
When a new action is created or an existing action is edited, the Action Setting popup appears.
The Title is the name of the action. This is what will appear when you connection the action to other nodes in GlobalCapture and what will appear in the list of actions available to the user in validation. Make sure you title is clear and concise.
Validation security should only be used in GlobalCapture 2.4 and earlier. Security should be controlled using GlobalCapture Searches in 3.0 and later.
Validation Users is the list of users/groups that can be secured to this action. Only users/groups secured to the action will have the action available in validation.
Secured Users and Groups is the list of users and groups that can take this action when in Validation.
System Actions
A System Action is an event that is triggered by either an elapsed amount of time, a form being resubmitted, or data and confidence level validation that is handled automatically by the OCR Engine. The Timer, Automatic Approval, and GlobalForms Resubmission System Actions types can be used only once per Node. Multiple system actions can be applied to a single action.
Set a Timer - Use the Timer setting to trigger an event after a specific amount of time has elapsed, such as a time-based escalation or to periodically send email reminders that a document is awaiting user action. The document will enter the validation step and, if there is no action taken, will proceed to the next step in the Workflow once the set time has elapsed.
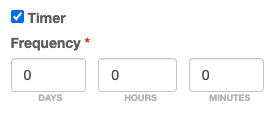
Timer
Set Automatic Approval - Use Automatic Approval to move the document along this action path if the data passes the set validation parameters. When enabled, contextual settings appear below the checkbox. One or both of the additional settings that appear can be enabled to further control the approval process.
OCR Confidence Validation - Set the OCR confidence slider. If all extracted data has a confidence level above set amount, the document will automatically follow this path.
Data Validation - Data Validation requires the data entered into a process field match the field requirements.

Automatic Approval
Set GlobalForms Resubmission - If a Workflow is importing forms from GlobalForms, when you enable GlobalForms Resubmission users can select them in the Batch Manager and then click GlobalForms Validation to launch the submission for editing. After users resubmit the forms and returns to GlobalCapture, the resubmissions will automatically move along the Workflow process.
Template Validation - Allows for the retention of details from the document being processed. This can be used by administrators when modifying templates to understand how changes will impact extraction.
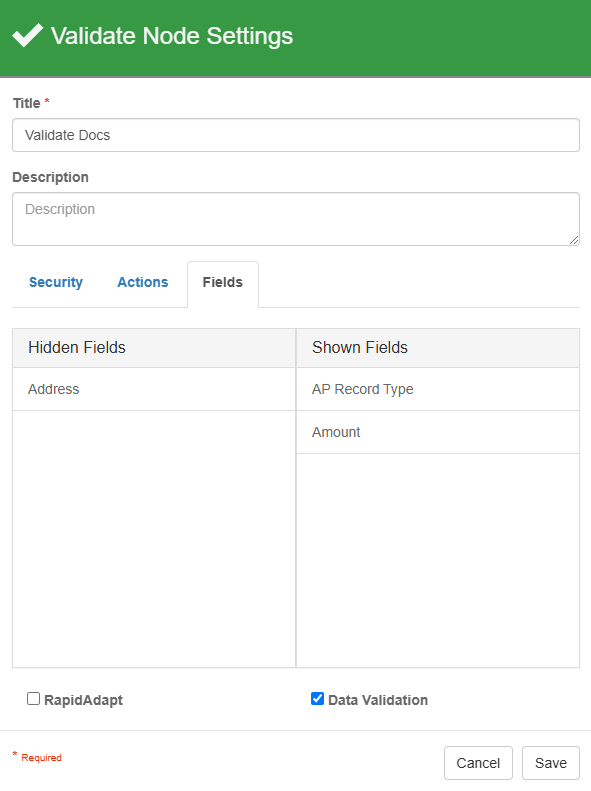
Fields Tab
Use the Fields tab to set which Process Fields will be visible and what the order they will appear to users while validating at this step in the process.
Use the Hidden Fields to keep fields that a user might not need to view (such as ReleasedFilePath) or should not view (such as Social Security Number) from appearing in the Batch Manager or Validation Station. Just keep in mind that users cannot correct data in Fields that they cannot see. If there are Data Type or Field Length mismatches in Hidden Fields, they will remain stuck in a validation step or error at release.
Note that the Fields are not hidden for users with administrator-level Batch security.
Validate node, fields tab.
Select Actions
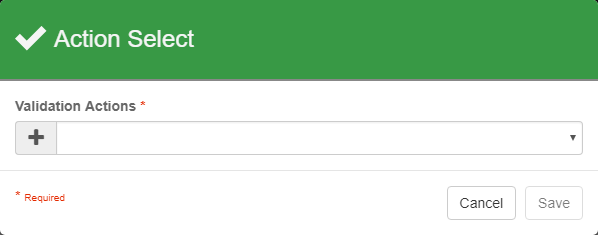
Validate Node Action Select
To validate a document, drag a Connection from the Validate Node to the next Node in the Workflow and in the Action Select dialog, select one of the Actions that you have configured from the drop-down list. You can connect the Validate Node to one or more other Nodes. Also, keep in mind that once an action has been assigned it can no longer be used until the existing link is deleted and, conversely, it is possible to create an Action that remains unassigned and therefore unused.
Add Validation Points to Catch Issues Early
When confidence in the document capture is high, a Workflow can validate documents automatically. However, there can be times in the process when it is a good idea to allow for manual validation. Once documents are validated with a high confidence level, they can proceed smoothly through the rest of the Workflow.
Validate Early in the Process – Add a Validate Node immediately after the Import Node so that end users may visually inspect and validate documents entering the system, before they continue in the process. Pages which are flipped over, stained, or folded may need to be rescanned before the OCR process is completely successful.
Validate Separation – If a multi-page document has no standard Zones, barcodes, or blank pages (or low blank-page confidence) to separate automatically, use the Validate Node to allow users to manually divide the scan into individual documents from the Validation Station.
Validate Status – Assign users to monitor the Batch Manager and manually validate whether documents are approved for processing. Use the Email Node to send notifications when further attention is needed.
Use Cases
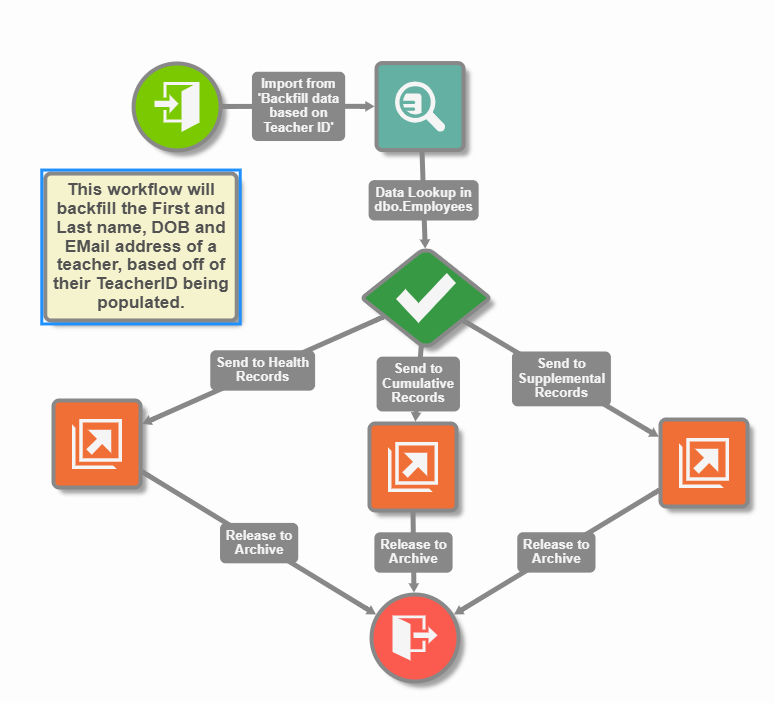
Configure a validate node to require user-based workflow decisions
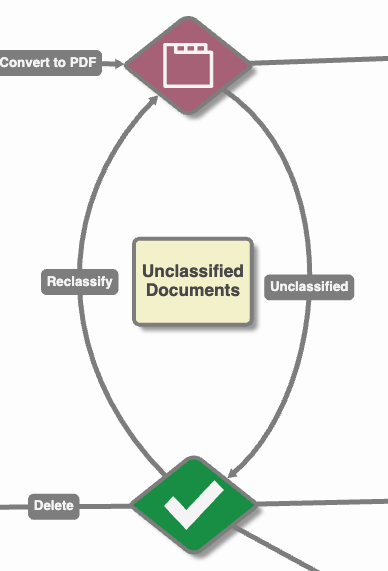
The Validate node has been configured to send documents to different archives based off of what type of document it is. This process will require users to access the Batch Portal and manually send these documents through the remainder of the workflow by choosing one of the following actions available to them.
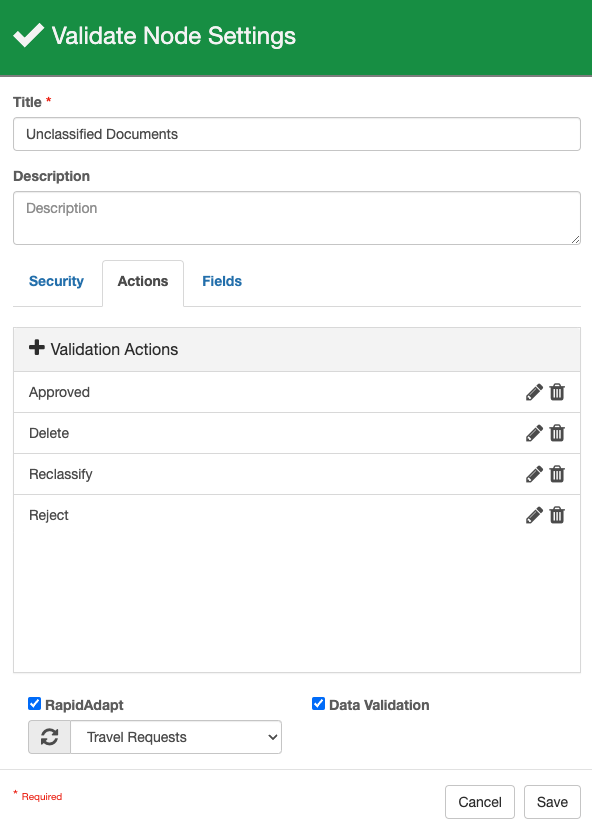
Configure a Validate node with RapidAdapt enabled
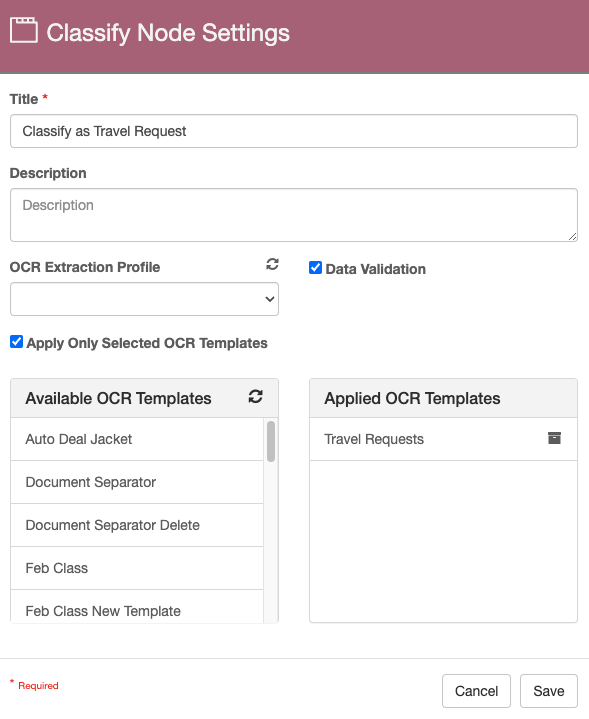
In this example, we'll focus on configuring the Validate node for Rapid Adapt. When a document is unclassified, you can route it to a Validation node with Rapid Adapt enabled. The user can then create a template to extract data from this document. The template is added to the Travel Requests templete group, and then can be sent back to Classification to have the new template applied.