CTS DirectConnect
CTS DirectConnect allows you to connect network based scanners to your Capture in the Cloud instance by scanning to folders that are continuously monitored. The ingestion of documents from these folders can be set up to run automatically using a Windows service or executed on demand. Built-in reliability features include automatic retries, error handling with dedicated error folders, and optional file backup for added protection. Advanced functionality such as encrypted credential management, recovery of failed files, and detailed logging ensures both security and transparency.
Click here for CTS DirectConnect Legacy Documentation.
Version History
- 1.0.690.1307
Fixes an issue with documents procesed with template OCR, and specifically documents being separated by a zone.
Preparation
Before you begin, make sure you have the following:
The CTS DirectConnect package. Download it here: GlobalCapture_DirectConnect.zip
The URL of your GlobalCapture CTS instance: capture-mycompany.mysquare9.com.
A privileged user and password to authenticate to GlobalCapture CTS. For more information on licensing in GlobalCapture, refer to our knowledge base article, “License Management”
An internet connected workstation capable of running CTS DirectConnect, see our hardware requirements for more information.
It is best practice to install CTS DirectConnect on your server as to not rely on any one persons PC to be the destination of all scans.
Configuring CTS DirectConnect
Setup
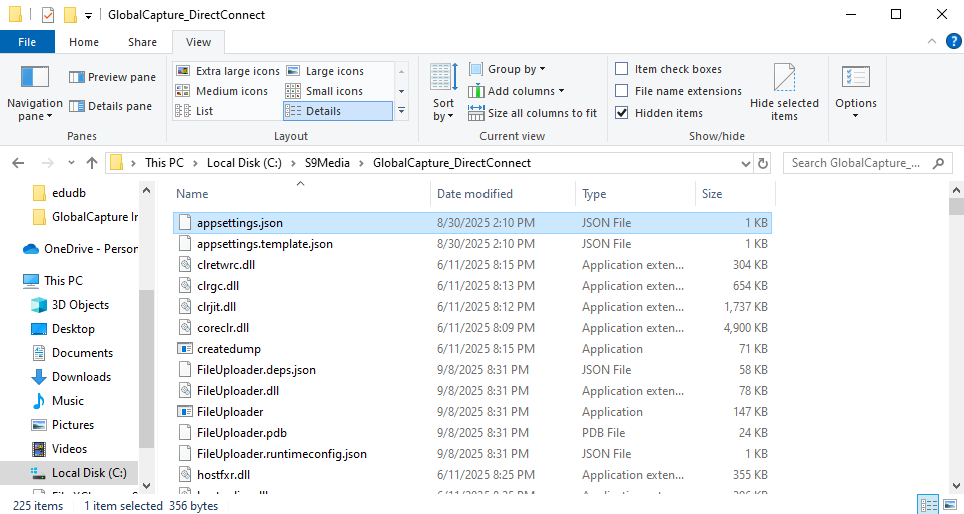
Download and Extract the contents of the package.
While this folder can be placed anywhere, it must remain in place and accessible at all times, as it contains required components that the system relies on for proper operation. Deleting, moving, or restricting access to this folder may cause errors or prevent the service from running correctly.
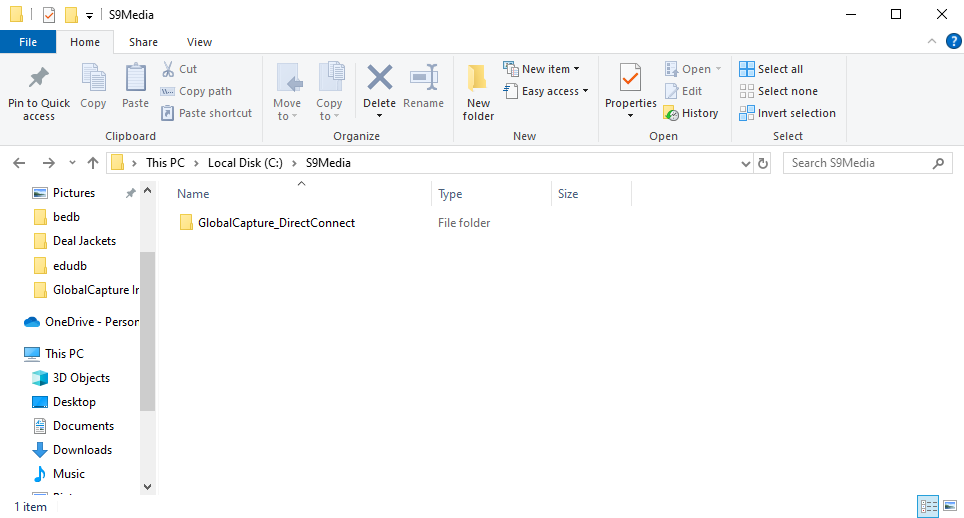
Best practice is to create a folder on the root called S9Media and adding the extracted folder here.
Extracted File
Create a copy of the appsettings.template.json to the same location and rename the copied file appsettings.json.
appsettings.json
Open the appsettings.json and add your Capture API endpoint to the BasePath. All other settings are optional. See appsettings.json Details below.
The BasePath should look like:
https://<your_instance>.mysquare9.com/square9captureapi
{
  "AppSettings": {
    "BasePath": "https://<your_instance>.mysquare9.com/square9captureapi",
    "VerboseLogging": false,
    "DefaultWatchPath": "C:\\Watch",
    "DefaultBackupPath": "C:\\Backup",
    "HttpTimeoutMinutes": 2,
    "MaxRetryAttempts": 3,
    "RetryDelaySeconds": 30,
    "FailedRetryHours": 24,
    "MaxConcurrentUploads": 2,
    "UploadDelayMs": 0,
    "WatchFolders": []
  }
}
Create a Secure Credentials file. Make sure this user is a GlobalCapture Administrator.
Open a CMD prompt. Make sure to run the CMD prompt as an Administrator.
Change the directory to the location of your unzipped file.
Run the command:
FileUploader.exe --encrypt-creds “<your_username>” “<your_password>”
Secure Credentials CMD Prompt
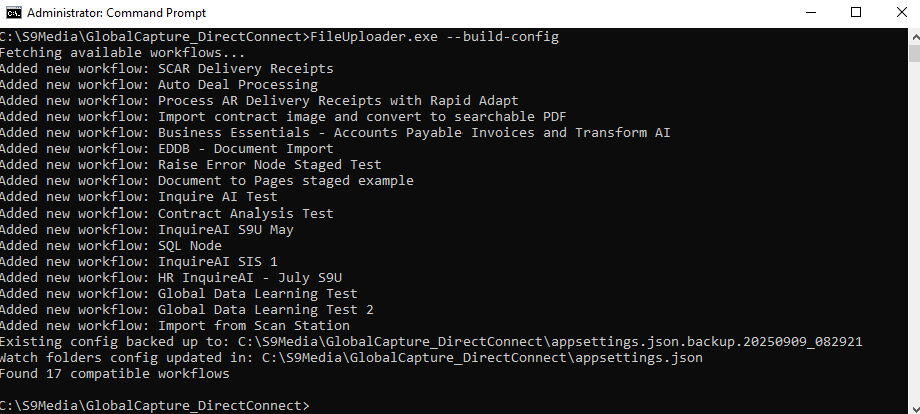
Generate the Workflow Config File. This will pull all the workflows from GlobalCapture that have the CTS DirectConnect node, and update the appsettings.json file.
From an Administrator CMD prompt, change the directory to the location of your unzipped file.
Run the command:
FileUploader.exe --build-config
Workflow Config File CMD Prompt
If you run --build-config where it has previously been run, the application will attempt to merge the existing with the new.
Successful --config-build
Create the watch folders by running FileUploader.exe. This will create all the watch folders.
FileUploader.exe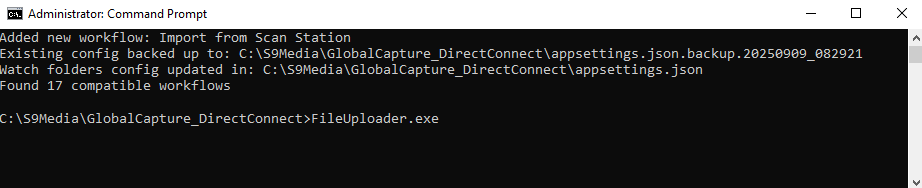
Create Watch Folders
If you configure the service to run automatically, watch folders will be automatically created.
A folder called Watch is created on the local drive.
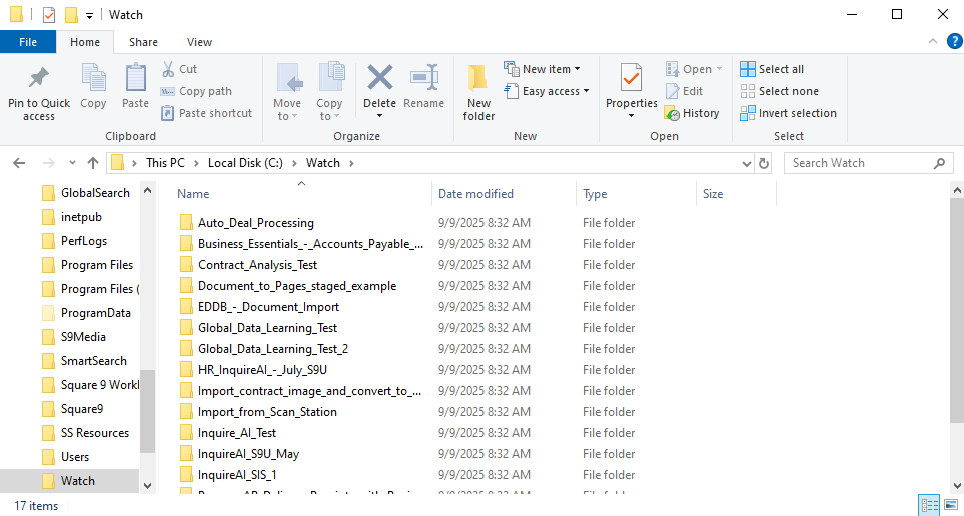
Watch Folders
Press CTRL+C to quit when prompted.
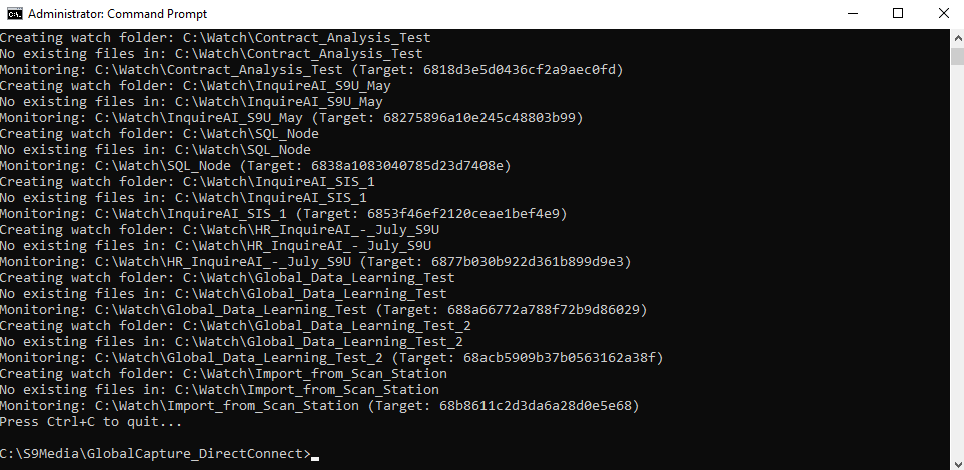
Successful Watch Folder Creation
Executing Workflows
Ingestion of documents from the watch folders can be executed multiple ways.
Uploading a Single Document from ANY Location on Demand
Individual documents can be upload to a GlobalCapture workflow from ANY location on demand. This is handy when dealing with a one off document.
Open a CMD prompt as an Administrator.
Change the directory to the location of you GlobalCapture_DirectConnect extracted file.
Run FileUploader.exe with the file path to the watch folder.
FileUploader.exe "<fully qualified path to file>" 
Uploading a Single File
You will be prompted to select the workflow to process the document. Enter the number of the workflow and press Enter.
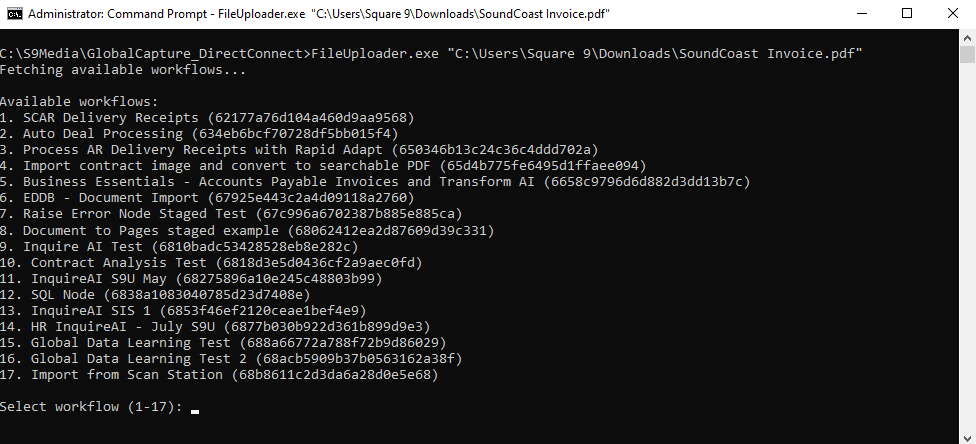
Workflow Selection
The document will enter the selected workflow and appear in the GlobalCapture Batch Manager. The file is NOT deleted from the source location.
Uploading Documents From ALL Watch Folders on Demand
Open a CMD prompt as an Administrator.
Change the directory to the location of you GlobalCapture_DirectConnect extracted file.
Run FileUploader.exe.
FileUploader.exeUploaded documents are removed from the Watch folders.
Automated Ingestion from ALL Watch Folders
Create a Service that runs in the background and automatically ingests files are deposited into the watch folders.
Open a CMD prompt as an Administrator.
Run: sc create "GlobalCapture DirectConnect" binPath="<pathtoyourfile>\FileUploader.exe --service" start=auto
sc create "GlobalCapture DirectConnect" binPath="<pathtoyourfile>\FileUploader.exe --service" start=auto
Create the Service
Start the service: sc start “GlobalCapture DirectConnect”
sc start “GlobalCapture DirectConnect” 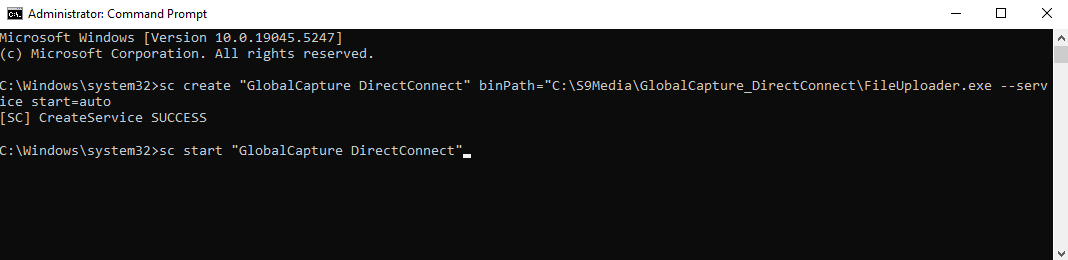
Start the Service
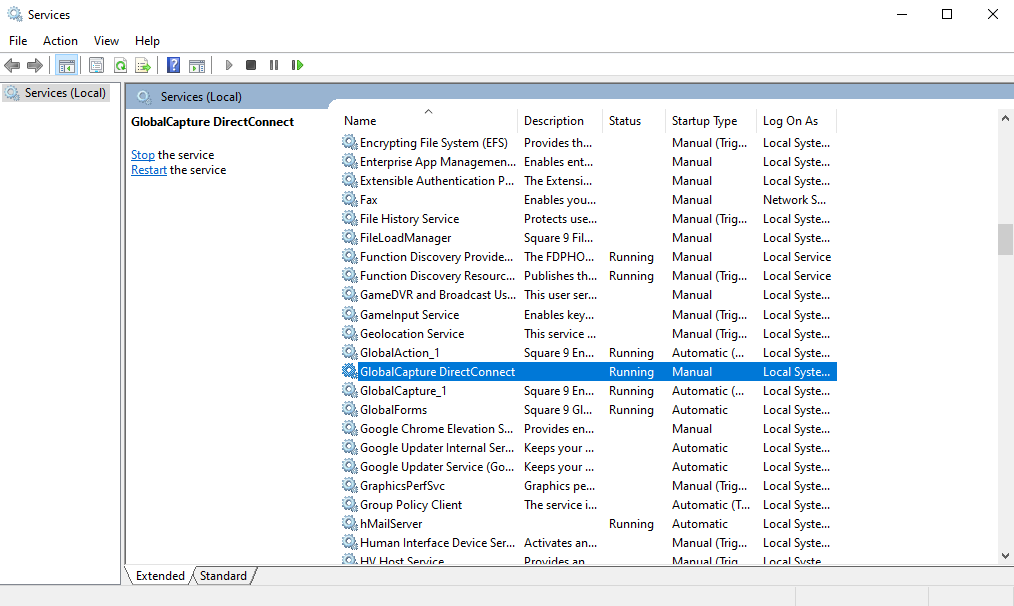
GlobalCapture DirectConnect Service
Updating Workflows
When new workflows are constructed, the appsettings.json needs to be updated. This will add the new workflow(s) to the WatchFolders array and create the watch folder in the designed location.
Generate the Workflow Config File. This will pull all the workflows from GlobalCapture that have the CTS DirectConnect node, and update the appsettings.json file.
Open a CMD prompt. Make sure to run the CMD prompt as an Administrator.
Change the directory to the location of your unzipped file.
Run the command:
FileUploader.exe --build-configWorkflow Config File CMD Prompt
If you run --build-config where a it has previously been run, the application will attempt to merge the existing with the new.
Create the watch folders by running FileUploader.exe. This will create all the watch folders.
FileUploader.exeCreate Watch Folders
If you have configured the service to run automatically, watch folders will be automatically created.
Update Command
You can create a simple batch file that executes the above commands with a click.
Create a file with the following code.
Update the file path on line 2 to reflect the location of your GlobalCapture_DirectConnect folder.
@echo off
cd /d "C:\S9Media\GlobalCapture_DirectConnect"

:: Run first command and wait
FileUploader.exe --build-config

:: Start second command, wait 2 seconds, then kill it
start "" FileUploader.exe
timeout /t 2 >nul
taskkill /im FileUploader.exe /f

exit
Save the file with a .bat extension.
Run this each time a new workflow is created to add the workflow to the appsettings.json and create the watch folder.
Failed File Recovery
If a document fails to be uploaded to the GlobalCapture workflow, it is moved to a failed files folder located within the watch folder for that particular workflow.

Failed Folder
Navigate to the failed folder.
Remove the timestamp and _FAILED suffix from the file name.
Move the file back to the watch folder.
Delete the corresponding .error.txt file.
appsettings.json Details
Available configurable parameters for the ingestion of documents using DirectConnect.
Parameter | Description | Default | Required |
|---|---|---|---|
| Base URL of the workflow API | - | Yes |
| Enable detailed error logging | false | No |
| Default workflow ID (used for interactive mode) | - | No |
| Default path for auto-generated watch folders |
| No |
| Default path for auto-generated backup folders^ |
| No |
| HTTP request timeout in minutes | 2 | No |
| Maximum simultaneous file uploads | 2 | No |
| Number of retry attempts for failed uploads | 3 | No |
| Base delay between retries (with exponential backoff) | 30 | No |
| Hours to wait before retrying failed files | 24 | No |
| Delay in milliseconds before processing each file | 0 | No |
^The Backup folder is only created when if BackupFiles is configured true for one or more watch folders in the WatchFolders array.
WatchFolders Array Configuration
These will automatically be populated and only appear in the WatchFolder array only after the setup is complete.
Each watch folder in the WatchFolders array supports:
Parameter | Description | Required |
|---|---|---|
| Full path to the folder to monitor | Yes |
| Workflow ID for files in this folder | Yes |
| Descriptive name for the workflow | No |
| Whether to backup processed files | No |
| Path to backup processed files | No* |
*Required if BackupFiles is true
Sample appsettings.json File
{
  "AppSettings": {
    "BasePath": "https://capture-educationtest.mysquare9.com/square9captureapi",
    "VerboseLogging": false,
    "DefaultWatchPath": "C:\\Watch",
    "DefaultBackupPath": "C:\\Backup",
    "HttpTimeoutMinutes": 2,
    "MaxRetryAttempts": 3,
    "RetryDelaySeconds": 30,
    "FailedRetryHours": 24,
    "MaxConcurrentUploads": 2,
    "UploadDelayMs": 0,
    "WatchFolders": [
      {
        "Path": "C:\\Watch\\SCAR_Delivery_Receipts",
        "TargetId": "62177a76d104a460d9aa9568",
        "Name": "SCAR Delivery Receipts",
        "BackupFiles": false,
        "BackupLocation": "C:\\Backup\\SCAR_Delivery_Receipts"
      },
      {
        "Path": "C:\\Watch\\Auto_Deal_Processing",
        "TargetId": "634eb6bcf70728df5bb015f4",
        "Name": "Auto Deal Processing",
        "BackupFiles": false,
        "BackupLocation": "C:\\Backup\\Auto_Deal_Processing"
      },
      {
        "Path": "C:\\Watch\\Process_AR_Delivery_Receipts_with_Rapid_Adapt",
        "TargetId": "650346b13c24c36c4ddd702a",
        "Name": "Process AR Delivery Receipts with Rapid Adapt",
        "BackupFiles": false,
        "BackupLocation": "C:\\Backup\\Process_AR_Delivery_Receipts_with_Rapid_Adapt"
      },
    ]
  }
}
Troubleshooting
Log File
Log files are automatically generated to record system activity, including processed files, errors, and status updates. CTS DirectConnect processes are monitored and logged in a log file located within the GlobalCapture_DirectConnect folder. A folder called logs will be created once the process begins. These logs provide valuable insight for troubleshooting and performance monitoring.
"FileUploader Service starting..."- Service startup"Started monitoring folder: {FolderPath}"- Folder monitoring active"Successfully processed file: {FilePath}"- File processing success"Moved failed file to: {FailedPath}"- File processing failure
Log files are kept for 30 days.
Diagnostic Commands
Service | Command |
|---|---|
Check Service Status |
CODE
|
View Service Configuration |
CODE
|
View Logs |
CODE
|
Common Issues
Files Not Being Processed
Symptom: Files added to watch folders are not being ingested.
Check:
Check if the service is running:
sc query "GlobalCapture Direct Connect".Folder permissions: Service account has read/write access.
File locks: Files are not in use by another application.
Configuration: Watch folder path is correct.
Logs: Check for error messages.
Authentication Failures
Symptom: HTTP 401/403 errors in logs.
Check:
Verify credentials are correct.
Re-encrypt credentials:
FileUploader.exe --encrypt-creds username password.Test API access manually.
Connection Issues
Symptom: HTTP timeout or connection errors.
Check:
Network connectivity to API server.
Firewall settings.
Proxy configuration (if applicable).
API server status.
Increase
HttpTimeoutMinutesin configuration.
File Process Failures
Symptom: Files moved to failed folder.
Check:
Error details in
.error.txtfiles.File format compatibility.
Workflow configuration on server.
API server logs.
Service Won’t Start
Symptom: Windows service fails to start.
Check:
.NET 8 Runtime is installed
Configuration file exists and is valid JSON
Service account permissions
Windows Event Log for service errors