How To Bulk Insert List Values Using Import and Export Wizard
If you are creating a GlobalSearch list with a small number of entries, it is easy to create the list using just the GlobalSearch client. If you are creating a list based on a SQL database, using an Assembly Bound list is often a viable solution as well. However, if you want to create a more permanent list with a large number of values that is not dynamically updated, or add a large number of values to an existing list, then doing a bulk import may be easier.
As its name implies, the SQL Import and Export Wizard is a utility used to add extract data to/from a database in MS SQL Server. In this case, we are using it to bulk insert multiple values into a GlobalSearch list from a CSV file.
Before You Begin
Back up your SQL database
The steps in this article can cause irreversible damage to your database if followed improperly. Make sure you back up your SQL database prior to beginning. If you have any questions about your current SQL backup plan, please consult your database administrator or IT. For more information about backing up your GlobalSearch databases, please consult the following documentation:
Ensure the Import and Export Wizard is installed
The Import and Export Wizard is included with the SQL Server Data Tools (SSDT). Chances are, if you have SQL Server Management Studio, you have the Import and Export Wizard installed as well. If you need to download it, consult the following link:
Make sure you already have the list in GlobalSearch
This article details how to add new list values to an existing GlobalSearch list. If you are looking to import values into a new list, you must create that list first. On creation, just add one item (the rest can be added from the CSV).
For more information about creating GlobalSearch lists, please consult the following documentation:
Step 1: Get the list IDs for the lists you want to update.
Before you can build out your CSV file, you should know the list IDs for each list you want to update. This can be checked in the SQL backend using the following steps:
Connect to your SQL instance using SQL Server Management Studio.
The default SQL instance for GlobalSearch will be an instance called “GETSMART” installed on the same server as GlobalSearch.
Locate your production database.
If you are using the default “GetSmart” database, then you will be using the “SmartSearch” SQL database.
If you are not using “GetSmart”, then the name of the SQL database will match what displays in GlobalSearch.
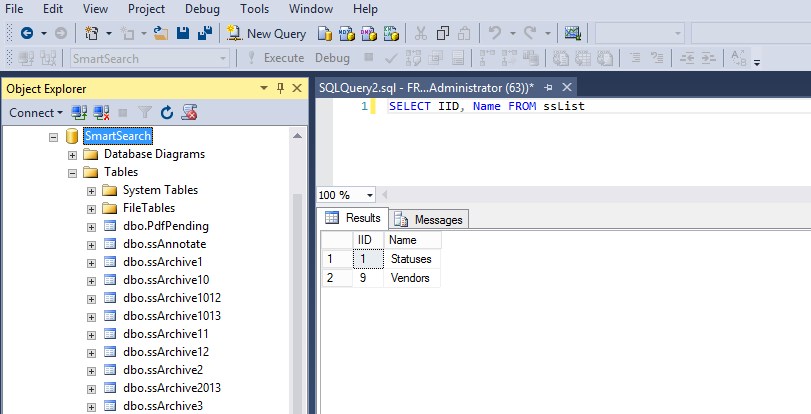
Right-click your database and select “New Query”
Type out the following query and click “Execute”
SELECT IID, Name FROM ssList
This will output a table with each list in your GlobalSearch database and its associated ID. In the screenshot below, we can see that there are two lists in the GetSmart database: “Statuses” and “Vendors”. The Statuses list has a List ID of 1, and the Vendors list has a List ID of 9.
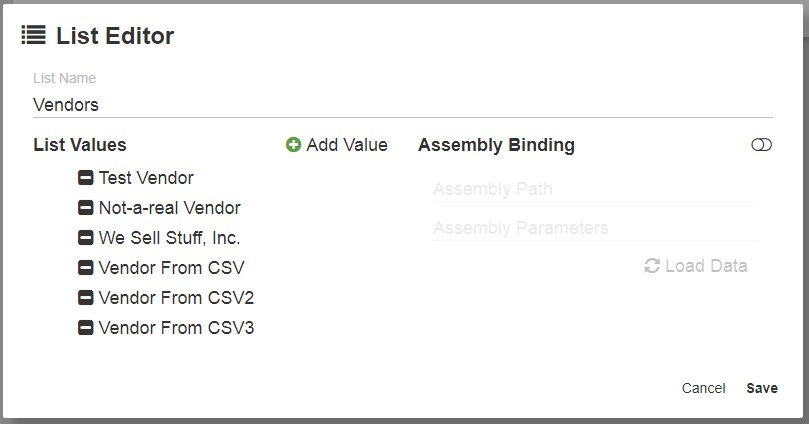
In our example, we will be adding new vendors to the Vendors list. Here is how the example list currently appears in GlobalSearch.

Step 2: Prepare your CSV file
Create a new CSV file using your text editor of choice (Notepad, Notepad++, Excel, etc.). Your CSV should have 2 columns, one for the ListID and one for the Value. The screenshot below shows an example which adds 3 new vendors to List ID 9 (as shown in step 1. This example uses column headers, but headers are not required. You can insert into multiple lists at a time, just make sure each list value is marked with the appropriate ID.

Perform the Insert
Do not proceed if you do not have a secure, reliable backup of your database. The following steps involve manipulating your SQL database directly and can cause irreversible damage if performed improperly.
Open a command prompt. Type “dtswizard” and press Enter. This opens the Import and Export Wizard
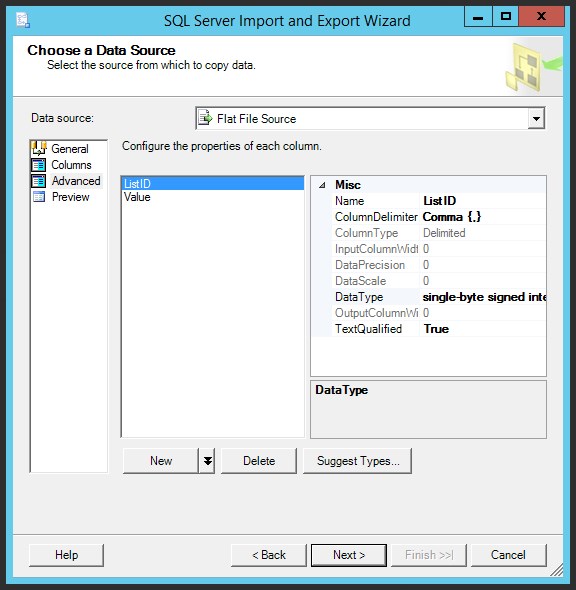
On the next screen, select “Flat File Source” as your data source. Browse for your CSV file.
If it does not appear on the list of available files, make sure you have “All files (*.*)” selected for your file types.
If you are not using column headers in your CSV, make sure that “Column names in the first data row” is unchecked.
Click “Advanced” on the left. For your ListID column, make sure the DataType is set to “single-byte signed integer”. If your CSV file is set up properly, selecting “Suggest Types…” and clicking OK should do this for you.
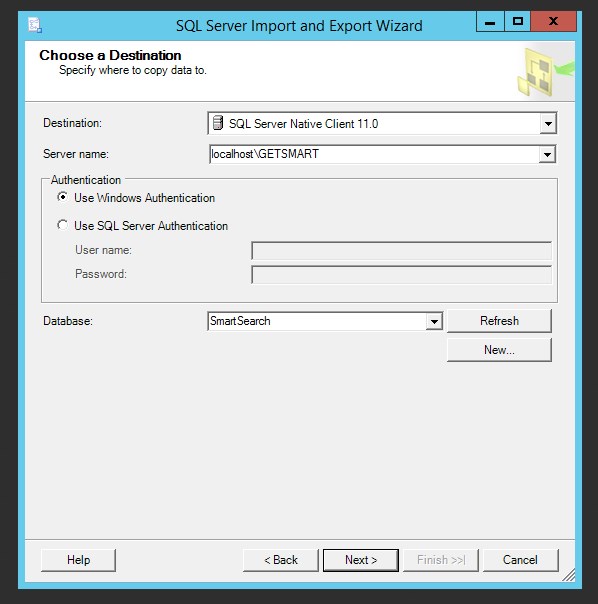
Click Next and select your SQL instance, authentication method, and database.
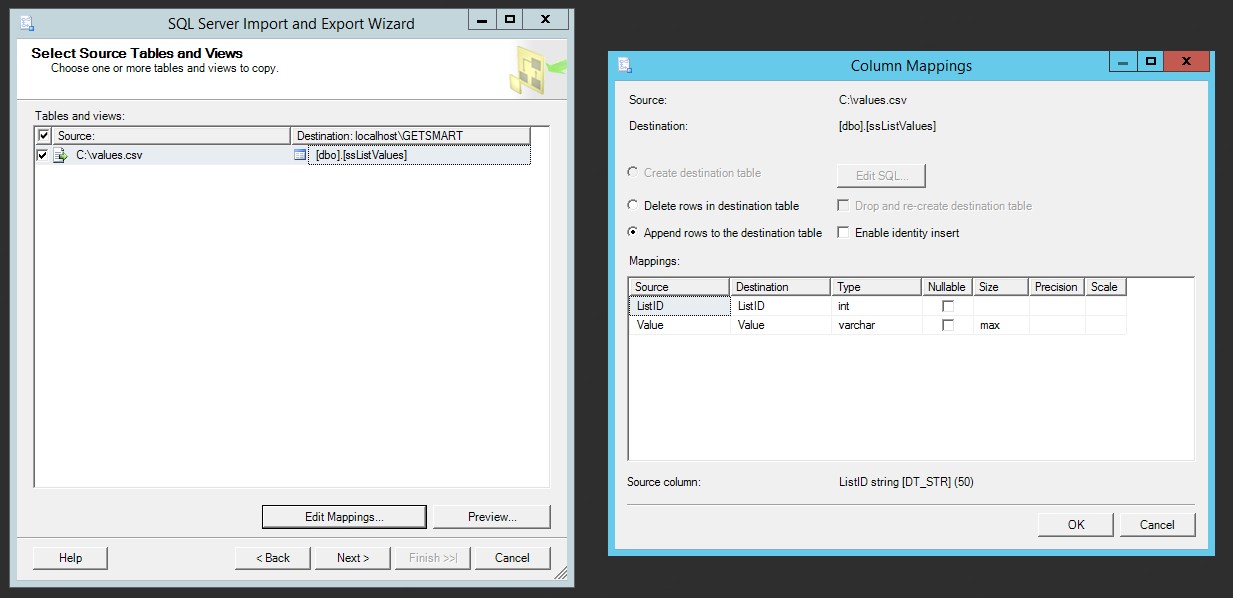
Click Next. On the following screen, change the “Destination” to the table “[dbo].[ssListValues]”.
Click “Edit Mappings…”. Make sure that “Append rows to the destination table” is selected.
Do not select “Delete rows in destination table”. This will remove all items from all lists in GlobalSearch. The only way to fix this is restoring from a SQL backup.
Make sure that your CSV columns are mapped to the correct SQL columns.
If the columns are ordered (ListID,Value) in your CSV, then they will be mapped correctly by default.
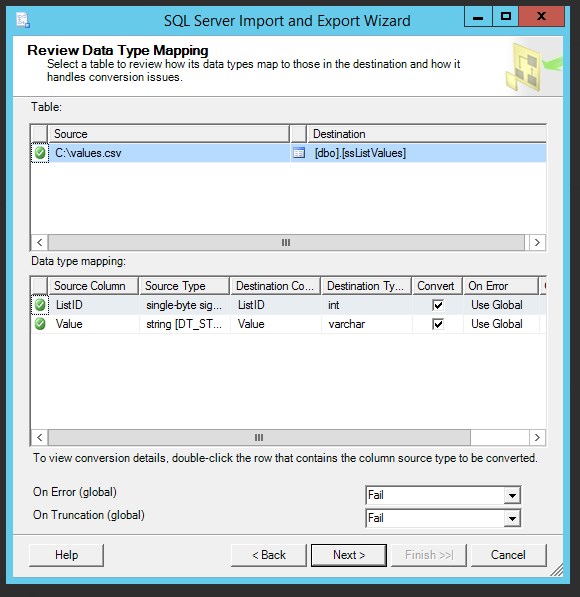
Click OK, then Next. Review that everything is set up properly, then click Next again.
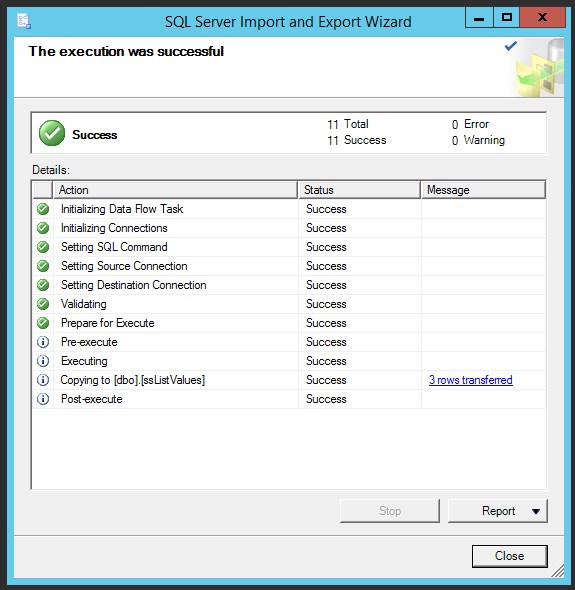
Click “Next”, then “Next”, then “Finish”.
If everything went successfully, the following window should look something like this.
Confirm in GlobalSearch that the new values have been added to your list. If the new values have not been added to the list, or any of your existing lists have been affected, restore your SQL database from a backup and start again.