Annotations
You must have Annotation permissions to add and modify annotations on a document.
Annotations allow you to easily markup documents, or redact sensitive data while protecting the integrity of the original record. Documents can be annotated using the tools found in the Annotate menu of the Document Viewer.
Annotations layer in the order they are created. For example, if you create a Note, then draw a highlight, if the two overlap, the highlight will appear in front of the Note. You may customize your annotations including custom stamp creation, and color of a Note along with its font type, color and border, and set styles, if you wish. You can add annotations to any file format, but if you send out an email or export the document with annotations, the emailed/exported file will be converted to the PDF file format.
Annotations May be Burned In
If you are working in an Archive where you do not have Modify Annotations permission, moving a document with annotations will cause any annotations to become a permanent part of the document. This means the annotations are embedded, and the document is now a new PDF. This is a permanent change, so care should be taken when secure archives with this type of process flow.
Accessing Annotations
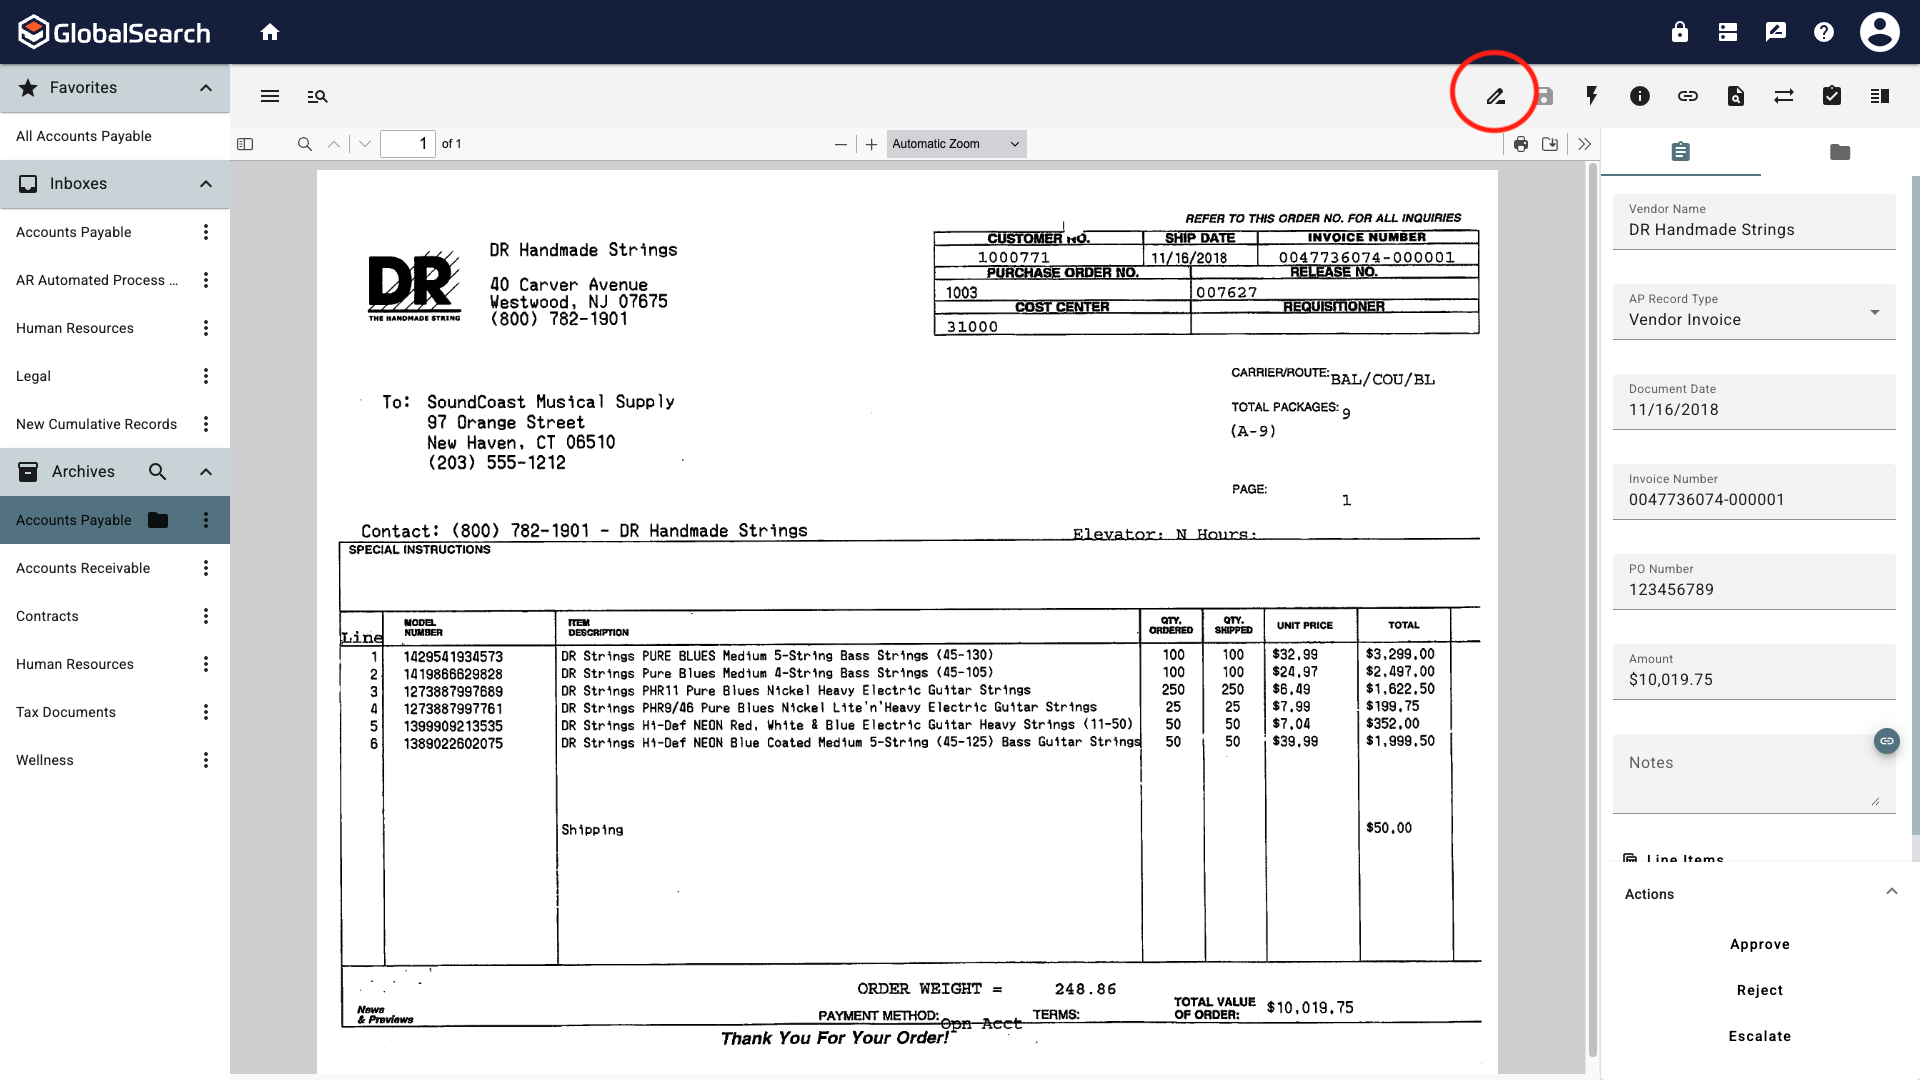
Annotations are access from the Document Viewer Toolbar by clicking the Annotations Menu ( ) icon.
Annotations Menu Icon

Available Annotations
To add an annotation, select the annotation from the list then click and drag where you want the annotation to appear and is dimensions. Location and size can be altered at any time as long as the annotation has not been burned into the document.
Annotation Menu Options
Once an Annotation is applied, Annotation options can be accessed by right clicking on the Annotation. Available options will vary based on the type of Annotation.
Delete - Deletes the annotation from the document.
Properties - Opens the Properties dialog for the annotation. Here you can adjust parameters such as color, opacity, note text, etc. Properties available will vary by annotation type.
Properties only apply to the selected annotation. Each annotation that is placed, regardless of type, has it’s own properties. Properties are carried when annotations are duplicated.
Duplicate - Creates a copy of the annotation and places it on the document.
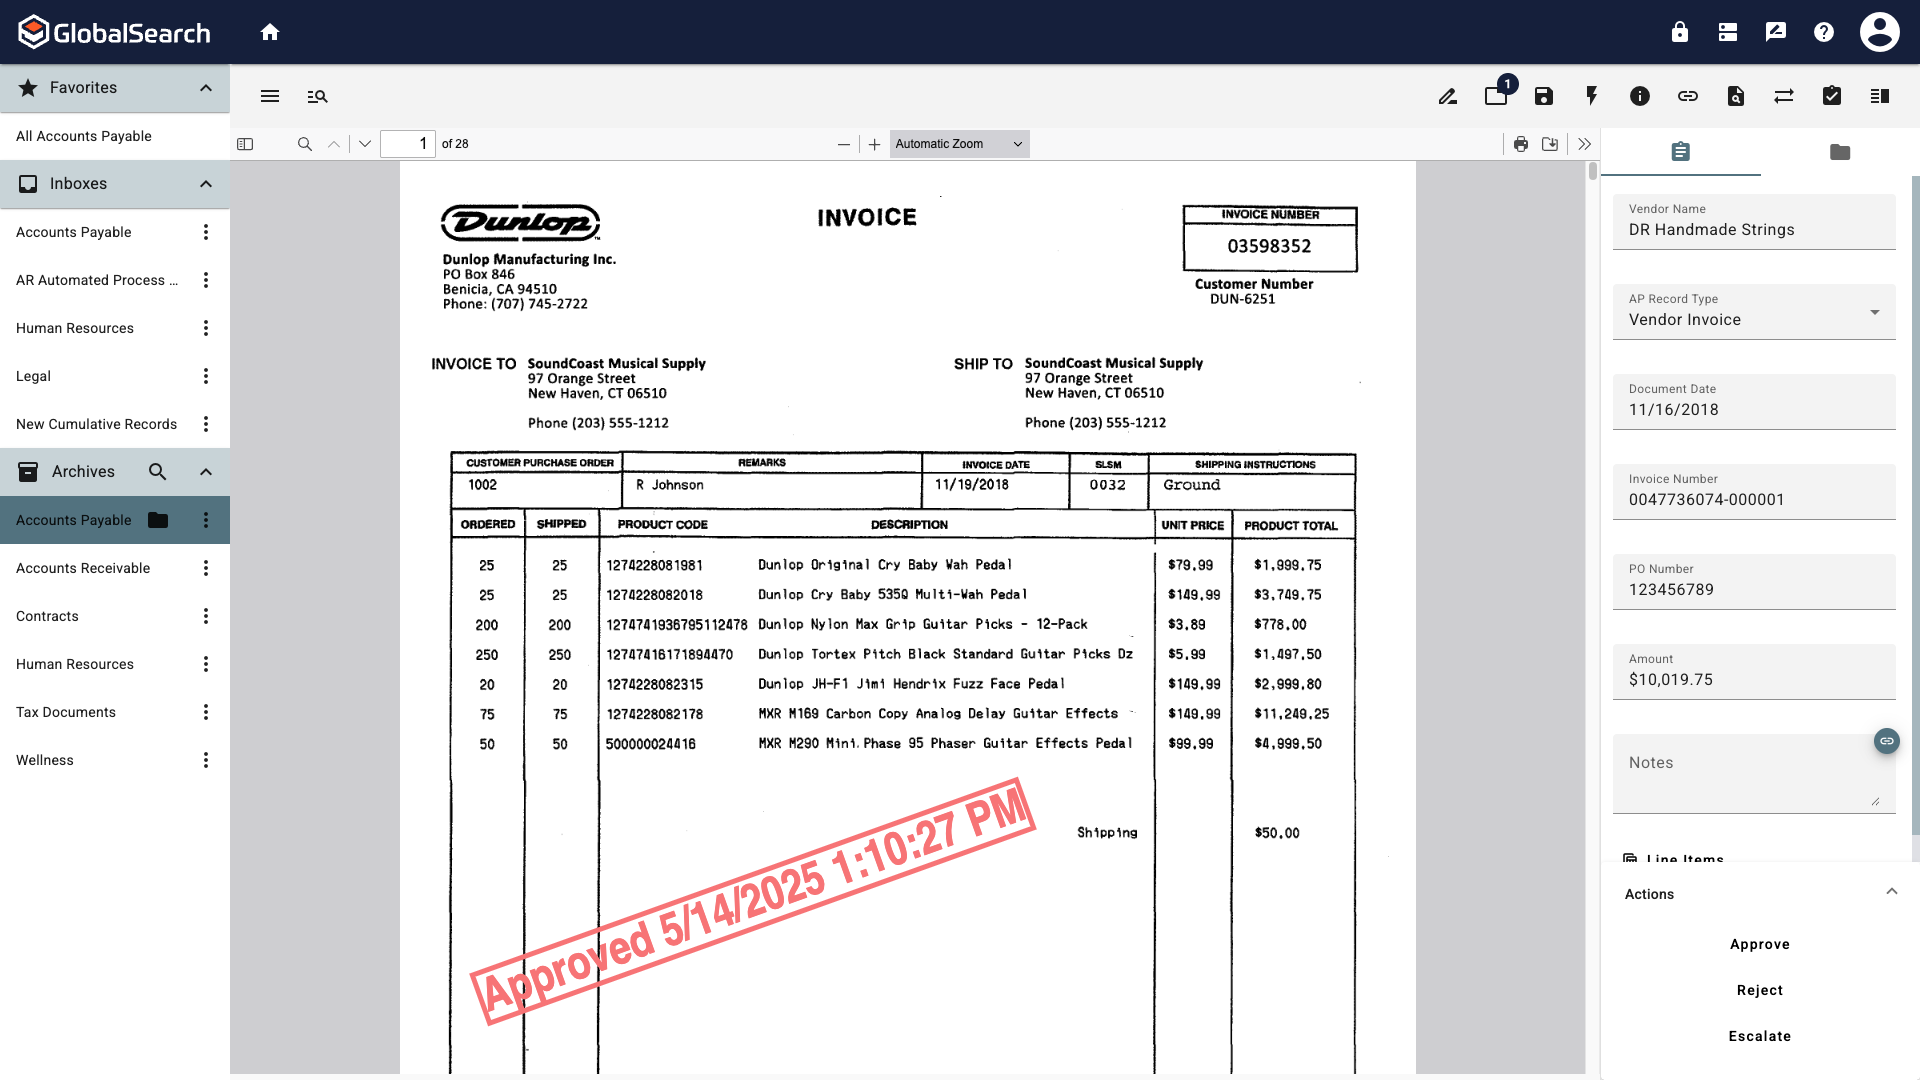
Burn - Makes the annotation permanent on the document.
Exercise extreme care when Burning annotations to a document. Once annotations are burned, the annotation cannot be changed or removed regardless of permissions. Any document that is not a PDF will be converted to a PDF when Burning annotations. This cannot be undone.
Annotations
Annotations can be moved around the page of a document but cannot be moved between pages within the same document.
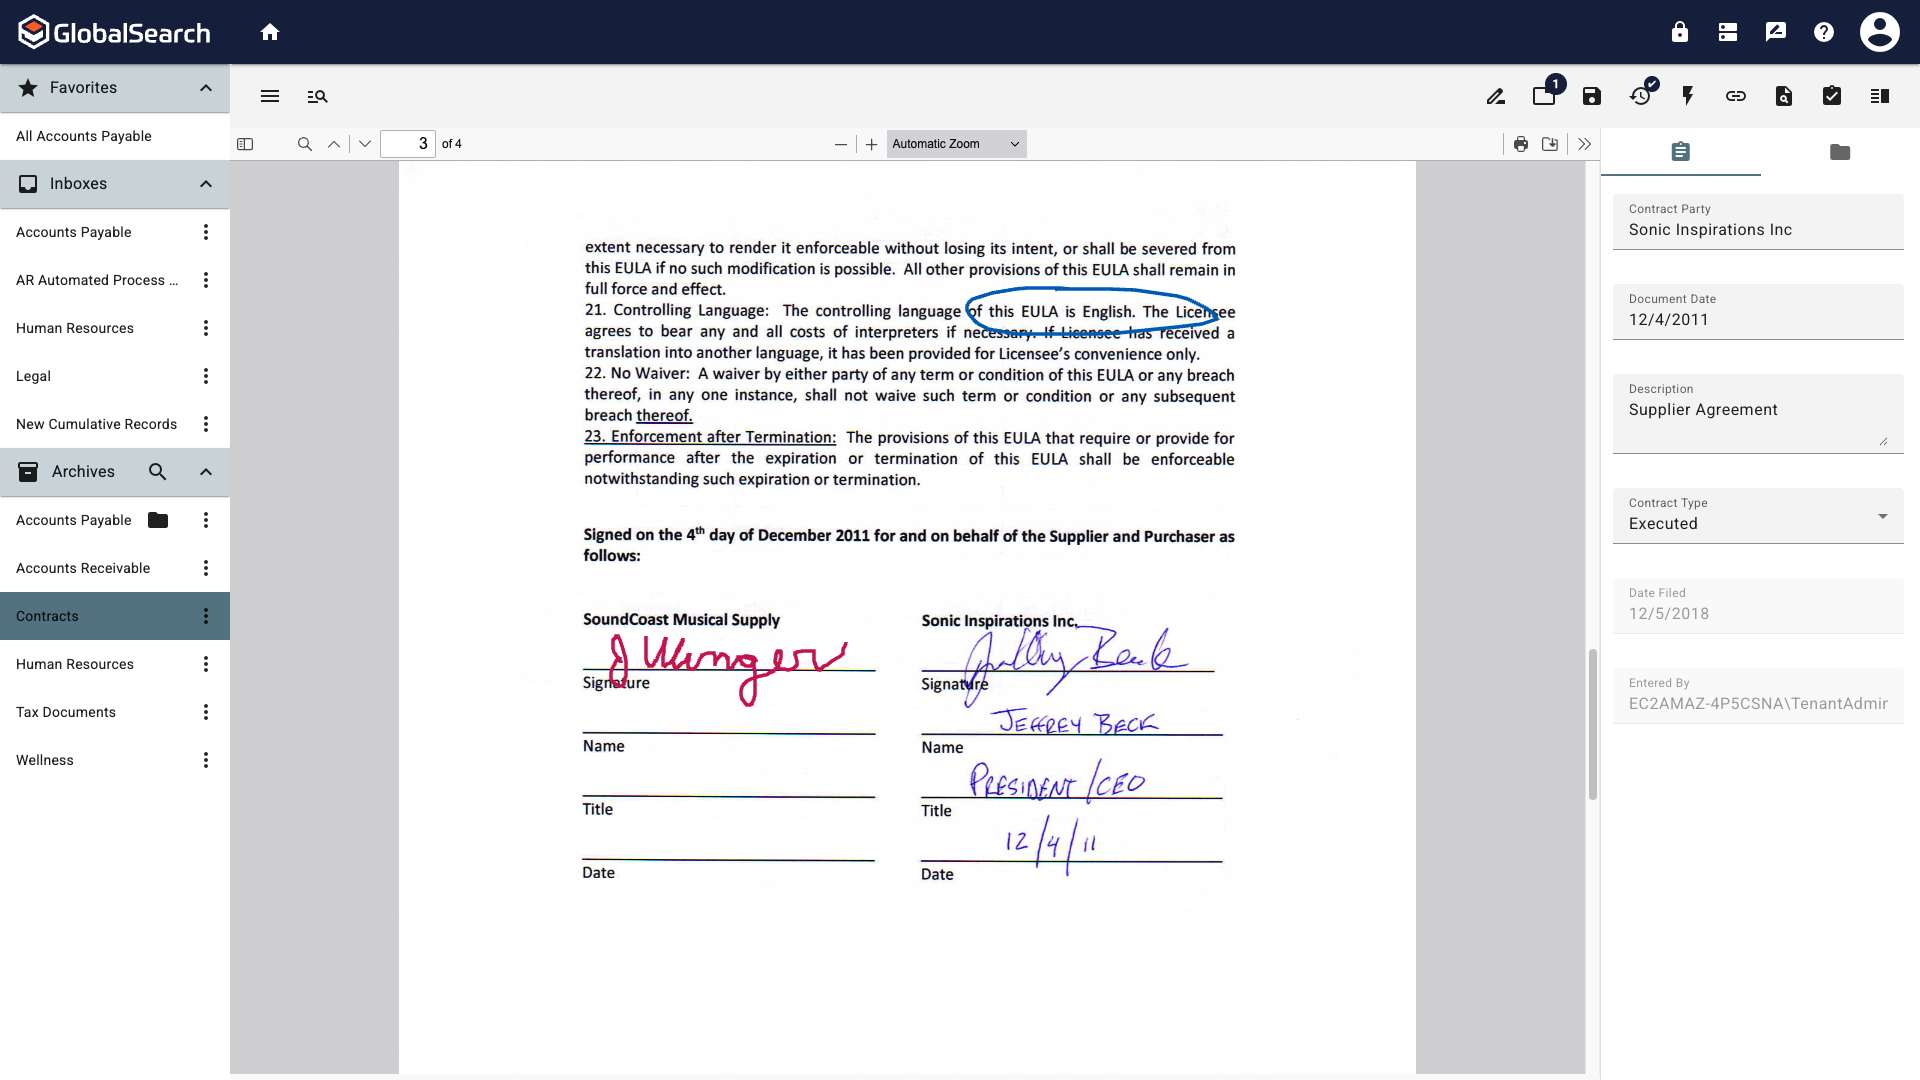
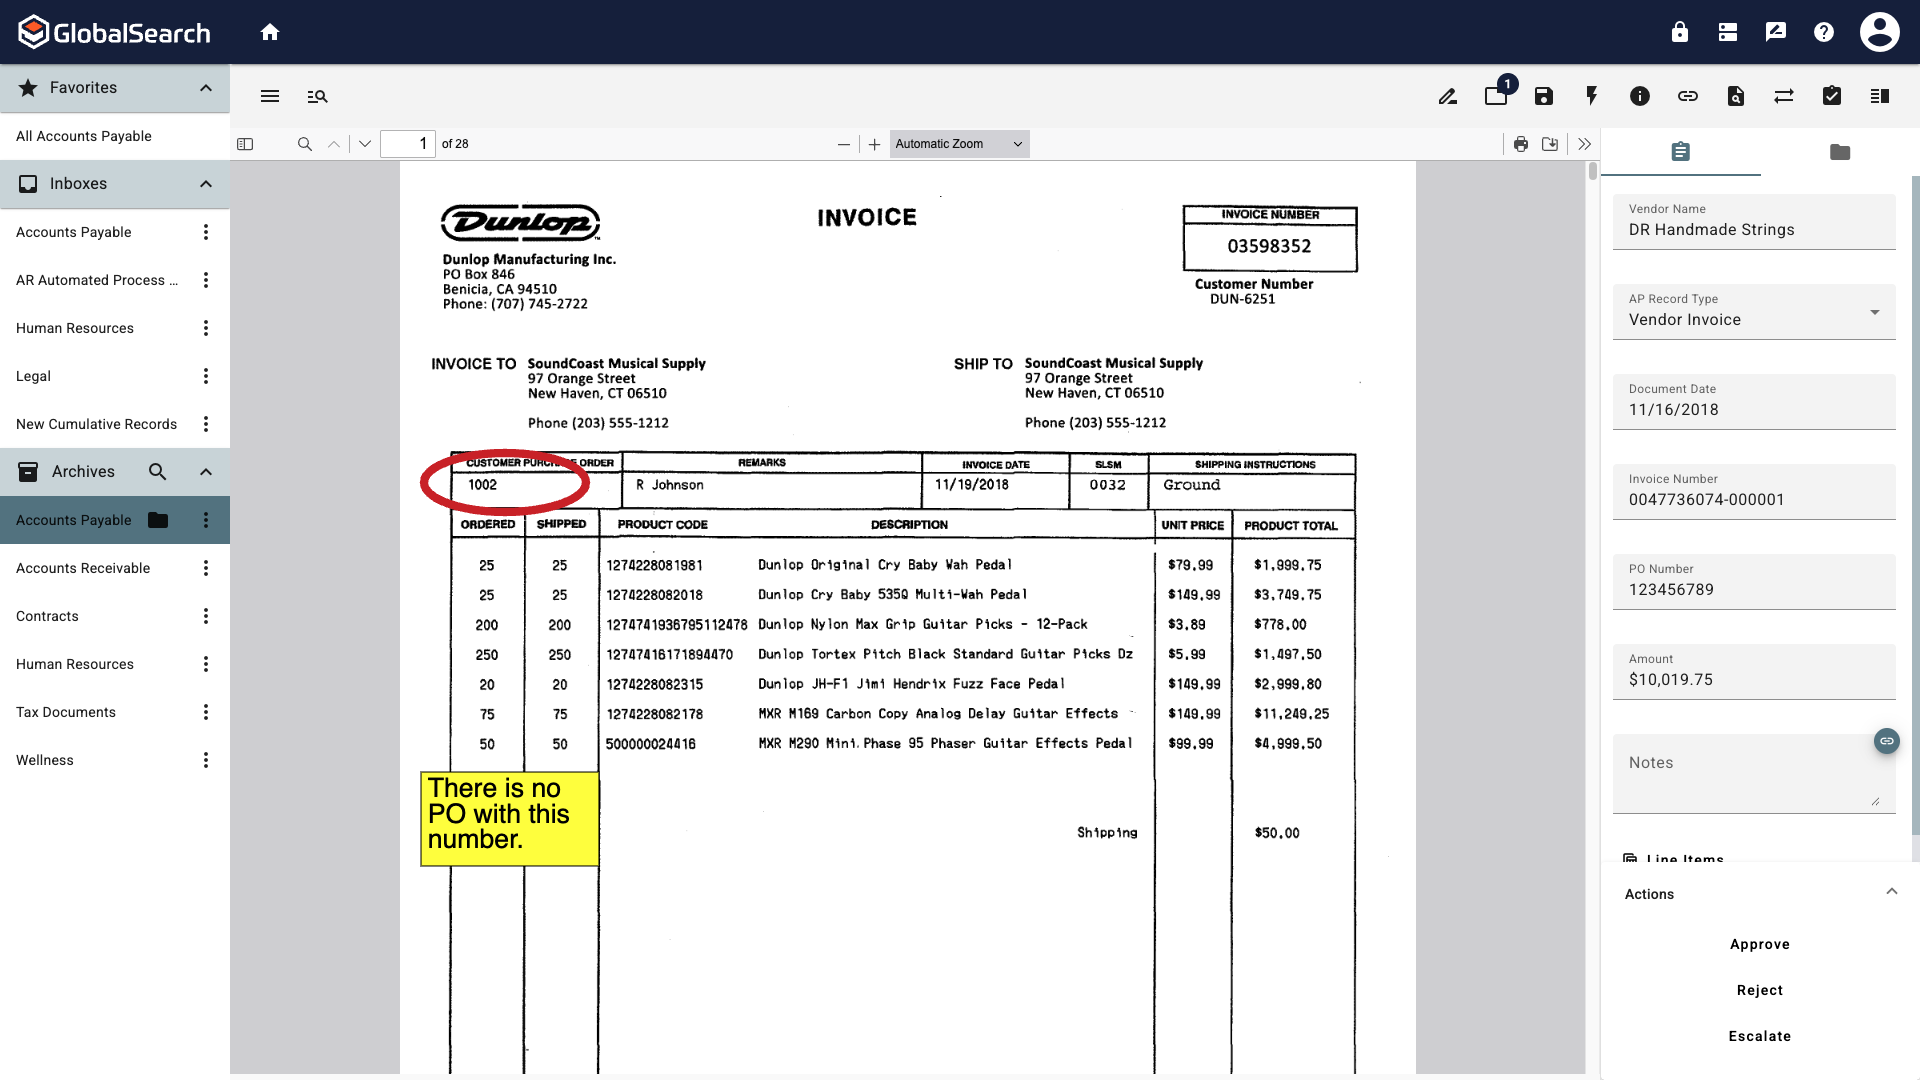
Highlight
Highlight
Highlight a portion of your document. Select the Highlight annotation and draw a box over the area to highlight. Once completed, the properties of the highlight can be adjusted.
Use the Resizing Handles (white circles) at the corners of the annotation to change it’s size.
Use the Rotation Handle (green dot) to rotate the annotation.
Burn (
 ) - Click burn to make the annotation a permanent part of the document. When Burn is active, the icon will turn Red (
.png?inst-v=c360de5b-20ec-445f-9550-67f2fa93b20e) ). The annotation will remain editable until the document is saved. Once saved, the annotation becomes permanent.
). The annotation will remain editable until the document is saved. Once saved, the annotation becomes permanent.
Fill
Color - Change the color of your annotation. Select from the list of available or enter a HEX code to use a specific color.
Opacity - Change how opaque the annotation is between 0 and 1. 0 is transparent, it will appear as if the annotation is not there, 1 is completely opaque.
Click Confirm to apply your changes or Cancel to revert back to the perviously saved properties.
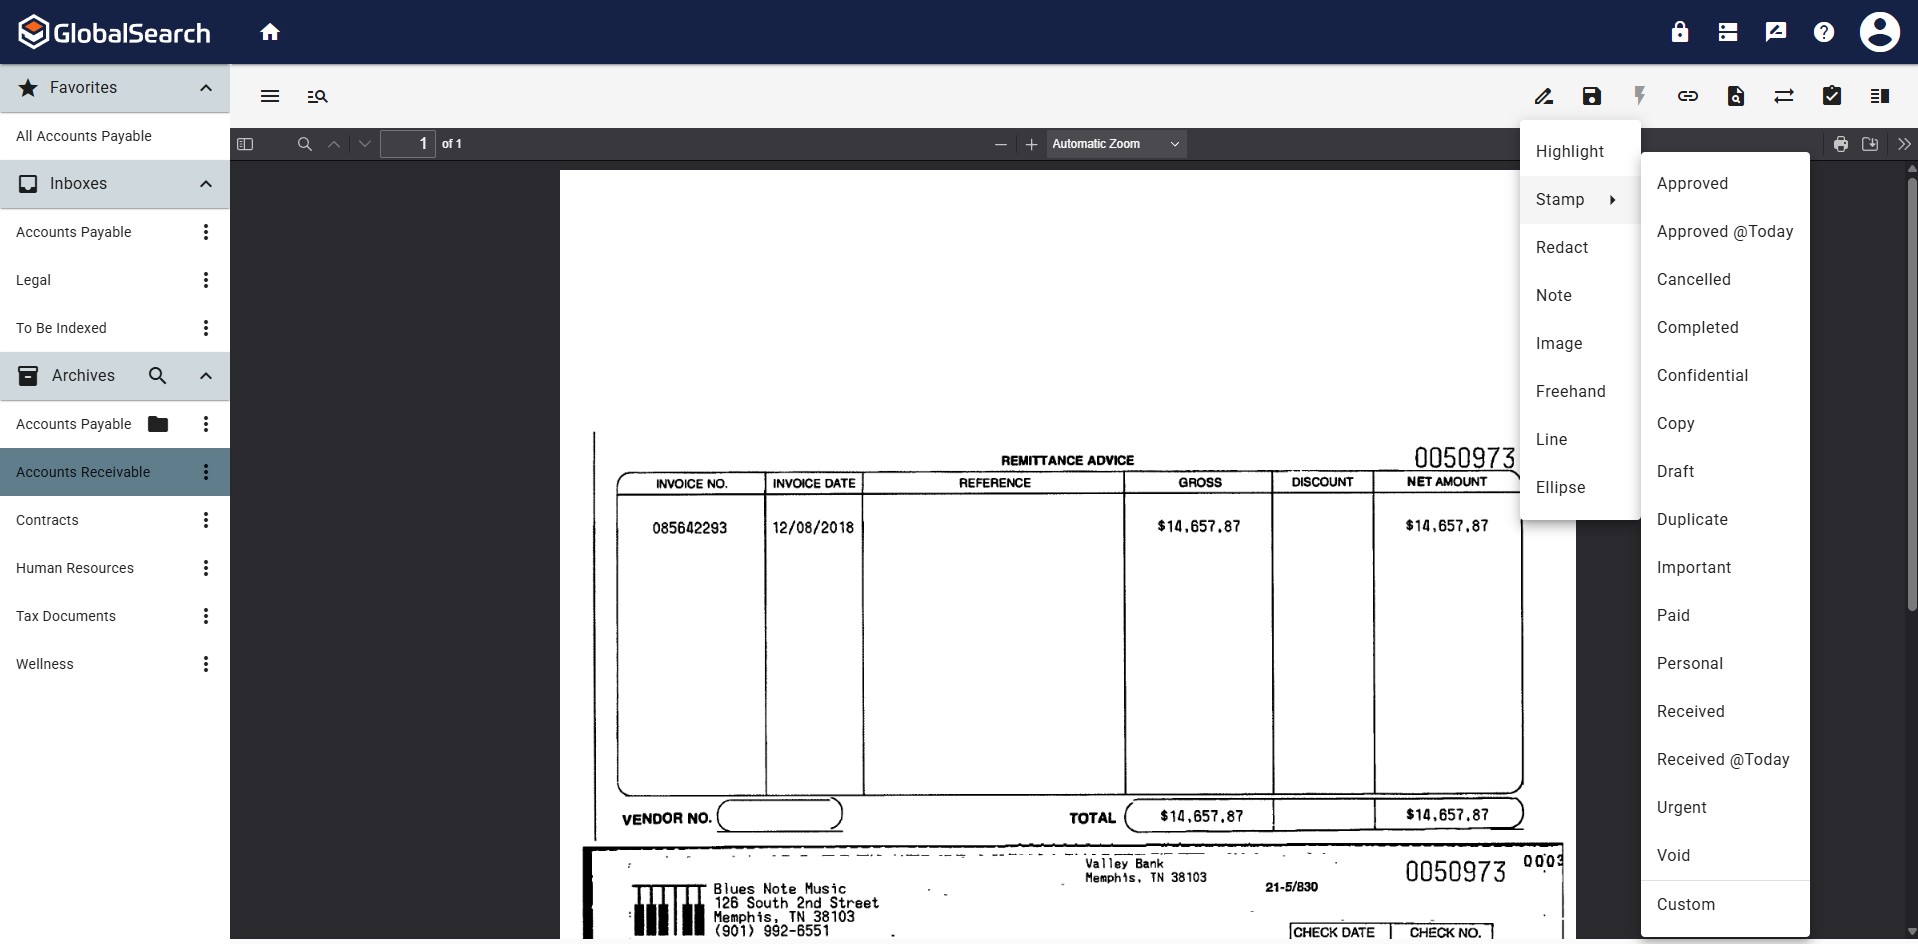
Stamp
Stamp
Add a Stamp to easily apply a repetitive message to a document. Select the Stamp annotation and then select a stamp from the list of stamps created by the GlobalSearch system administrator or create your own Stamp by selecting Custom. Draw a box to set the size and placement of the stamp on the document. Once completed, the properties of the highlight can be adjusted.
Stamps provided by the system administrator can be edited once applied but those changes will only apply to this annotation. Applying the stamp a second time will apply the annotation with the administrator defined defaults.
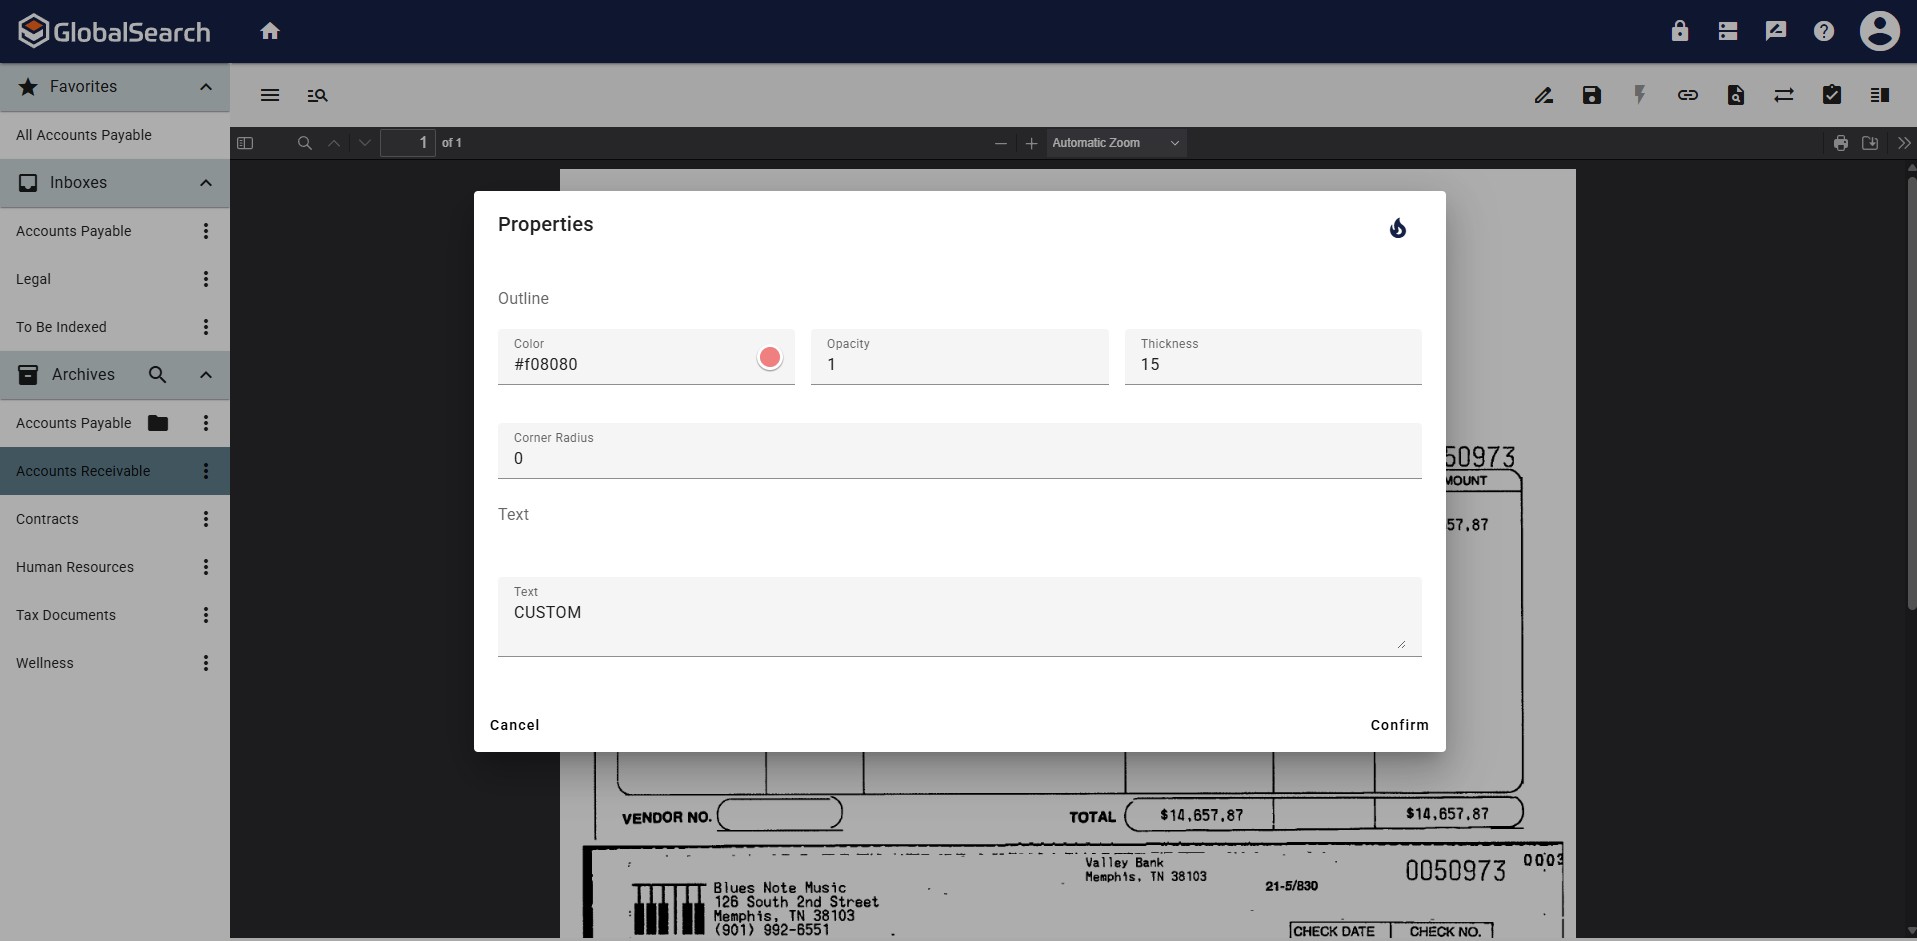
Outline
Color - Change the color of border around the annotation. Select from the list of available or enter a HEX code to use a specific color.
Opacity - Change how opaque the border is between 0 and 1. 0 is transparent, it will appear as if the border is not there, 1 is completely opaque.
Thickness - Change the width of the border. This can be any whole number greater than 1.
Corner Radius - Set the curvature of the corners of the stamp. 0 is a squared corner, numbers greater than 0 increase the curvature of the corner.
Text
Text - Enter the Text to appear in the stamp here.
Stamps accept @Today to included the current Date and Time and @User to include the username of the logged in user when the stamp is applied.
One Time Use Custom Stamp
Custom one-time-use stamps can be created by selecting the Custom option in the Stamp Dropdown menu.
Create your one-time-use stamp by clicking and dragging your cursor across the document viewer.
This brings up the Properties menu for customization.
You can make the Custom stamp permanent by toggling the Burn icon.
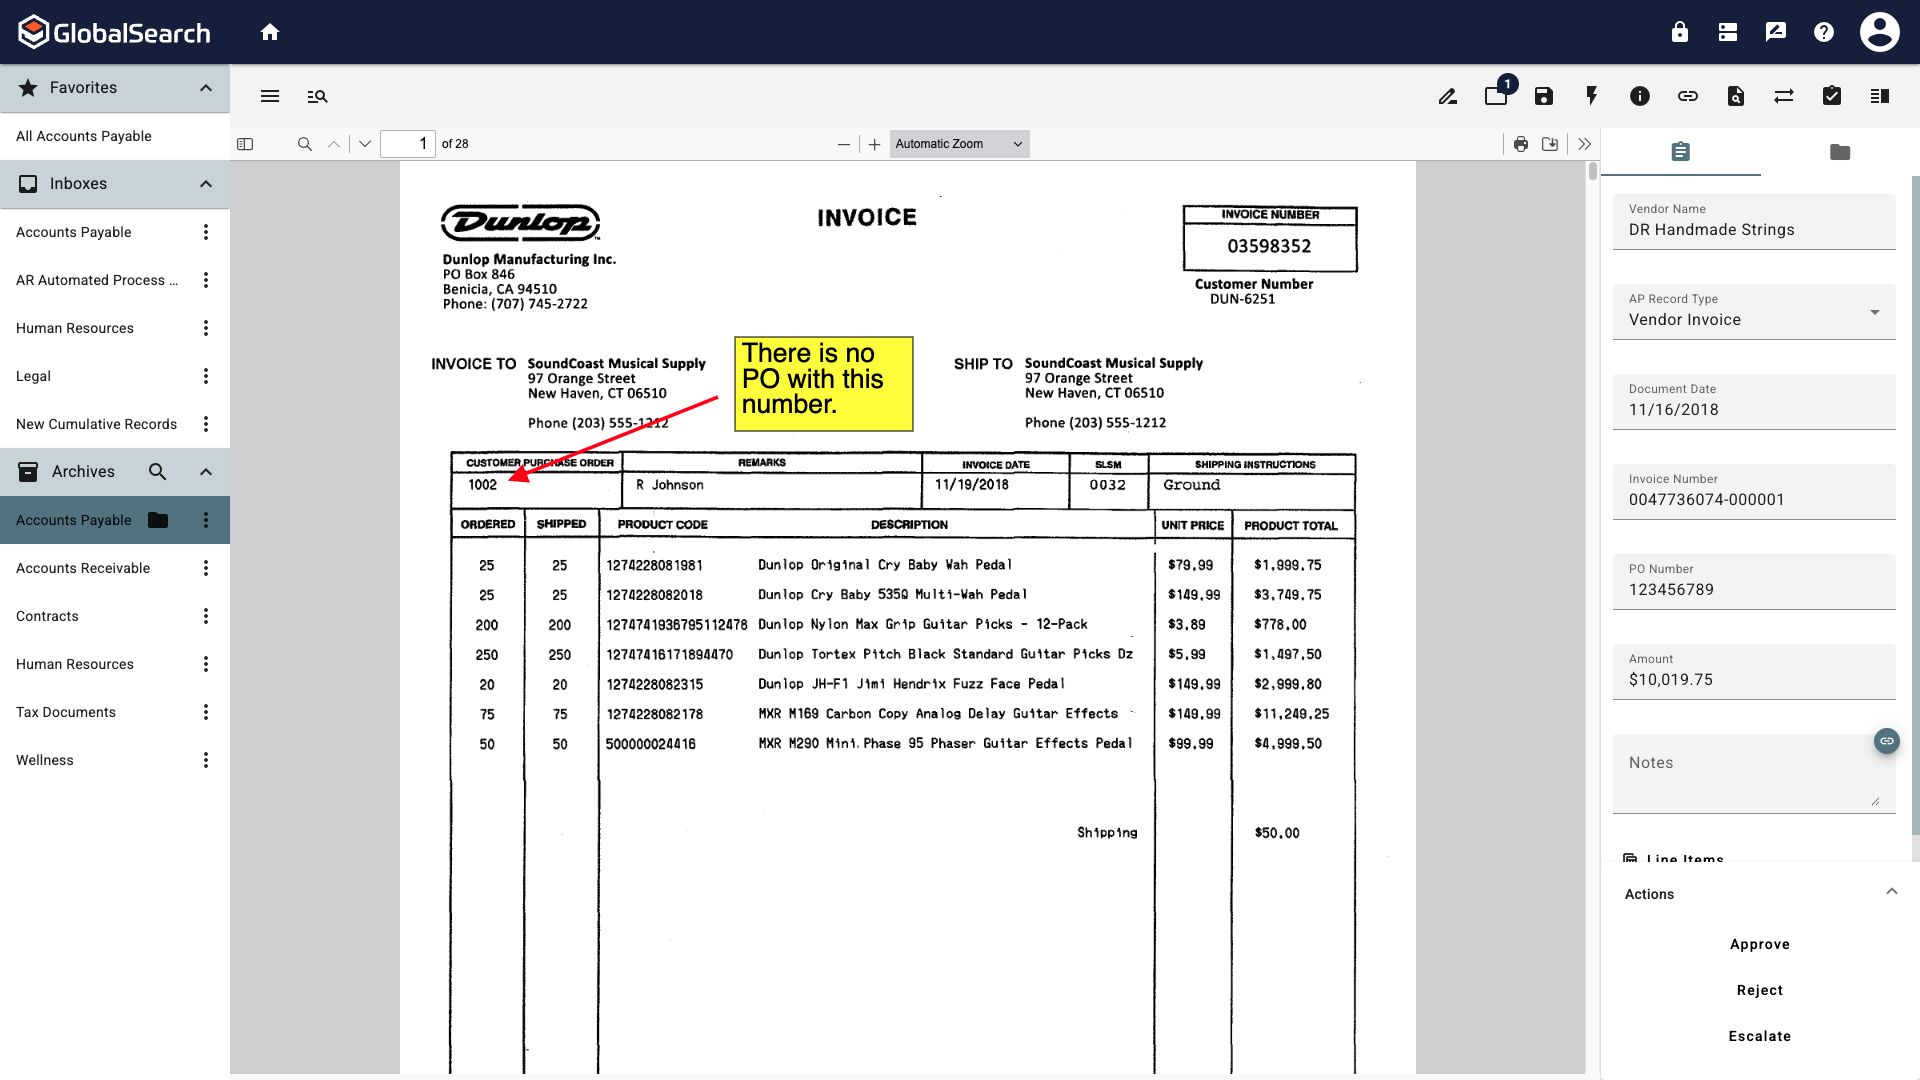
Redact
Redact
Black out an area of the page from general view. Select the Redact annotation and draw a box over the area to Redact. Once completed, the properties of the redaction can be adjusted.
Outline
Color - Change the color of border around the annotation. Select from the list of available or enter a HEX code to use a specific color.
Opacity - Change how opaque the border is between 0 and 1. 0 is transparent, it will appear as if the border is not there, 1 is completely opaque.
Thickness - Change the width of the border. This can be any whole number greater than 1.
Note
Note
Add a Post-It style Note your document to leave a message to those who access the document. Select the Note annotation and draw a box where the note should be placed. Once completed, the properties of the note can be adjusted.
Text
Emphasis - Style the text in your note with Bold, Italics, Strikethrough, and Underline.
Alignment - Set the alignment of your note text with Left Justified, Centered, or Right Justified.
Font - Select the font for your note from a list of web safe fonts.
Font Size - Set the font size. This can be any whole number greater than 1.
Color - Change the color of the text in your annotation. Select from the list of available or enter a HEX code to use a specific color.
Text - Enter the text to appear in the note here.
Image
Image
Image annotations can be added to embed a local image into a document. This is often employed by users looking to embed an image of their signature that is stored locally on the computer, or in other cases where an image or photo needs to be added to the document and adding a new document page isn't practical or necessary (insurance claims for example).
Click the Image annotation and draw a box where the image will be placed.
A File Explorer Window will open allowing selection of a document. Select an image and click Open,.
Only a single image can be selected for each image annotation and only JPEG and PNG file formats are accepted.
Color Images
Attaching images that are color have the potential to drastically impact a file's size. Use caution when embedding image annotations to prevent performance issues related to transmitting large files.
Freehand
Freehand
Draw Freehand on your document. This can be used to add freehand drawings, draw attention to something in the document, add a signature, etc.
After selecting the Freehand annotation, click and hold while moving the mouse on the document, drawing a line that tracks the mouse movement. Once the click is released, the annotation is finished and can be moved and properties adjusted.
Line
Line
After selecting the Line annotation, click and hold while moving the mouse on the document, drawing a line connecting the click and release points. Once the click is released, the annotation is finished and can be moved and properties adjusted.
Start Cap
Width - If a Style is selected, determines the width of the style: Wide, Narrow, or Medium.
Height - If a Style is selected, determines the height of the style: Long, Short, or Medium.
Style - Sets a shape at the beginning of the line: None, Filled Arrow, Filled Ellipse, Diamond, Arrow
End Cap
Width - If a Style is selected, determines the width of the style: Wide, Narrow, or Medium.
Height - If a Style is selected, determines the height of the style: Long, Short, or Medium.
Style - Sets a shape at the beginning of the line: None, Filled Arrow, Filled Ellipse, Diamond, Arrow
Ellipse
Ellipse
After selecting the Ellipse annotation, click and hold while moving the mouse on the document, an Ellipse will be created. Once the click is released, the annotation is finished and can be moved and properties adjusted.