Delete Pages Node
This node is available for GlobalCapture on-premise solutions only.
Node Properties
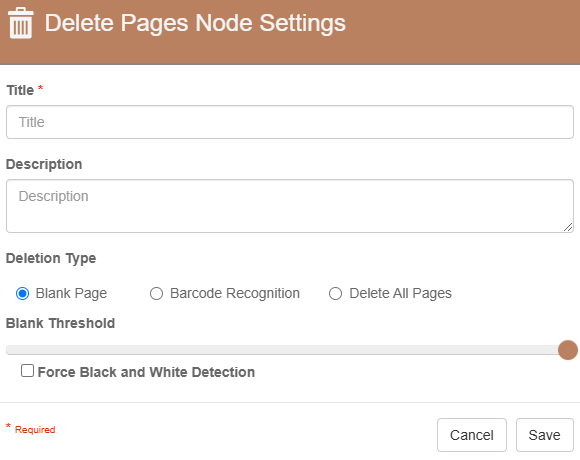
Delete Pages default properties
Title
Add a title for this node. Titles are useful when reading the history in the history of a workflow for easier understanding of the overall process.
Description
Provide a synopsis of what this node is doing, or make note of any important details. This is useful for providing additional information such as workflow details and use case information. A good description is helpful when returning to modify the workflow in the future.
Deletion Type
Blank Page
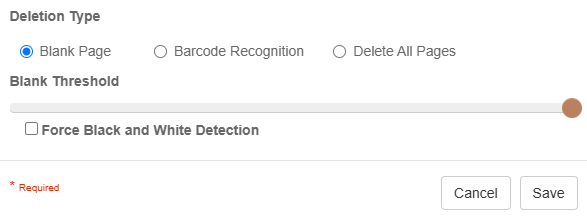
Delete Pages - Blank Page Settings
The Blank Page radio button is used to delete blank pages.
Use the Blank Threshold slider bar to determine the sensitivity if a page is blank or not. By default, the Blank Page threshold is set to 99%.
Enabling Force Black and White allows for temporary color drop-out while deleting pages. This is useful for removing specks, watermarks or other debris on the page that may cause a false reading.
Barcode Recognition
Unlike blank page deletion, barcode separation will not automatically delete separators. You will need to add a barcode deletion step if you do not wish to maintain barcode pages in your documents.
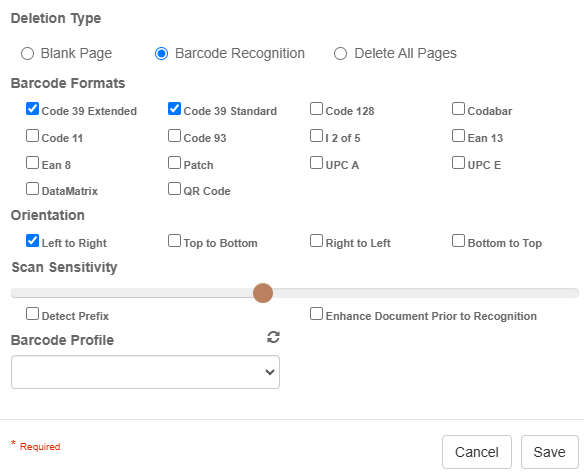
Delete Pages - Barcode Recognition Settings.
The Barcode Recognition radio button is used to delete documents using a barcode.
When enabled, different Barcode Formats are able to be selected, limiting the types of barcodes recognized.
Orientation is the direction the node reads the barcode.
The Scan Sensitivity sets the threshold for determining the presence of a barcode based on space between the bars. By default this is set to 5.
Detect Prefix is useful when multiple of the same barcode type are present. This ensures the identified data is in the barcode before deleting. When selected, a textbox will appear and a barcode’s prefix can be added.
Enhance Document Prior to Recognition temporarily enhances the image before reading the barcode.
Barcode Profile applies a specific barcode extraction profile. If none is selected, the default will be used.
Delete All Pages

Delete Pages Node, Delete all pages settings.
Use Delete All Pages to purge documents from your capture processes. It's important to ensure a delete step is part of any production workflow or documents will continue to collect and consume disk space indefinitely. Release Nodes that release documents to GlobalSearch include the ability to purge documents, so a Delete Node may not be required if you are releasing to GlobalSearch.
Use Cases
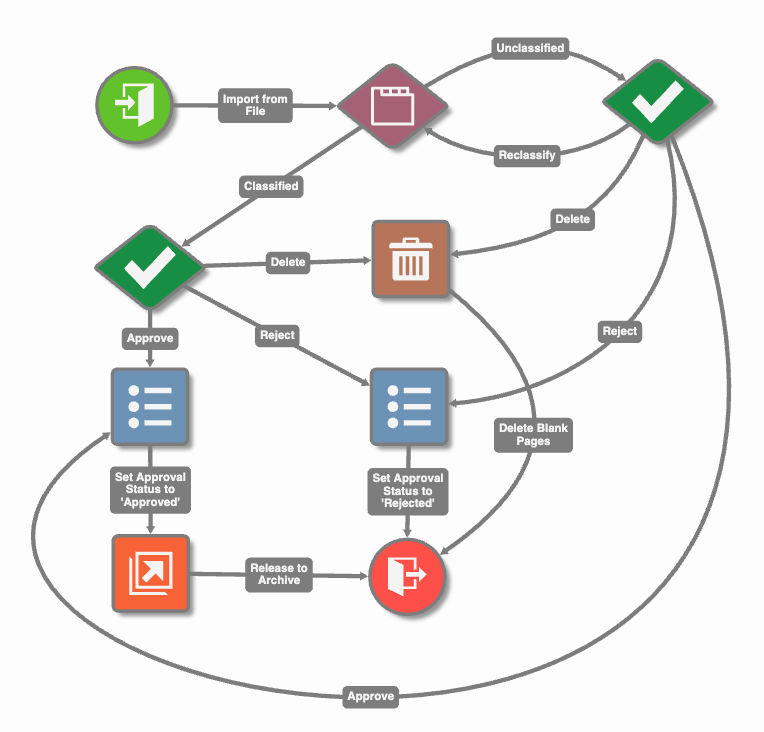
Perform blank page deletion - In this example, the Delete Pages node is configured to identify any documents that have a blank page and to remove the blank page before releasing to a GlobalSearch archive.
This is useful when using a blank page as a separator page in the Separate Node. Following up with the Delete Pages node to remove the blank page after the separation occurs reduces file size, loading time, and improves the user experience.
This could easily be modified to use a barcode separator page and then delete the separate page using barcode recognition.
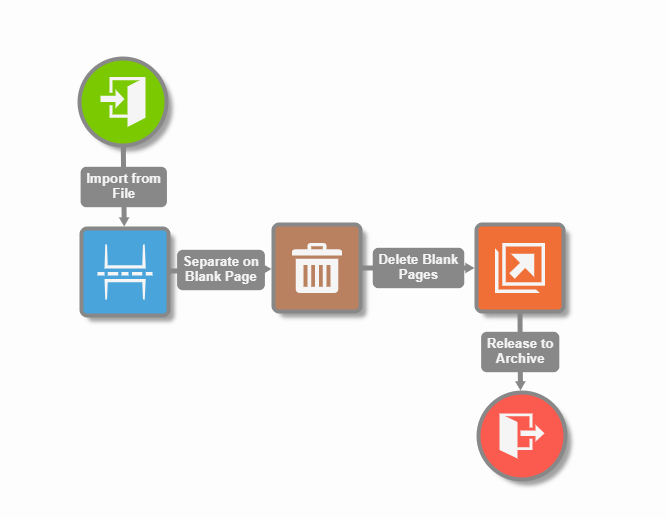
Delete Blank Pages Workflow
Delete all pages - In this example, the Delete Pages node is configured to delete all of the pages of a batch if the document if a determines it is not worth filing away.
This is a useful option to give validate users so they can remove unnecessary documents from the process.
Delete All Pages Workflow

