Release Node
Use the Release Node to release data and documents from a Workflow to GlobalSearch or to the file system. You can use multiple Release Nodes in a Workflow if you need to release to more than one location or if you need to conditionally release to different locations based on previous workflow steps.
Release node icon
Node Properties
Release to Archive properties
Release to Inbox properties
Release to File (On-Premise Only)
Title
Add a title for this node. Titles are useful when reading the history in the history of a workflow for easier understanding of the overall process.
Description
Provide a synopsis of what this node is doing, or make note of any important details. This is useful for providing additional information such as workflow details and use case information. A good description is helpful when returning to modify the workflow in the future.
Release Types
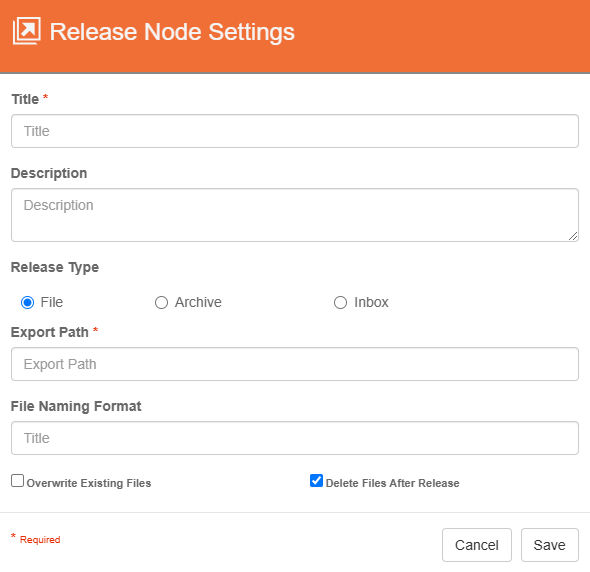
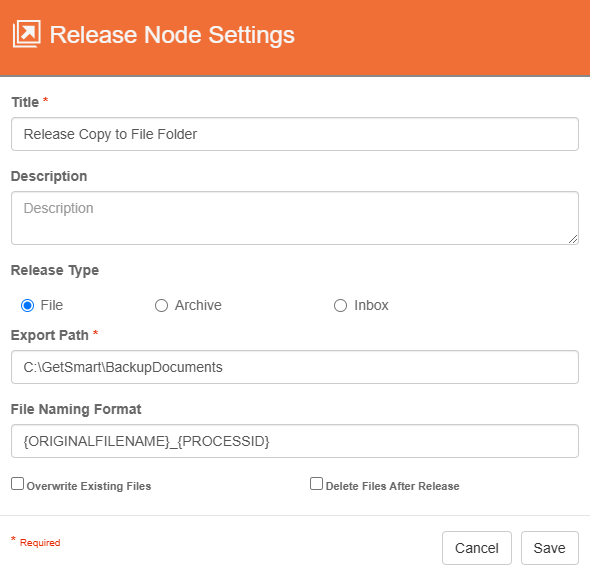
Release to File
Release to File is available for GlobalCapture on-premise solutions only.
Release to File
You can release documents from the Workflow directly to a local or network file system.
Export Path: The location of the file folder to release document to.
If releasing to a network share, be sure to use a network addressable path (UNC path), never a mapped drive. Also be sure that the service account GlobalCapture is using has permissions to the network share.
File Naming Format: When specifying the File Naming Format, you can specify a specific value or use Square 9 Notation to set the values automatically.
When you release documents from GlobalCapture to a file folder, the file name always displays as a unique character name. If you need to retain the original file names, use the S9 Notation of {ORIGINALFILENAME} to retain to document’s original file name.
Overwrite Existing Files: Overwrite files in the release folder with new files of the same name.
Delete Files After Release is available for GlobalCapture on-premise solutions only.
Delete Files After Release: Remove the file from the GlobalCapture working directory. If releasing to multiple locations, this should only be enabled on the final release node.
When to use Delete Files After Release
The Delete at Release checkbox is enabled by default. As documents are captured, validated, and exported to an application like GlobalSearch, they are usually no longer useful in the GlobalCapture system where they take up disk space. If your workflow has document related steps that happen after a release step, you will want to be sure Delete Files After Release is off. In these cases, you may want to leverage a Delete Node to purge documents prior to the process ending.
Check Network Share Permissions. If releasing over a network share, the user running the GlobalCapture service needs to be a user with rights to the designated export directory.
If releasing to multiple locations, this should only be enabled on the final release node.
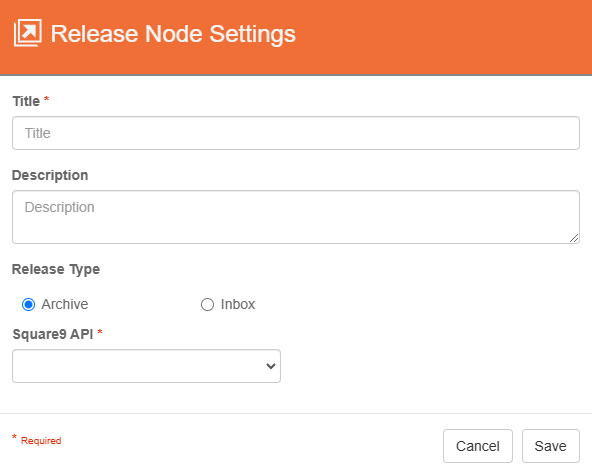
Release to Archive
You can release your GlobalCapture data and documents directly to an GlobalSearch Archive.
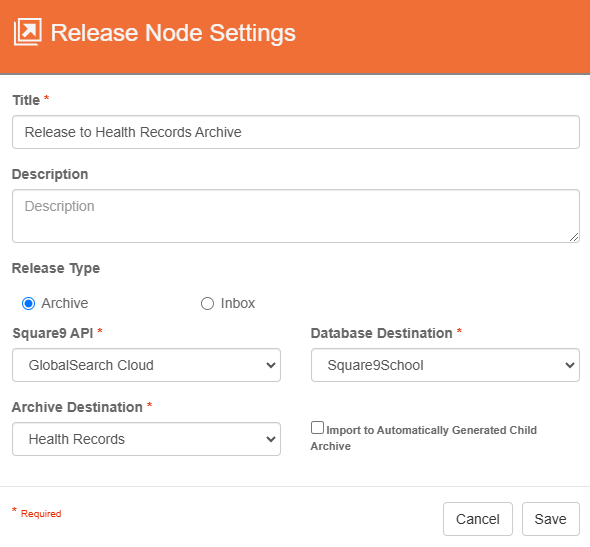
Release to Archive
Select the Square9API Portal, Database, and Archive.
Import to automatically generated child archive: Create a destination archive based on the selected process field data. When enabled, select the name of the archive from the Process Field Value for Archive Name list.
Exercise caution when using this feature.
Created archives will need to be managed with searches and security.
Remember to keep you database scalable and maintainable, too many archives can lead to confusion.
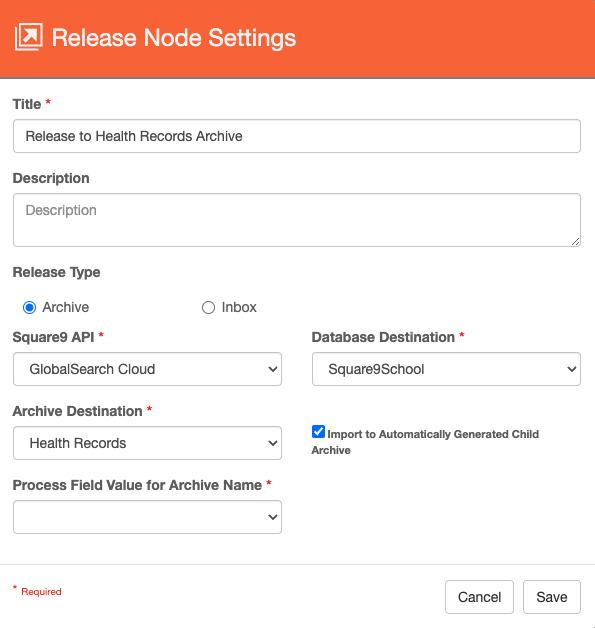
Process Field Value for Archive Name
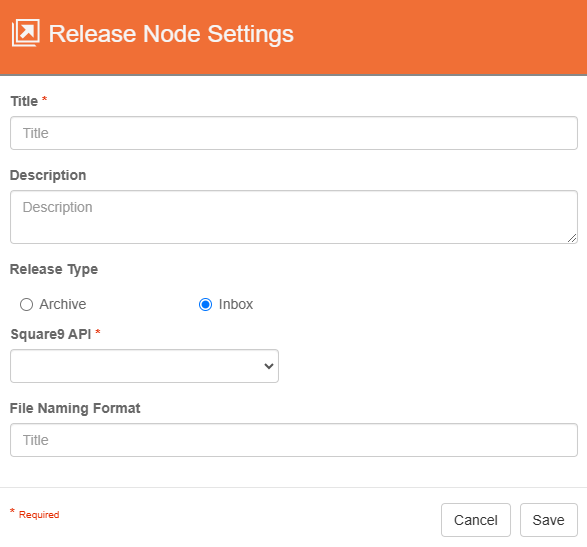
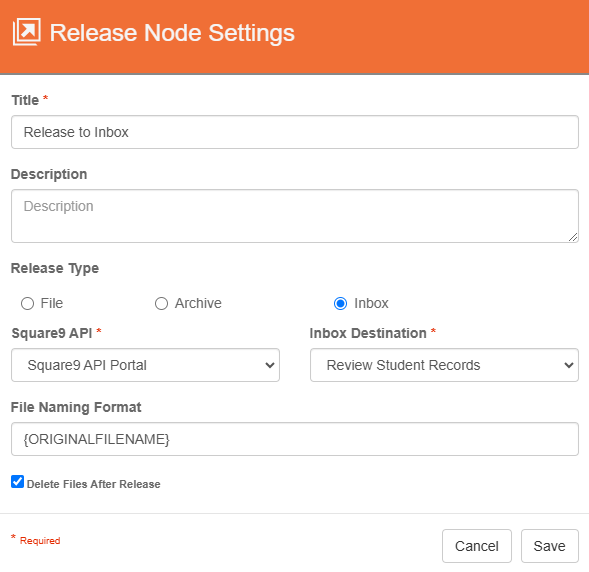
Release to Inbox
You can also release to Inboxes in the GlobalSearch. Documents are most commonly released to an Inbox post-processing where no indexing has been automated but where features like page separation or image enhancement are required. You then access the documents from the Inbox, where they can be indexed into an Archive manually.
Index Field data is not retained in an Inbox. If you have extracted data (from using the Process Field Node, or the Validation Station, for instance) it will not be retained in the Inbox. Release to an Archive to preserve associated data.
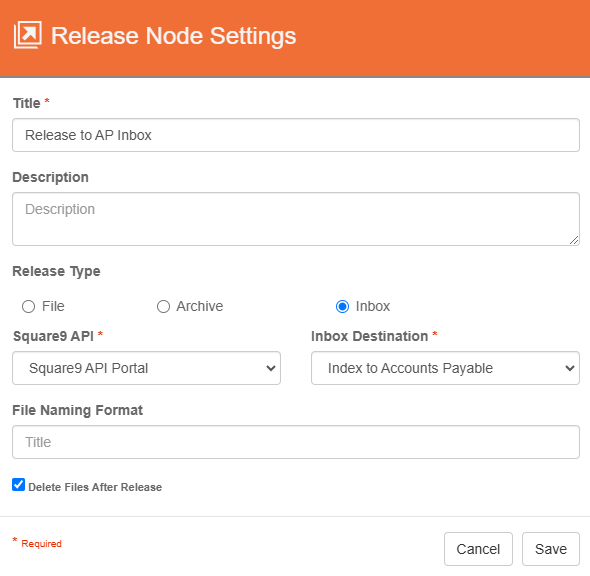
Release to Inbox
When selected, you’ll be asked to choose an Square9API Portal, Database, and Inbox.
Use Cases
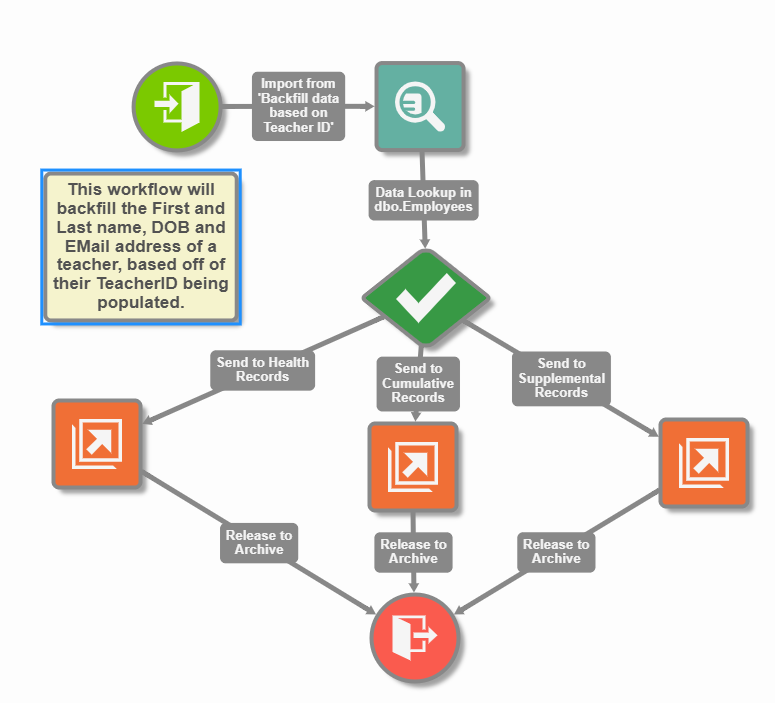
Configure multiple release nodes to release to different locations
Configure 3 different release nodes to release to 3 different archives within GlobalSearch. Having multiple release nodes is useful for automatically routing documents, without the need for users to move them manually into their proper locations.
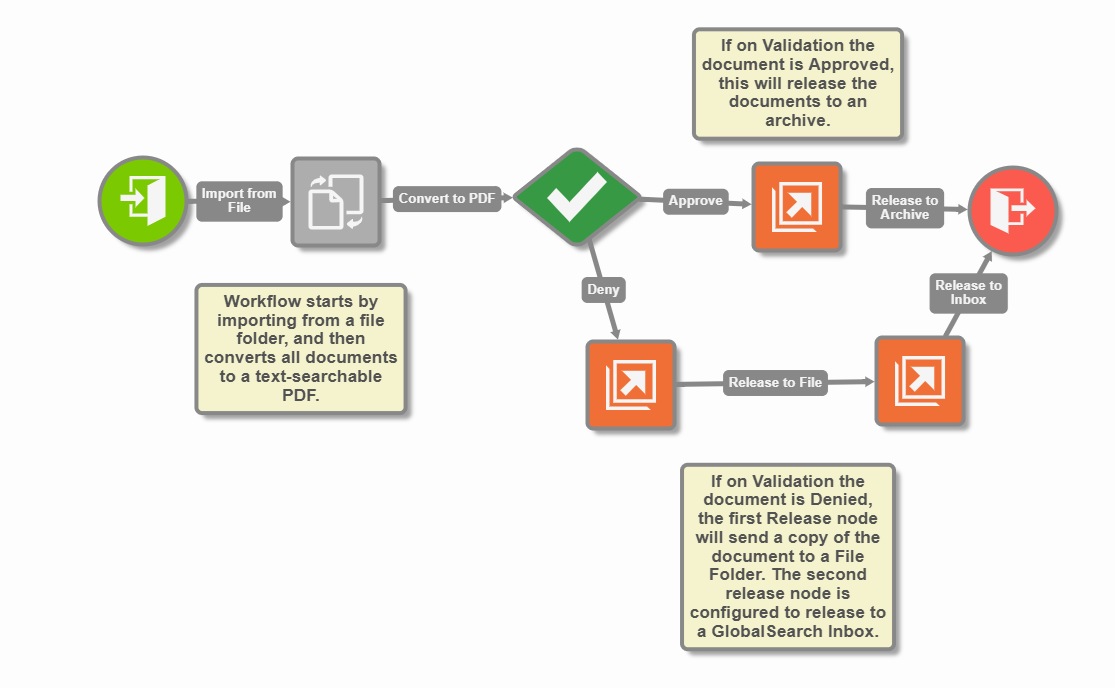
Configure consecutive Release nodes to export to multiple locations
A GlobalCapture workflow that utilizes an Approve or Denied decision to route documents to their proper locations. When a document has been denied, the first release node is configured to save a copy of the document locally to a file folder and the second to an Inbox in GlobalSearch. To do this, I will need to uncheck the option to Delete Files After Release on the first release node so a document exists to be released by the second release node.
This process is useful to save copies of the document before they go through the remainder of the workflow, or to be used for other purposes without losing the original copy of the document.
Configure multiple release nodes to save copies of documents
A GlobalCapture workflow can utilizes multiple release nodes at different steps throughout the workflow process. immediately after importing a document, we can add in a release node to save the original document before it proceeds through the workflow process by disabling Delete Files After Release.
Adding in release nodes after certain steps can be useful for testing new functionality in workflow processes while maintaining our original test document.

Release to Multiple Instances of GlobalSearch
It is possible to have a single capture instance which is releasing to multiple GlobalSearch instances.
Important Notes
Release Performance
For "on premise" customers (customers who host their own GlobalSearch environment on the same network as their GlobalCapture environment), performance optimizations can be made to minimize network traffic related to file transfer at release time. In the Square9.GlobalCapture.exe.config (by default, C:\GetSmart\CaptureServices\GlobalCapture_1) add the following entry to the appSettings section of the file:
<add key="GSReleaseDirectory" value="C:\SmartSearch\WebPortalCache" />
Note that the path for "value" should represent the path to your GlobalSearch server's ViewerCache location. This is defined in the Square9Api (C:\inetpub\wwwroot\Square9API) web.config file. If the GlobalSearch and GlobalCapture servers are not physically on the same server, the path specified must be a common network share.
When this key is present in your environment, files are transferred directly in the file system, rather than through API routes. This results in faster transfer rates as files don't need to be broken down into chunks, transferred, and then reassembled. All customers where throughput is a consideration should leverage this setting.
Field Caching (GlobalCapture 2.1 and earlier)
GlobalCapture systems that release to GlobalSearch (on-premise or in the cloud - C2) have the ability to cache GlobalSearch field details. This minimizes network traffic and improves processing speeds. All new installations from GlobalCapture 2.2 and greater will have caching settings enabled by default. Customers upgrading from a previous version may not have the settings present. Any customer using GlobalSearch with their capture applications should add this setting. In the Square9.GlobalCapture.exe.config (by default, C:\GetSmart\CaptureServices\GlobalCapture_1) add the following entry to the appSettings section of the file:
<add key="FieldTimeout" value="600"/>