Create, Edit, and Delete Template Zones
GlobalCapture uses an OCR engine to extract indexing data from document images. GlobalCapture Templates define the areas where extraction should take place as Zones. Zones can be configured for a Template in a variety of ways, from simply defining a set area for structured extraction to complex, dynamic, multi-Zone unstructured extraction. Each Template can have one or more Zones. Zones can be applied to one or more pages or multi-page documents.
The options available for Zones in your Template design depend upon the GlobalCapture licensing available.
Licensing is not enforced at the time of Template design. Licensed extraction features are only enforced by the GlobalCapture Engine at run time because the Template Designer may be used by multiple Engines with different licensing in the same installation. Be sure you understand the licenses available to your production installation prior to creating Templates with features you may not be able to leverage.
Some key points about Zones include:
Structured Data Extraction – Use Structured Data Extraction for standardized documents (like forms and certificates) with data in specific locations. Extraction areas are defined by their coordinates on the document page. The Marker and Positional zones are Structured Data Extraction Zones.
Unstructured Data Extraction – Unstructured Data Extraction uses advanced capture technology to evaluate documents in a far more dynamic manner. Use it, for example, to determine how to separate a batch scan into its various documents, extract line-item data, find keywords in a document, and find values in proximity to keywords. Unstructured Data Extraction Zones include Pattern Match, Directional, and Data Lookup zones.
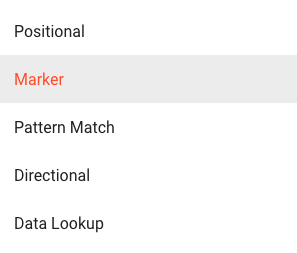
Zone Types
Hierarchical Relationships Between Zones – Zones can be bound to parent Zones, for as many nested levels as you need. For example, you could set a parent Zone to find the text “PO Number” and a child Zone to look to the right of that text and extract the number found in that location.
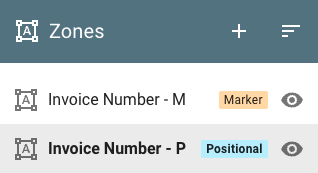
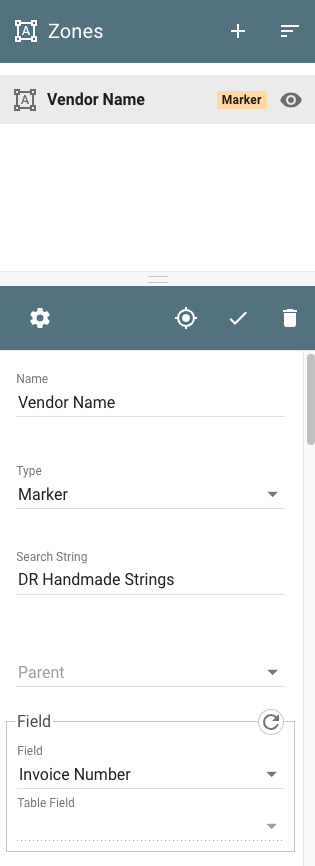
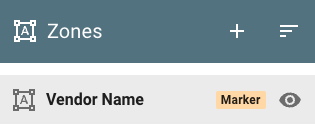
Zones
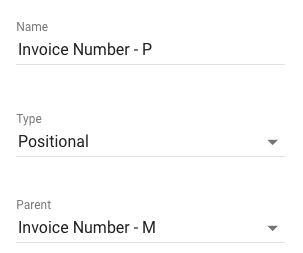
Invoice Number - P Properties
Zones
Map to Fields – When you need to track the data extracted from Zones (such as vendor name or invoice number), you can map the Zones to indexing fields in GlobalCapture and GlobalSearch (if installed). Create whatever fields you need in the Field Catalog and then map them to your Zones.
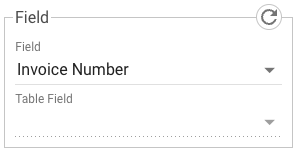
Field Mapping
Regular Expressions – You can use regular expressions (Regex) to precisely define the variables of your Zone's search string. REGEX Storm is a good regex tester.
Find a date in the format of MM/DD/YYYY - [0-9]{1,2}/[0-9]{1,2}/[0-9]{2,4}
Find a US Auto VIN number - \b[(A-H|J-N|P|R-Z|0-9)]{17}\b
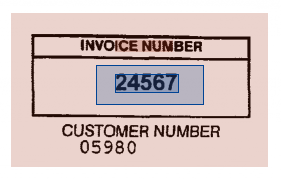
As you create and test your Zones in the Template Designer, two rectangular areas will appear on the sample document image. These are the Search Region and the Results Region. The Search Region is the area of the document to be searched for data to extract. It can be as large as an entire page or as small as a single character. Search Regions can be defined by coordinates on the page (in pixels) or by its relationship to other Search Regions in the Template. The position of Zone coordinates or the start of a search string match goes from the top-left corner of the document image or parent Zone to the bottom-right corner.
Search Zone and Results Region
If the OCR engine returns results from searching the Search Region, the Results Region appears. This is usually, but not always a subset of the Search Region. Since the Search Region may be configured to extract overlapping data or dynamically extract data from other Zones, the Results Region may not be in exactly the same place on the page as the assigned Search Region.
Create Zones
To Create a Zone, in the Template Designer menu bar, click the Add (
 )icon and in the drop-down menu, click the Zone (
  ) icon.
Configure the settings for the new Zone. The Zone parameters are contextual, depending upon which Zone type you have selected.
If a configuration error exists after applying Zone Properties, a validation message displays in red under the Zone in the Zones Pane.

Configuration Error
Click the Apply (
 ) icon to save the Zone configuration.
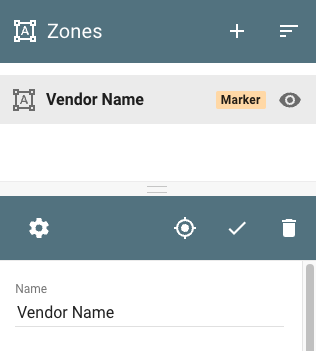
Zone and Zone Properties Panels
Edit Zones
To Edit a Zone, select it in the Zones pane. Its properties will display in the Properties pane.
Reconfigure the settings for the new Zone.
Click the Apply (
)icon.
Copy Zones
To Copy a Zone, select the Zone to copy.
In the Template Designer menu bar, click the Add (
)icon and in the drop-down menu, click the Copy (  ) icon.
Configure the settings for the new Zone. The Zone parameters are contextual, depending upon which Zone type you have selected.
If a configuration error exists after applying Zone Properties, a validation message displays in red under the Zone in the Zones Pane.
Configuration Error
Click the Apply (
) icon to save the Zone configuration.
Selected Zone
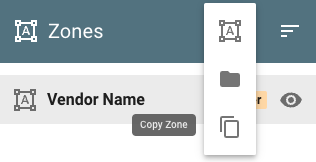
Copy Zone
Delete Zones
To Delete a Zone in a Template, in the Zones pane, select the Zone.
In the Properties Pane for that Zone, click the Delete (
 ) icon.
Delete Zone
Name Zones for Future Use
When you name each Zone, you should clearly indicate what it is for, especially if using several Zones in the Template. Indicate the Type and possibly the parent/child relationship. For example, you could begin all of your Marker Zones with “M_” to make it easy to select a Marker Zone when you are building a parent/child relationship with a Zone.