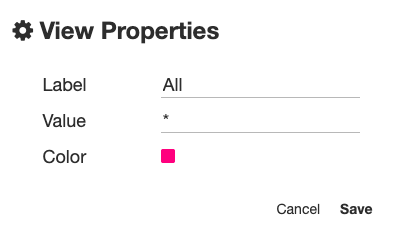
Create custom views to group the results of a search into separate tabs based on a specific field value. This is very beneficial in scenarios where a Status field is applied or where documents are identified by type. Index fields that are drop down lists are great candidates for views.
Important Information about Views:
-
Each archive can only have ONE set if views configured.
-
You can enable or disable Views based on a Search. To learn how to enable your Searches to support Custom Views, refer to the Display Archive Views in Search Results page.
-
Views do NOT update automatically when a new value is added. If a new value is added to a list, the view must be updated.*
*This is why fields that can have any value are not good candidates for a view. Ex. If you used Name as a view, every time you hired a new employee or an employee left, the view would need to be manually updated to reflect the changes.
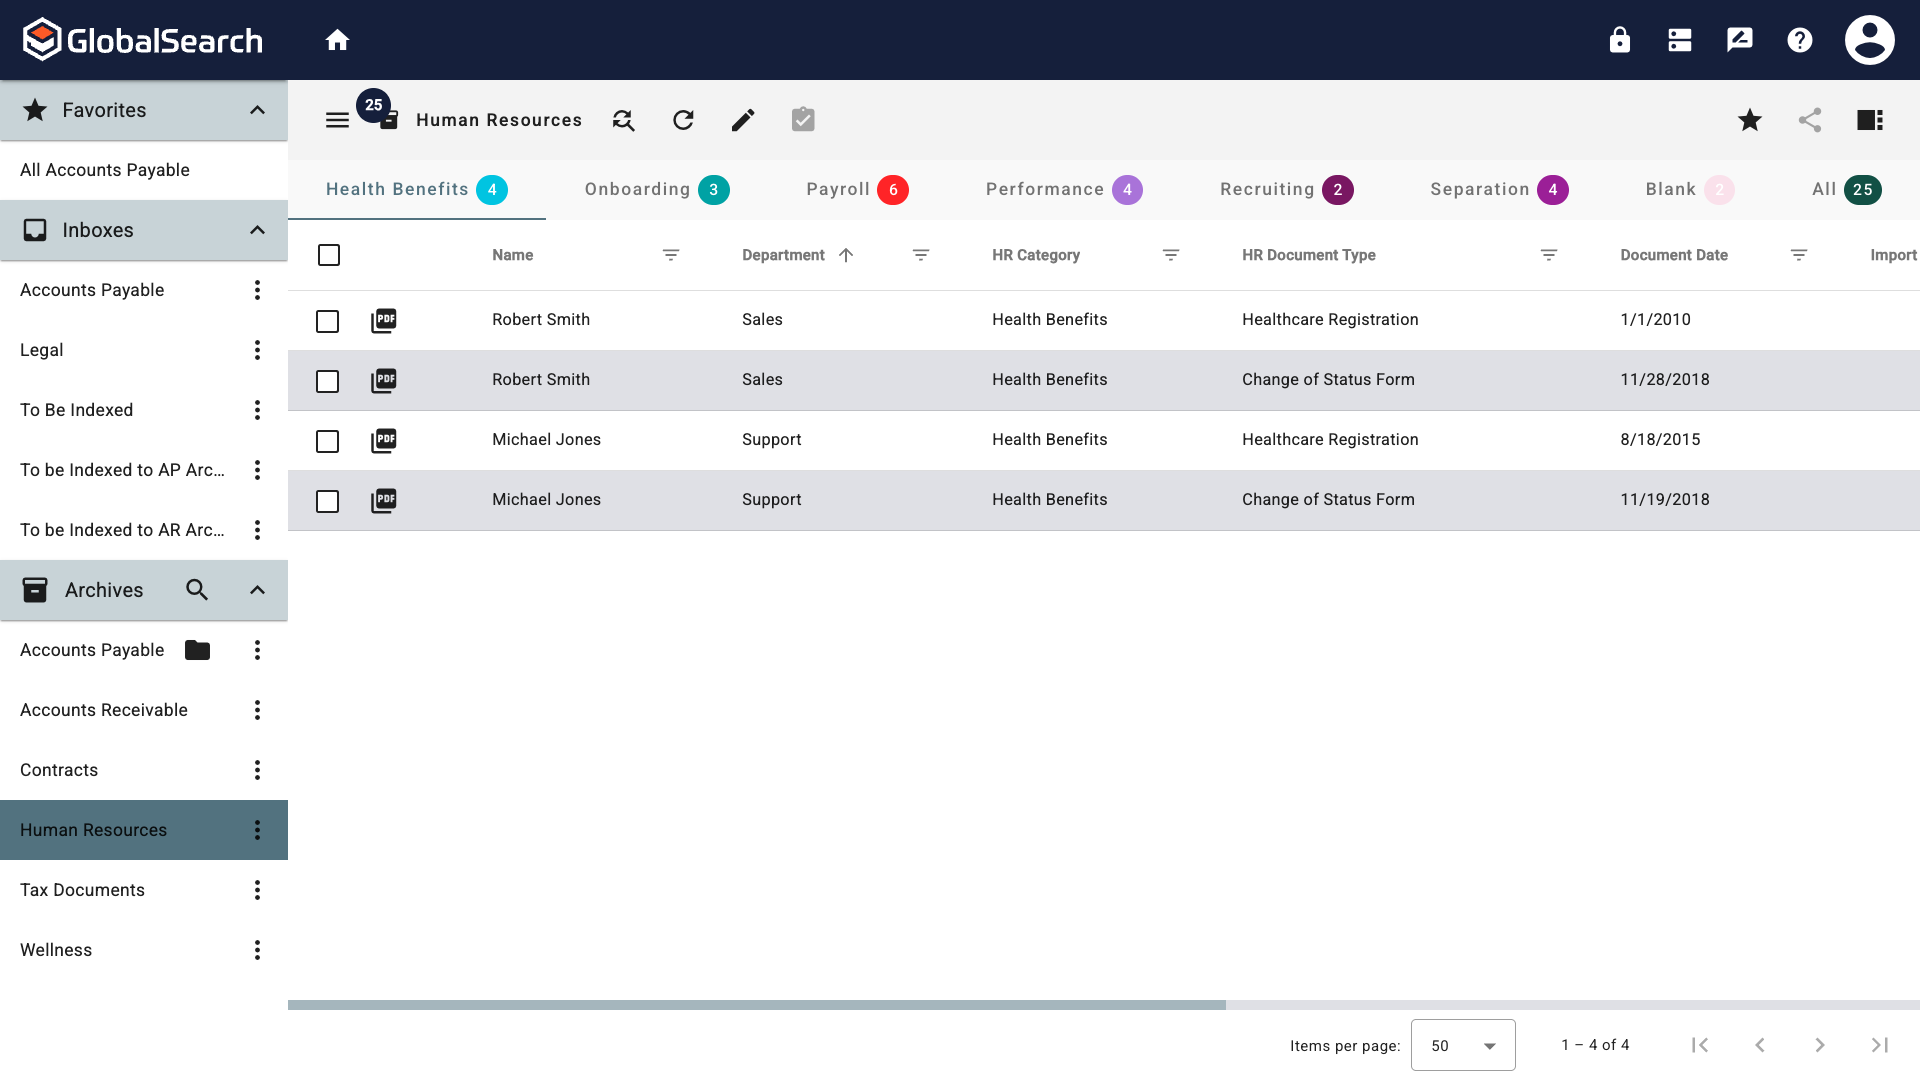
Enabling and Configuring Views
You must be an administrator to enable and configure view.
-
Navigate to the GlobalSearch Administrator page by click the Lock (


-
From the left pane, select Archives (

-
If you have multiple databases, select the database that contains the archive in which to create the views.

-
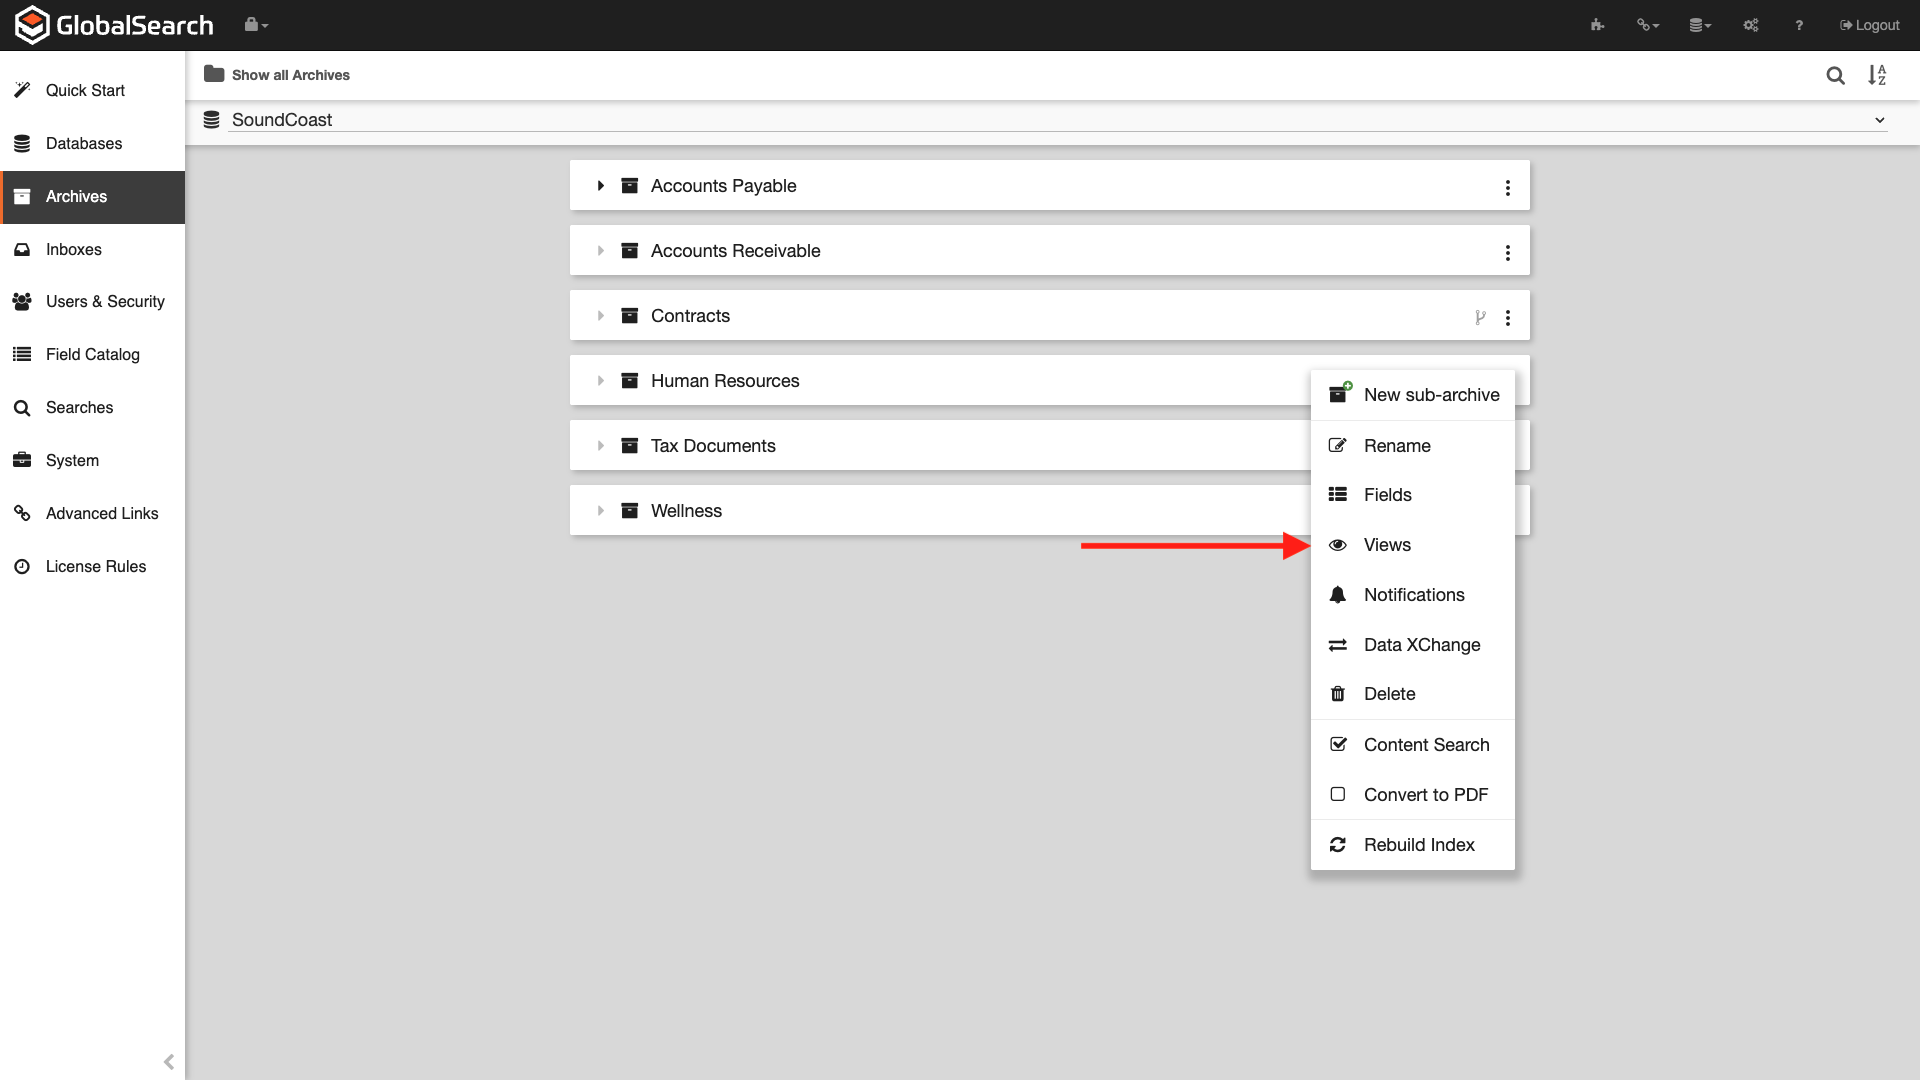
Next to the archive, click the Ellipsis (


-
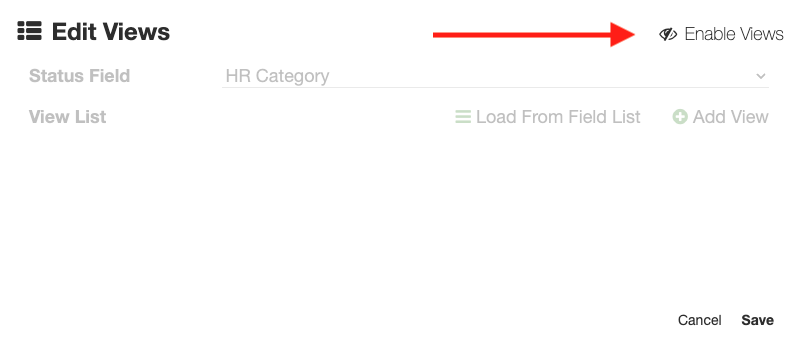
Click Enable Views.
-
Select the Status Field from the list of available index field. This will be the field that contains the data that will be used to sort your search results onto the tabs.
Remember, views do NOT update automatically when a new value is added. If a new value is added to a list, the view must be updated.*
*This is why fields that can have any value are not good candidates for a view. Ex. If you used Name as a view, every time you hired a new employee or an employee left, the view would need to be manually updated to reflect the changes.
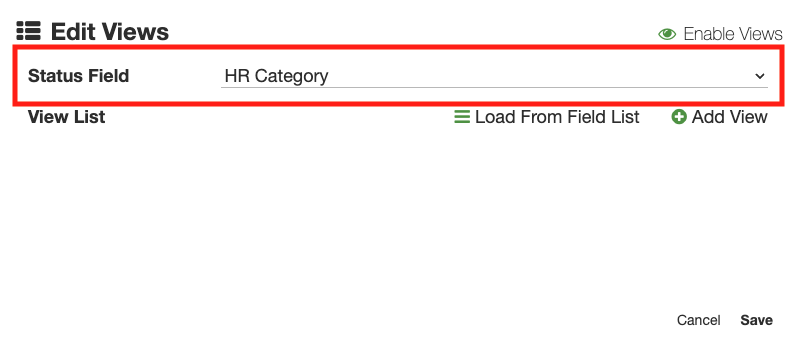
-
The View List can be populated manually, using the values in the list for the selected field, or both.
-
Load From Field List (

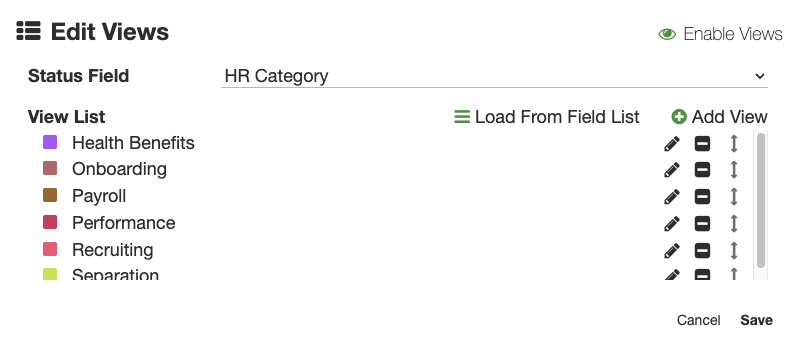
Load From Field List -
Manually Entry - Click the
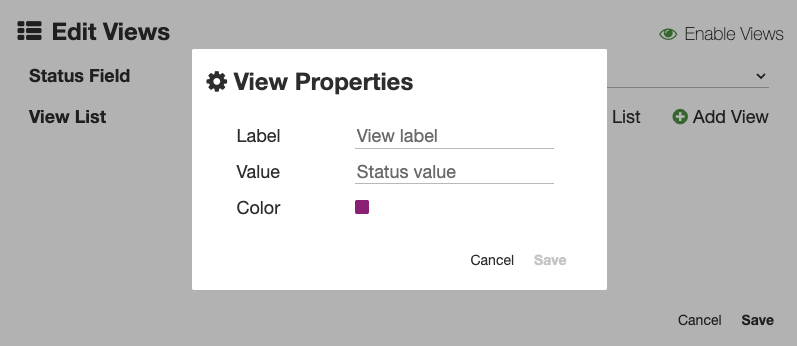
Manually Add View -
Label - The label is what appears on the view tab across the top of the search results page. This can be any value.
-
Value - This is the value in the selected index field that must be matched for a document to appear on this tab. It is importat that this value matches what is present in the index field for a document to appear on this tab. This is NOT case sensitive.
-
Color - Select the color of the circle next to the tab label that appears. Click the color box to change the color.
-
-
-
Click Save.
Speciality Tabs
Only documents who index field value in the Status Field selected matches one of the values in the View List will appear when a serach with Views enabled is run. If the field is blank or does not contain one of the values in the view list, that document will not appear when a search with views enabled it selected. There are 2 additional tabs that can be created to help combat this issue.
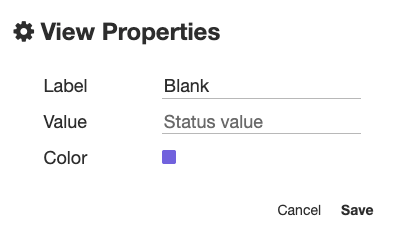
Blank Tab
Gathers all documents that match the search criteria on a single tab that contain no data in the index field selected as the status field.
-
Click
-
Assign a Label.
-
Leave the Value empty.
-
Select a Color.
-
Click Save.
All Tab
Lists ALL documents in the archive that match the search criteria on a single tab.
-
Click
-
Assign a Label.
-
Enter an Asterisk * as the Value.
-
Select a Color.
-
Click Save.