Pulling Data From SQL Into Forms
Using GlobalForms 10 it is possible to access information stored in a SQL database to dynamically populate information onto forms. This example will show you how to take a field within GlobalSearch and pull all of the values into a select component, which would appear similar to a drop down control.
Configuring SQL Server
In this example we will be using Microsoft SQL Server and creating a login for a globalforms SQL user account.
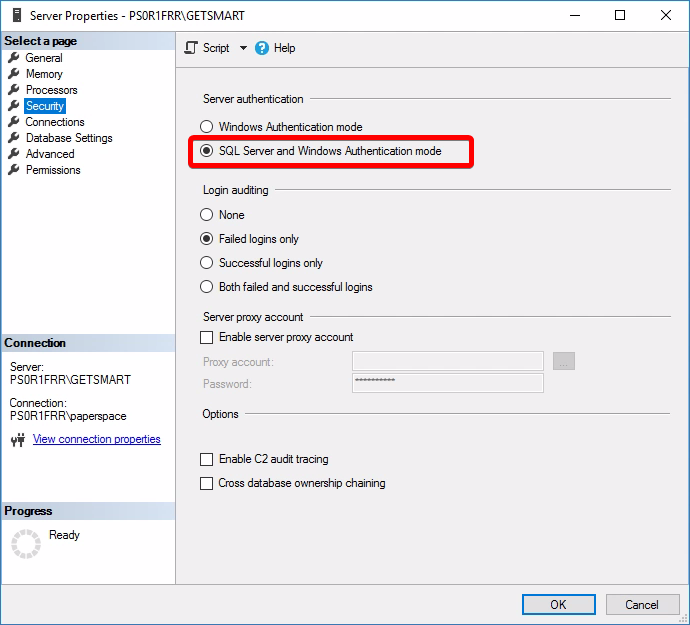
- Right click on the server name from within SQL Management Studio and make sure that your server is using SQL Server and Windows Authentication mode under the Security section.
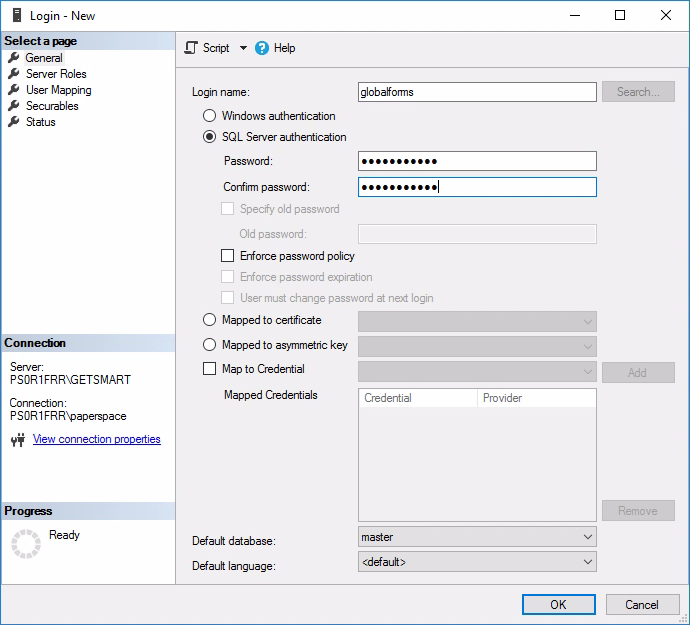
- In the Object Explorer expand Security and then right click on Logins and select New Login. Create your SQL user as shown in the picture below.
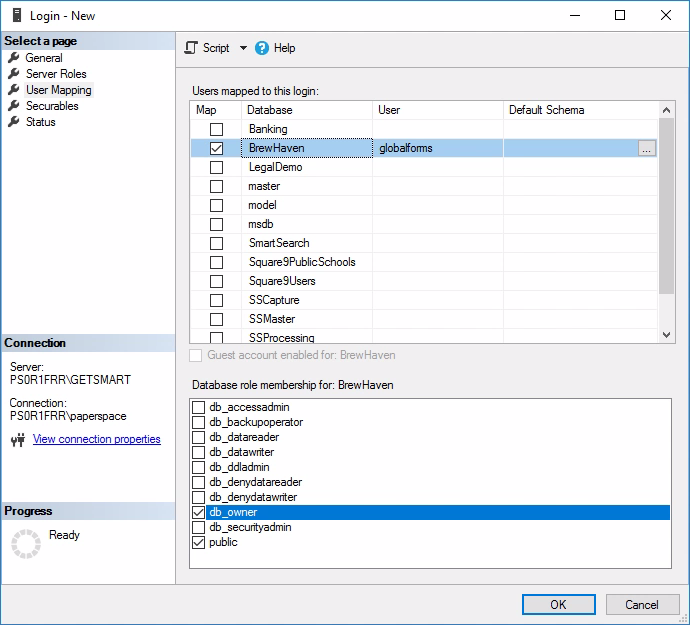
- Once you have set the username and password for your SQL user click on User Mapping on the left hand side and give your user db_owner permissions to the database you are going to be pulling data from and then click on OK to create your user.
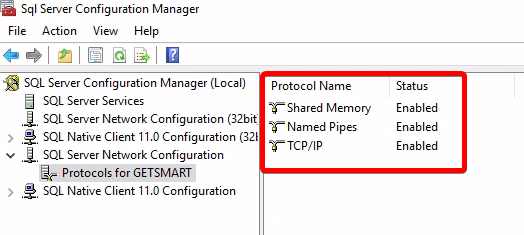
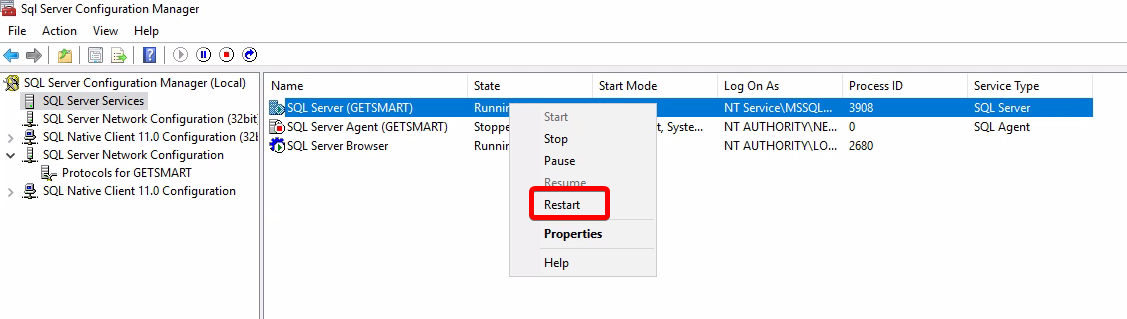
- Open the SQL Server Configuration Manager and make sure that Named Pipes and TCP/IP are enabled for your SQL instance. If you have to make any changes here a restart of the SQL instance will be required.
- Ensure the SQL Server Browser service is running
Configuring Your Route
- Navigate to X:\GlobalForms\config and open default.json (X: is the drive in which GlobalForms is installed)
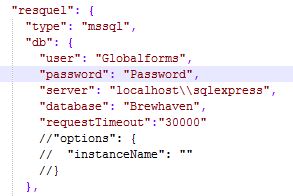
- Locate the section titled resequel which is where we will be configuring our server information. Populate the server information as shown below using your server information and the user you created.
- In the resquel section, configure the following:
- User: This is the SQL user you will use to establish your connection.
- Password: The password used for the user defined above.
- Server, defined as: SERVERNAME\\INSTANCENAME, if your SQL Server doesn't have an instance name, simply just put the server name.
- Database: The target database that the queries will originate from and be relative to.
- Request Timeout: How long (in milliseconds) requests will time out.
If connecting to a SQL instance secured via SSL (DirectSQL), uncomment and add the following to "options"
"options": {
"encrypt": true,
"trustServerCertificate": true
}
- In the routes section create a new route with the SQL query you are going to be using, with two needing to be configured for each query you wish to expose.
- method - the http verb used to make the request.
- endpoint - This name needs to be unique and will be used in forming of the URL you will need to target.
- For example, if you name your endpoint vendorNames, your endpoint URL will be: http://servername:3001/vendorNames by default.
- Visiting the URL after saving your configuration changes and rebooting the GlobalForms service is a good way to ensure a response is returned.
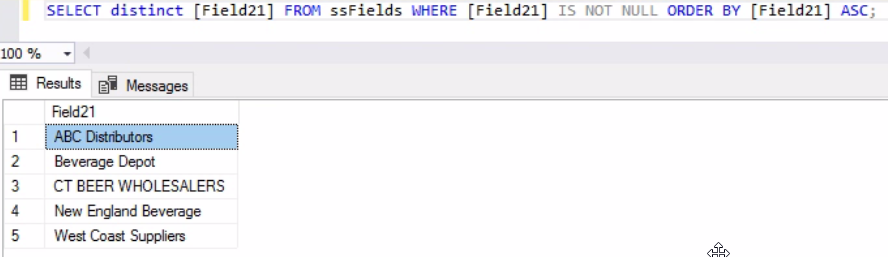
- query - This is the SQL query that will help build the data return back from the SQL Server. This is any standard T-SQL Query accepted my Microsoft SQL Server.
- It's a good idea to test this query works in SQL Server before editing your configuration file.
Below is an example of a defined endpoint:
route
CODE
{
	"method": "get",
	"endpoint": "/vendorNames",
	"query": "SELECT distinct [Field21] FROM ssFields WHERE [Field21] IS NOT NULL ORDER BY [Field21] ASC;"
},

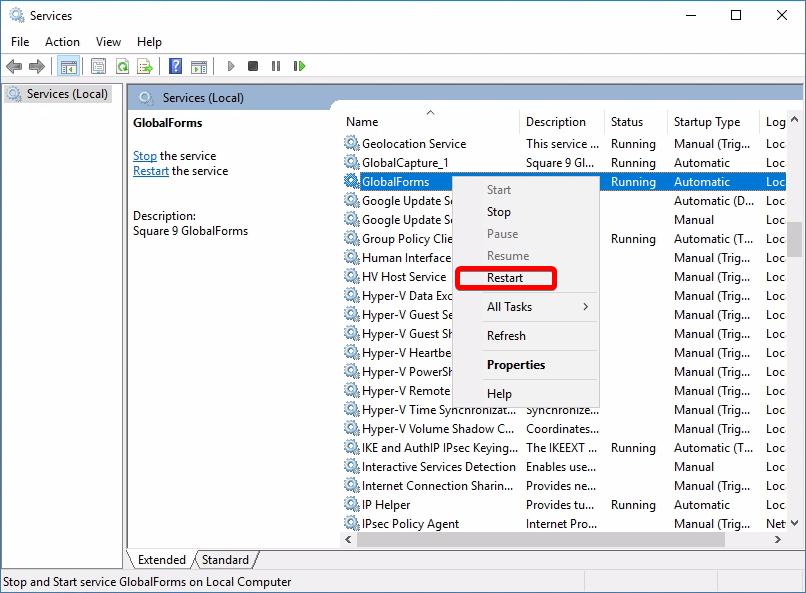
- Once you have configured your routes, restart the GlobalForms service. All changes will require a restart of the GlobalForms Service.
- You can then browse to the route you create in your browser and you should get a JSON response containing the data set you queried.

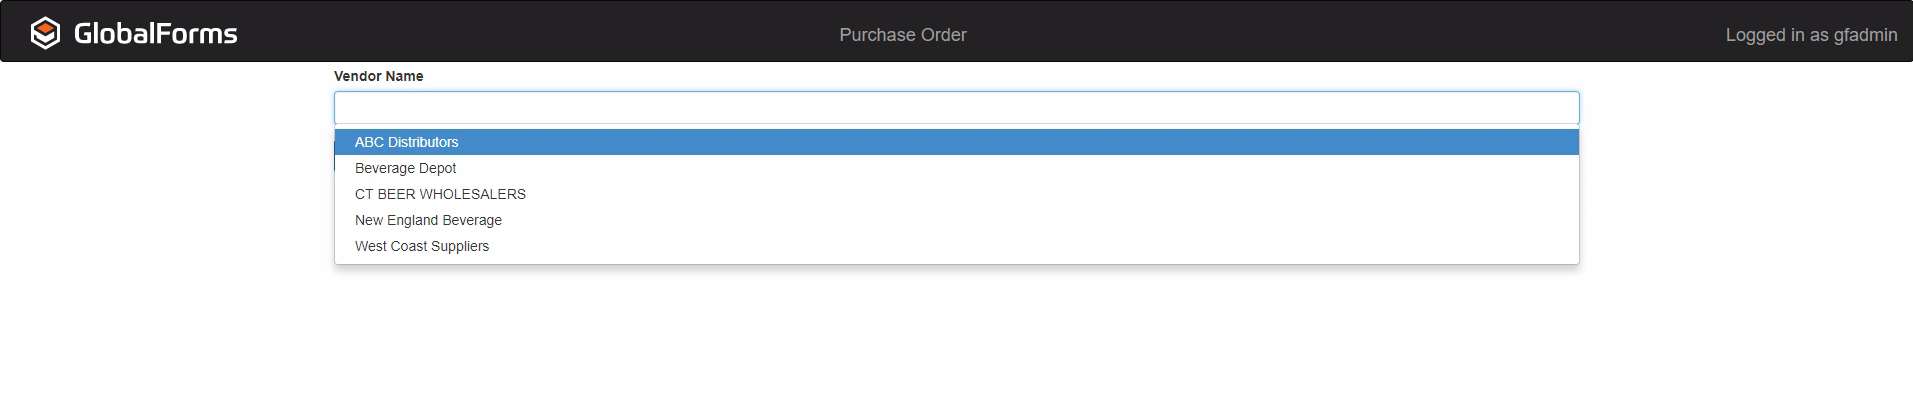
Configure Your Components
- Within the GlobalForms design surface drag over a select control.
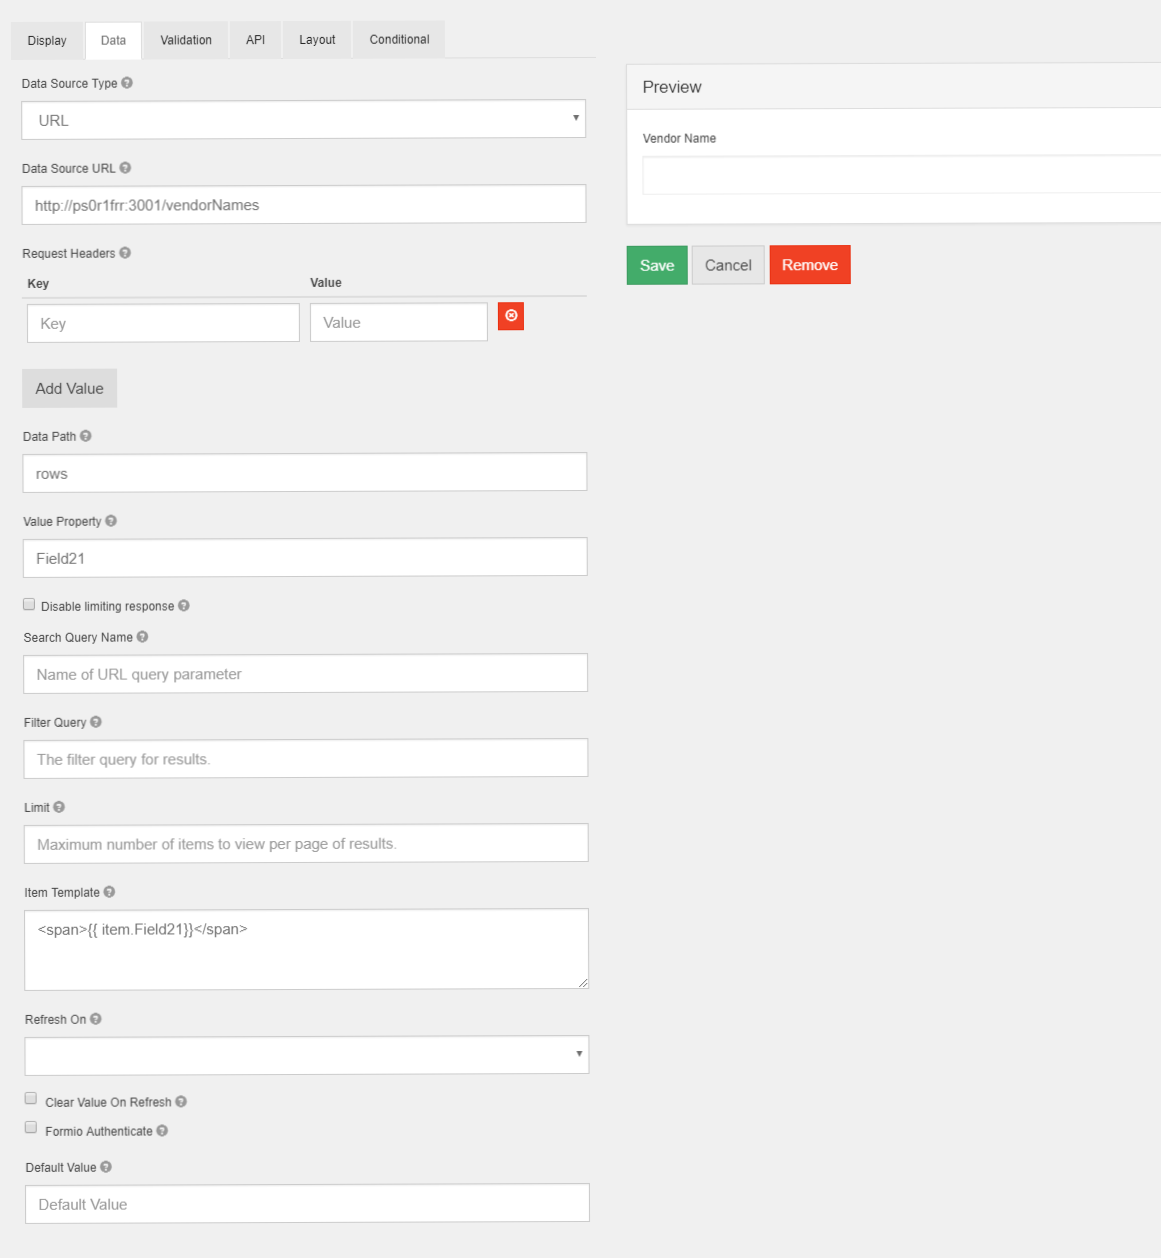
- On the data tab change Data Source Type to URL and then in the Data Source URL put the route you created. In this example http://localhost:3001/vendorNames.
- Enter rows in Data Path and then the key that contains the value of your data in the Value Property.
- In this example it is Field21. This is going to be the value of the data that is passed when the form is submitted.
- In the Item Template box you will specify how you want the data to display in the select control. The format of this box will be <span>{{ item.[Key] }}</span>.
- In this example, <span>{{ item.Field21 }}</span>
- Save and test your form.