Upgrade GlobalCapture Server
GlobalCapture is distributed through download links. These links can be obtained from the Square 9 Softworks Fulfillment department by contacting them at:
Phone – 203.789.0889 Option 1
Email – fulfillment@square-9.com
Once the link is sent, it is valid for 14 days. Download the self-extracting upgrade media to a folder of your choice.
GlobalCapture Media Extraction
- Once the installation media has been downloaded, double-click on it to run the self-extractor.
- In the GlobalSearch Self-Extractor window, select the location you want the files to go in Select extraction path.
The default location isC:\SSMedia\version. While not necessary, it is a good idea to put thessfeatures.licfile into theSSMediafolder, so that it is easy to find in the future. - Click OK to proceed with the extraction.
This may take some time. If the extraction errors out, it is possible that the download has been corrupted. If so, it will need to be downloaded again. Once it has been extracted, proceed to the upgrade.
GlobalCapture Server Upgrade
From your installation media, navigate to the
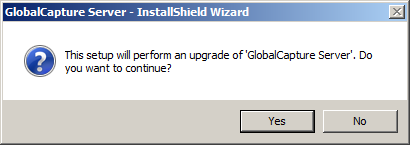
GCWdirectory, expand this directory, right-click onsetup.exeand select Run as Administrator.At the prompt to perform an upgrade, click Yes.
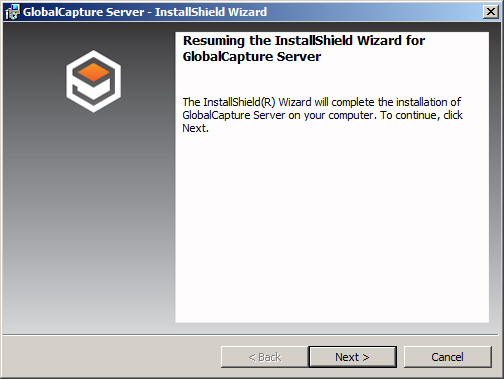
Click Next to start the GlobalCapture upgrade process using the Installation Wizard. There will be a pause while the installation is processing.
GlobalCapture Engine Upgrade
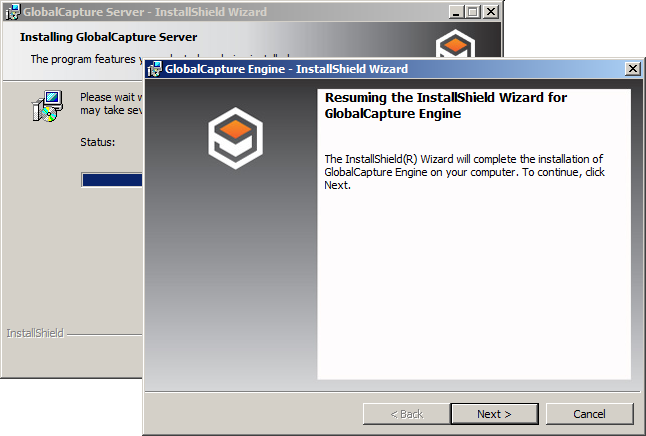
With GlobalCapture Server upgrading, the GlobalCapture Engine upgrade begins. If the GlobalCapture Engine InstallShield Wizard appears behind the GlobalCapture Server installer, drag it into view. (By default, this is the GCEngine_1 to be installed on the same machine as GlobalCapture Server.)
In Resuming the InstallShield Wizard..., click Next. There will be a pause while the upgrade is processing.
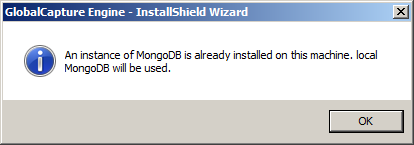
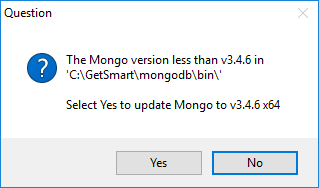
GlobalCapture v2.1 requires MongoDB v3.2.6 or higher. One of two dialogs may appear:
MongoDB v3.2.6 or higher instance is already installed; at the prompt, click OK.
- An upgrade is required; at the prompt, click Yes.
To view and save a log of actions and times related to the installation for future reference:
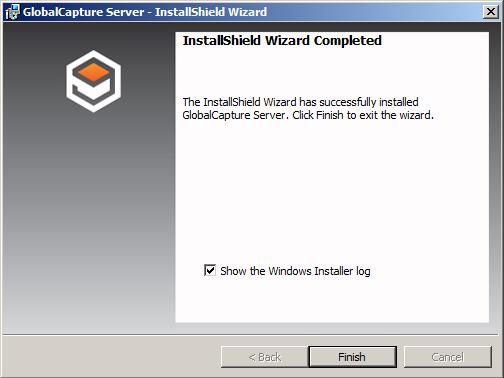
In InstallShield Wizard Completed, enable Show the Windows Installer log.
In Notepad, do a Save As to save your log and then close Notepad. Saving a log is recommended. When you are done, you will be returned to the installer.
Click Finish to complete the GlobalCapture Engine installation.

Complete GlobalCapture Upgrade
Once the GlobalCapture Engine upgrade is finished, the GlobalCapture Server upgrade will finish. Again, it is recommended that you first enable save a log file using Notepad for future reference.
To view and save a log of actions and times related to the installation for future reference:
In InstallShield Wizard Completed, enable the Show the Windows Installer log.
In Notepad, do a Save As to save your log and then close Notepad. When you are done, you will be returned to the installer.
Click Finish to complete the GlobalCapture installation.
In GlobalCapture Installer Information, at the prompt, click Yes to reboot the server, so that GlobalCapture is operational. Or, click No if you will manually reboot later. There will be a pause while the installation is processing.
You can also upgrade any additional GlobalCapture Engine instances you have installed.