Export Data Node
The Note node is available in GlobalCapture and GlobalAction.
Node Properties
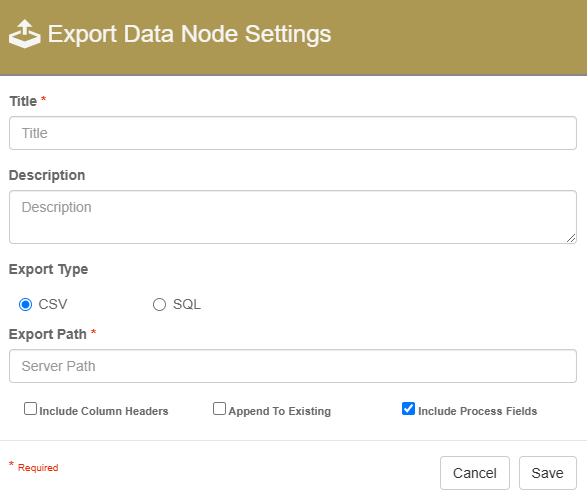
Export Data to CSV
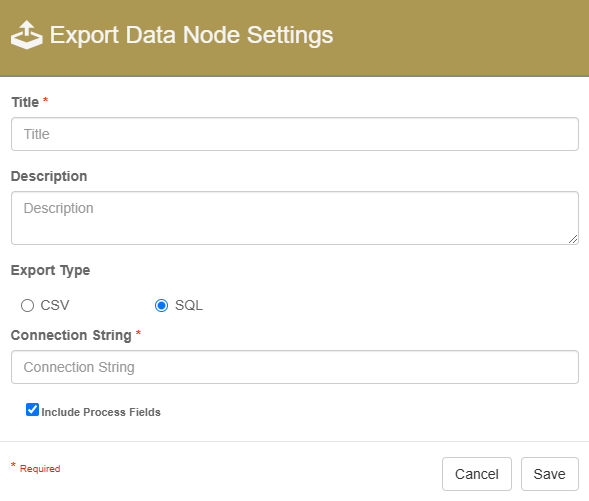
Export Data to SQL
Title
Add a title for this node. Titles are useful when reading the history in the history of a workflow for easier understanding of the overall process.
Description
Provide a synopsis of what this node is doing, or make note of any important details. This is useful for providing additional information such as workflow details and use case information. A good description is helpful when returning to modify the workflow in the future.
Export type: CSV
Export to CSV is only available for On Premise versions of GlobalCapture and GlobalAction.
When the CSV Export type is selected, several configurable options appear.
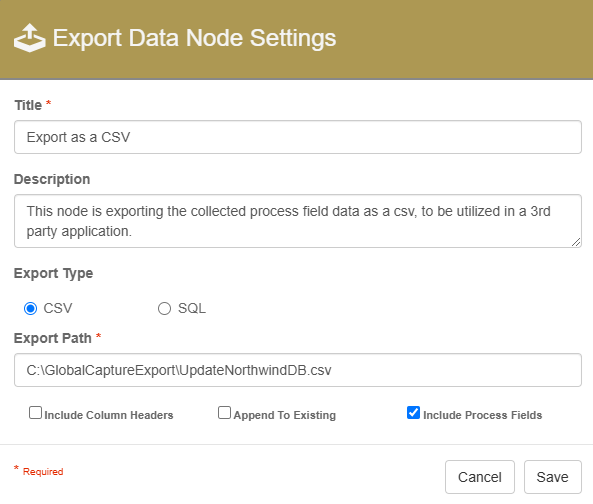
Export to CSV
Export Path: The location of the CSV file to release document to. This must include the name of the csv file.
Example: C:\GlobalCaptureExport\UpdateNorthwindDB.csv
Make sure to use a drive letter path or a network-accessible path. The service account user will need to have permissions to the folder location.
Include Column Headers: Selecting Include Column Headers includes the Index Field name as a column header in the CSV export.
Append to Existing: Selecting Append to Existing adds the data to the existing CSV file in the Export To location. If not enabled, a new field is created each time and will be given a unique name by added (#) to the end of the file name.
Include Process Fields: When enabled, any process fields that have been added to the workflow will be added to the CSV file when the data export is completed.
Include Process Fields is available on the Export Data node for GlobalAction only.
If the document record includes a Table Field, the document’s header index data will be repeated once for each row it contains, then again for each Table Field row. This allows all rows of data for a document to be seen in a CSV Export.
Export type: SQL
When the SQL Export type is selected, several configurable options appear.
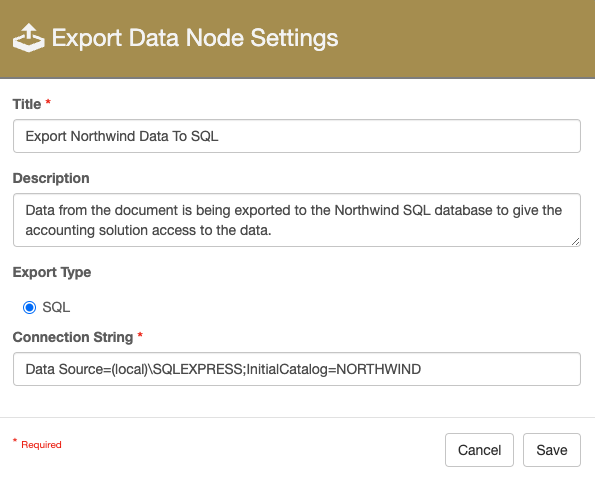
Export to SQL
Connection String: This is the connection to the SQL Server and database where the data will be exported to.
Example: Data Source=(local)\SQLEXPRESS;InitialCatalog=NORTHWIND
The service account user will need to have permissions to the database in SQL. If you are unsure of the permissions or connection string format, reach out to your Database Administrator for further assistance.
Include Process Fields: When enabled, any process fields that have been added to the workflow will be added to the CSV file when the data export is completed.
Include Process Fields is available on the Export Data node for GlobalAction only.
If the document record includes a Table Field, the document’s header index data will be repeated once for each row it contains, then again for each Table Field row. This allows all rows of data for a document to be seen in a CSV Export.
Use Cases
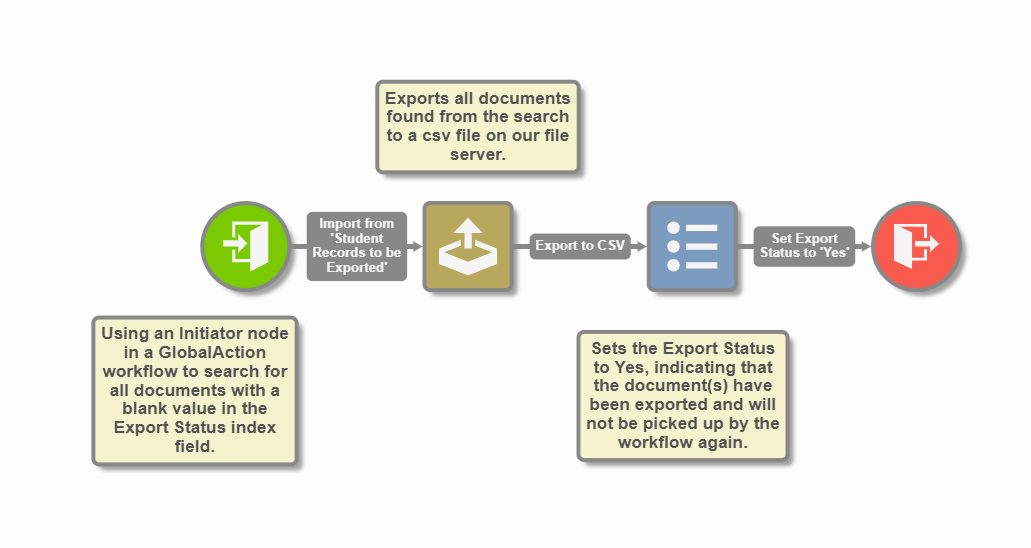
Exporting data to a CSV File
The Export Data node is configured in a GlobalAction workflow to create a CSV file and to append to the existing CSV file instead of creating a new one. This is useful for having an automated process that leverages the collected data to be used for other applications that use a CSV file format. By selecting append to existing, new data can be appended to the existing CSV file instead of creating new ones.

