Queue Node
This node is for GlobalAction only.
A Queue represents a process or a subprocess within the Workflow, which could consist of one or several actions concerning a document. Queues can be nested within other processes. For example, if there a collection of documents waiting to be approved or rejected, those documents would be sitting a Queue. An Email notification from within the Queue could trigger the user to change the documents’ status to “approved,” sending them to the next action in the Workflow.

Queue Node
Each Queue has its own security and reporting parameters, enforcing business rules while setting individual criterion for what you can see or do. While a document is in a Queue, only users or groups assigned to the Queue have the ability to see the Workflow buttons for the document or take action on a document. This include add/removing pages, updating index data, etc. All other users will view the document as a read-only document until it exits the workflow. All GlobalSearch permissions apply at all times.
Queue permissions for documents are not retroactive for users or groups added to a queue after a document has entered a queue. If you add a user to that group that is already secured to the Queue, that user will have retroactive permissions because of the group.
Queues can have both System and User Actions. System Actions allow a document to leave a Queue without user involvement. User Actions are triggered when the user manually clicks a Workflow button in the Document Viewer.
Queue Node properties
Node properties
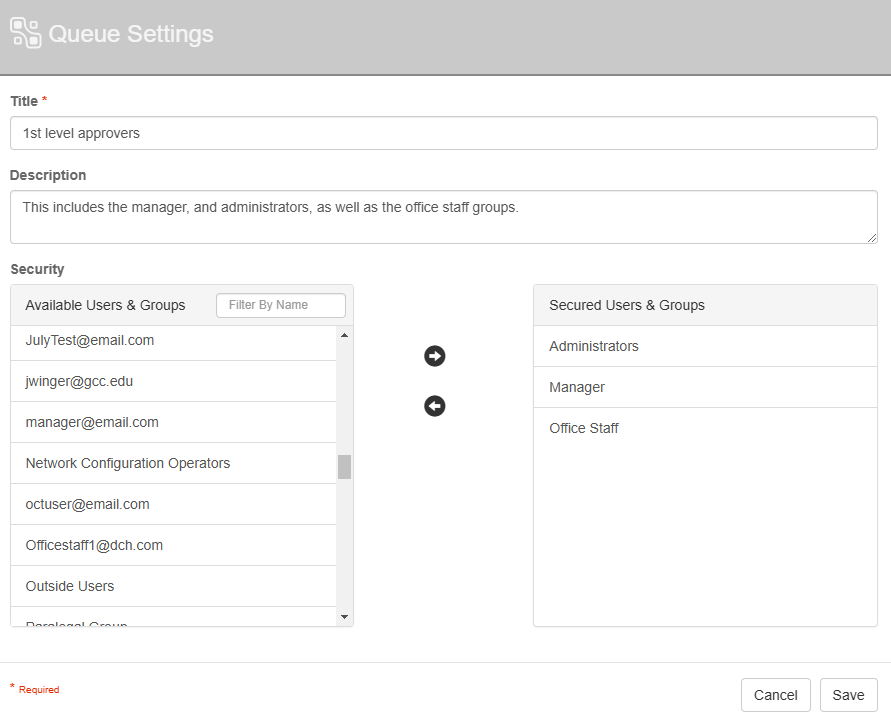
Title
The Title of your node should be brief but descriptive about the purpose of the Queue. Titles are important when revisiting workflows in the future and when migrating workflows. The title of the node will be displayed when resolving conflicts during imports.
Description
The Description of your node should provide notes about this node. This could include information about the actions being done, who has access, etc. Descriptions can be very useful when revisiting workflows in the future.
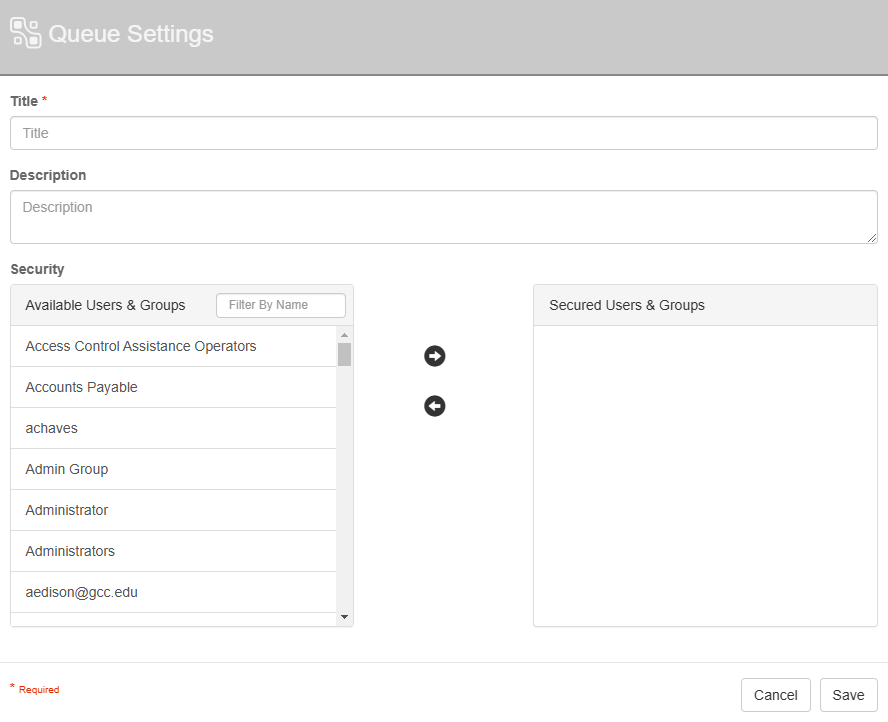
Security Settings
Using the arrow keys between the columns, or double-click on a user/group, to move them between the columns.
Available Users and Groups: This column displays all of the users that GlobalAction can access. These users are NOT secured to the Queue.
Secured Users and Groups: This column displays the users and groups that currently have access to this node.
When adding a Node to a Queue, the Queue box must go from grey to green to indicate that it is positioned in the Queue.
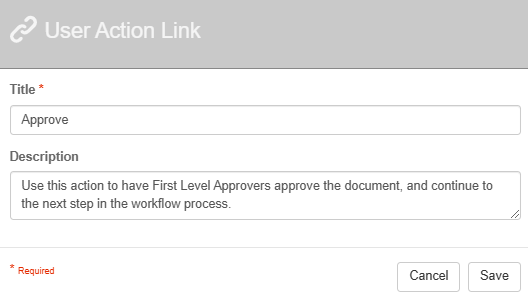
User Action Link
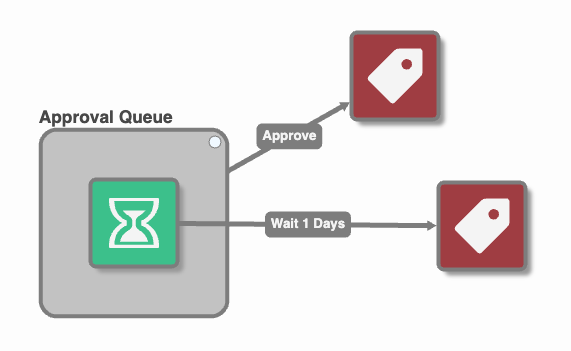
Place your mouse pointer over the Queue Connection Point (small circle in the upper right corner of the Queue Node) on the Design Canvas. The mouse pointer becomes a selection icon.
To create a User Action Link, drag a Connection from the Queue Connection Point to the next Node outside of the Queue in the Workflow.
To create a System Action Link, drag a Connection from a Node inside the Queue to the Next Node in the Workflow.
Enter a unique name for the User Action Link in the Title text box.
Enter a description in the Description text box.
Click Save.
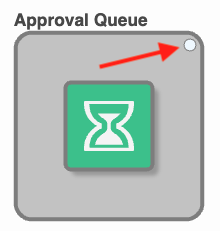
Queue Connection Point
User Action Link
User and System Action
Use Cases
Using the Queue node to have approver action on documents
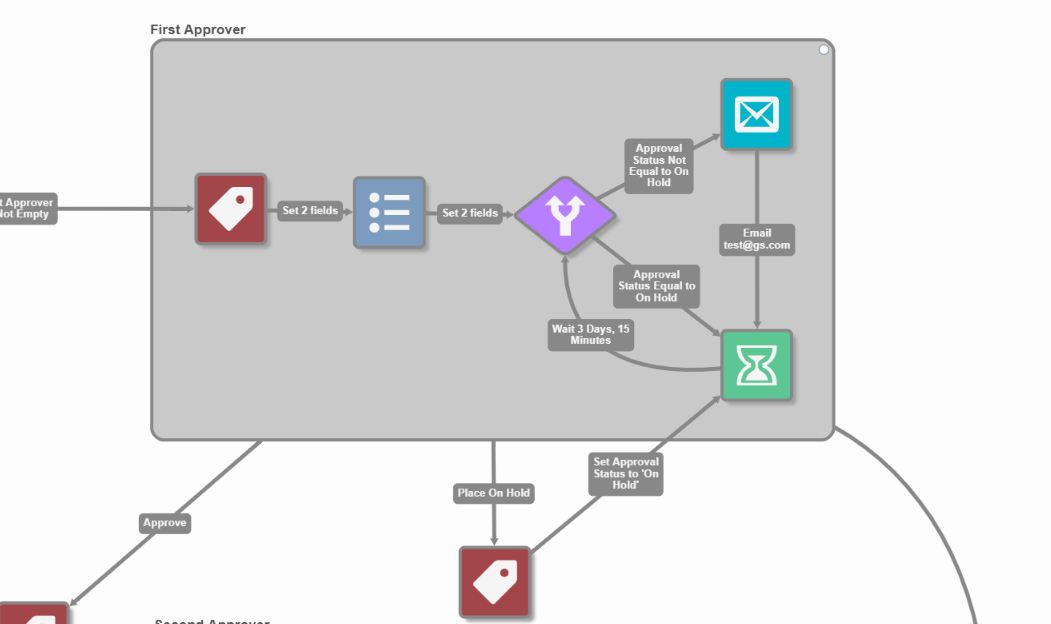
In this example, I've configured a Queue node for the approval part of my workflow.
This process includes setting the value for two fields using the Set Fields node, as well as carrying over existing data using the Set Process Field node. The data from our Set Process Field node data is going to be used in the body of our Email node, so that we can provide additional details about the document in question. There's a Condition node added to double-check the Approval field, and based on of the value, will route the documents accordingly.
The Queue node itself has 3 actions that the First Approver can take: Approve, Place on Hold, or Reject. Depending on the queue action selected, this will route documents to a different section of the workflow, and continue through the workflow process. This process contains no automated actions.
Users within the Administrators, Manager, and Office Staff groups will have access to documents in this Queue.
Queue Node Example Configuration
User Actions
System Actions to Automatically Move a Document Along
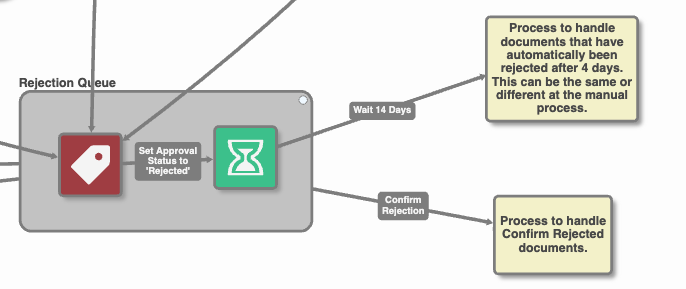
In this example, I've configured a Queue node to section part of my workflow for a "Rejection Queue."
This process has a User Action that can be taken to Confirm the Rejection or an Automated Action that will occur after 14 days.
System Action