Run GlobalSearch Server Installer
GlobalSearch is distributed through download links. These links can be obtained from the Square 9 Softworks Fulfillment department by contacting them at:
Phone – 203.789.0889
Email – fulfillment@square-9.com
Once the link is sent, it is valid for 14 days. Download the self-extracting installation media to a folder of your choice. The license file (ssfeatures.lic) and serial number should also be included in the email.
Prior to upgrading GlobalSearch, the logged-in account that will perform the installation must have the correct permissions, including permissions to create databases within SQL Server.
- Local Install – If you’re doing a local installation and there is no domain on your network, you must be logged into the GlobalSearch server as a local Administrator.
- Domain Install – If you’re installing onto a domain server, you must log on as a Domain Administrator and have permissions to create users on the Active Directory.
- Local Install on Domain Server – If your machine is connected to a domain even though the installation is local, logging on as a Domain Administrator is still recommended.
Troubleshooting SQL Server Deployment
Microsoft does not recommend deploying SQL Server on a server configured as a Domain Controller. Since SQL Server is required for the operations of GlobalSearch and GlobalCapture, Square 9 does not recommend this configuration. You can deploy in that fashion if you need to, but if you do so, Square 9 recommends that you first install SQL Server and then install your Square 9 application, following the Square 9 guidelines for deploying to an existing SQL Server instance. Please consult Microsoft article linked here for additional information.
GlobalSearch Media Extraction
- Once the installation media has been downloaded, double-click on it to run the self-extractor.
- In the GlobalSearch Self-Extractor window, select the location you want the files to go in Select extraction path.
The default location isC:\SSMedia\version. - Click OK to proceed with the extraction.
This may take some time. If the extraction errors out, it is possible that the download has been corrupted or you have run out of disk space. If so, it will need to be downloaded again. Once it has been extracted, proceed to the GlobalSearch installation.
Square 9 Installer
Use the Square 9 Installer to install first GlobalSearch and then GlobalCapture. After these upgrades, install any GlobalSearch clients and GlobalCapture Engines. Note that the process requires one or more system reboots to complete.
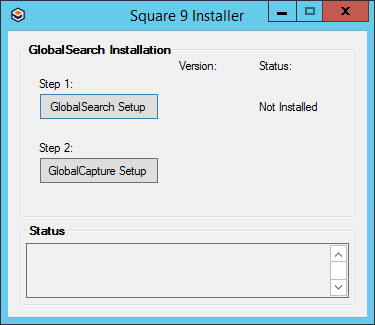
- Navigate to the installation media and right-click on
Square9.Installer.exe. Select Run as Administrator. - In the Square 9 Installer, click GlobalSearch Setup to begin the Installation Wizard for the GlobalSearch server installation.
- At the install prompt, click Yes.
Installation Wizard
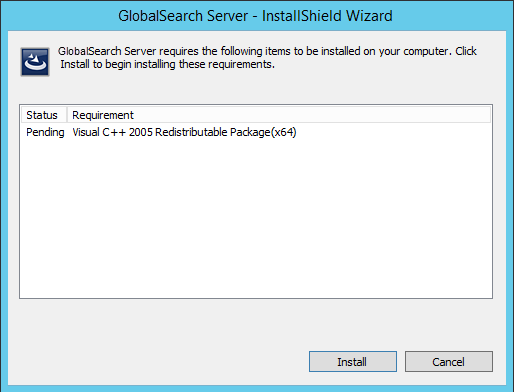
- If you are missing any prerequisites, a message will appear listing the missing items. Click Install. This may require further steps and a system reboot before continuing. If you do not receive this window, continue to the next step.
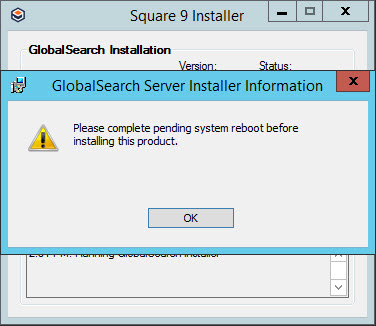
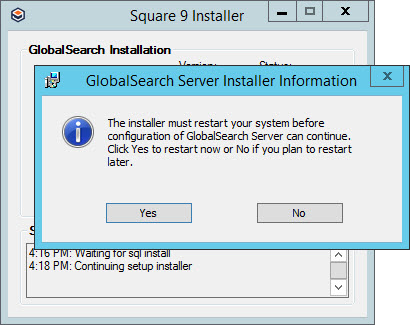
- At the reboot approval prompt, click OK.
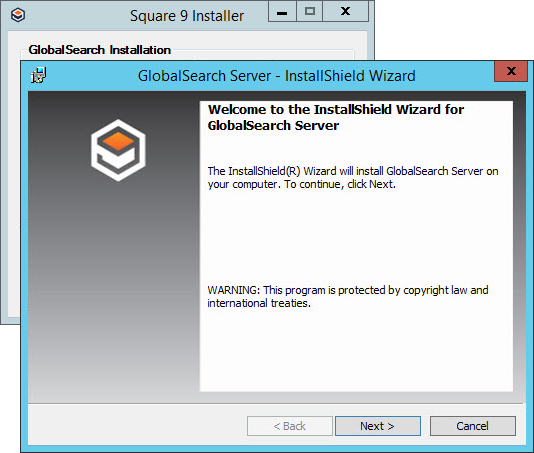
- Click Next to start the GlobalSearch installation process using the Installation Wizard. There may be a pause for installation.
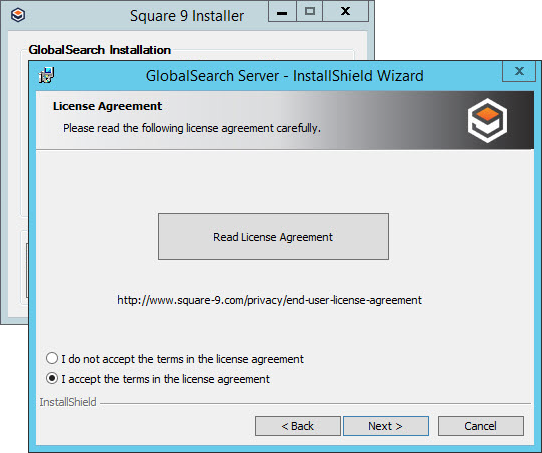
License Agreement
- Click Read License Agreement to read the agreement.
- Click I accept the terms in the license agreement to accept the terms and then click Next.
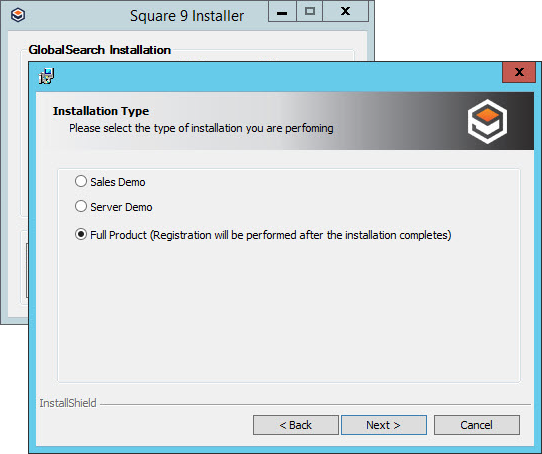
Installation Type
- In Installation Type, choose the type of installation:
- Sales Demo – This option is designed for resellers to demonstrate the product and as such, it has a 300-document database limit and no client install directory. It includes sample databases (installed by default), with several typical use situations to help with demonstrations. It assumes that your IP address will change and configuration files will be set to reference your machine as a localhost.
- Server Demo – This option is designed for demonstrating and training on the product. It also has a 300-document database limit and sample databases (installed by default). Unlike the Sales Demo, it includes a client install directory. It is configured to use your server’s static IP address or name.
- Full Product – This installation type configures the full product. It requires a serial number for the product, sent from Square 9 Fulfillment. The Full Product installation has no document database limit and includes a client install directory. Sample databases are installed, if you select them during a custom install.
- Sales Demo – This option is designed for resellers to demonstrate the product and as such, it has a 300-document database limit and no client install directory. It includes sample databases (installed by default), with several typical use situations to help with demonstrations. It assumes that your IP address will change and configuration files will be set to reference your machine as a localhost.
- Click Next.
Authentication Configuration
An SSAdministrator user and an SSAdmin group are created as part of the installation, whose members have complete control of the application. The user who does the installation is automatically added to the SSAdmin group, as is the SSAdministrator. The installation will create the SSAdministrator user either in AD or on a Local Server (depending on what you select at installation).
The SSAdministrator is the application identity running the IIS Application Pool and with access to directories for GlobalSearch created during installation. (The SSAdministrator will not have access to directories created after installation if they are not created within directories the account already has access to; access must be manually set.)
- In Authentication Configuration, in the Please select Client Authentication Type group, select the client authentication type:
- Single Sign On – Use to allow automatic sign on into GlobalSearch. When users launch GlobalSearch it will use their Windows Active Directory or Square 9 User credentials to log in.
- Manual – When selected, users launch GlobalSearch, a window will appear prompting them to log in using their credentials to sign into GlobalSearch. The information that is passed here will be the users’ Windows or Square 9 User credentials.
- Single Sign On – Use to allow automatic sign on into GlobalSearch. When users launch GlobalSearch it will use their Windows Active Directory or Square 9 User credentials to log in.
- In the Please select Authentication Server group, select either Active Directory or Local Server.
- Active Directory – Enable to indicate GlobalSearch is to be installed using Active Directory users and groups.
- Local Server – Enable to indicate GlobalSearch is to be installed using Workgroup users and groups (users and groups that are local to the server).
- Active Directory – Enable to indicate GlobalSearch is to be installed using Active Directory users and groups.
- Enter a password for the SSAdministrator account for the GlobalSearch instance, confirm it.
This password must meet your computer or network’s password guidelines. The Installation Wizard will let you enter a non-compliant password, but GlobalCapture services will not run properly if the password does not meet your system requirements. It is case sensitive. The SSAdministrator password can be changed at a later point. See Change the SSAdministrator Password for details. - Optionally, select Use IP in configuration files. This requires a static IP address.
- Click Next.

Setup Type
- In Setup Type, choose either the Complete or the Custom setup type:
- Complete Setup – To perform a complete installation, with all the default settings and file paths, choose Complete. This will include the installation of demonstration Inboxes and the demonstration databases in addition to the application.
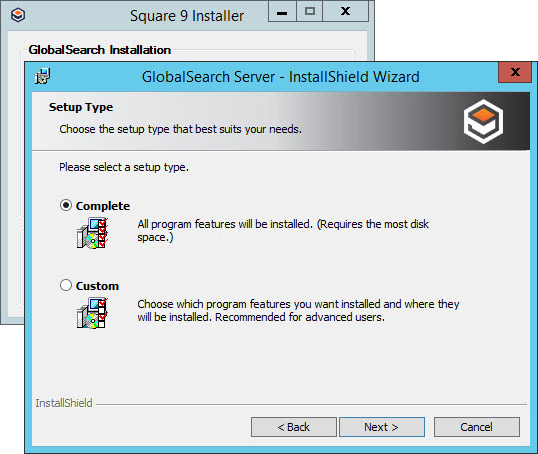
Custom Setup – To customize the installation, choose Custom and take the following steps. Note that optional features can be installed, but will not function without the proper license.
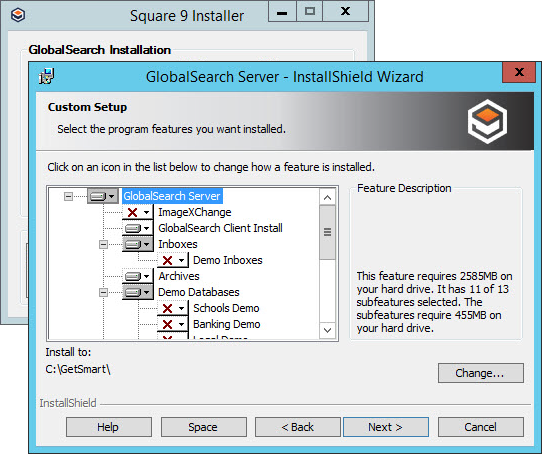
Run Custom Setup
To customize the installation, such as installing extra components, choosing the SQL Server instance to install to, or setting the location GlobalSearch will be installed onto, choose Custom. Note that optional features can be installed, but will not function without the proper license.
- In Setup Type, choose Custom and click Next.

- Scroll through the list and select the desired options. When you click on a feature in the list you will see a description and the amount of hard drive space required for that feature.
- To remove a feature from installation, in Custom Setup, click the drop-down to the left of it and select This feature will not be available.
Change Location
- To change the installation location for the
GetSmartdirectory from the default ofC:\GetSmart\, click Change. In Change Current Destination Folder, enter the path (or browse) to the destination folder and enter the path to where GlobalSearch will be installed. Click OK.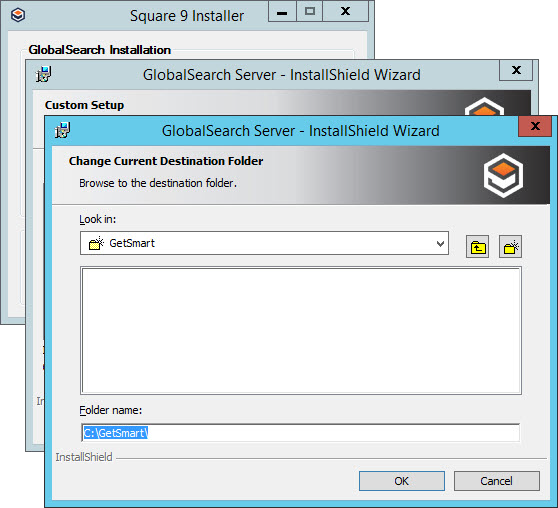
- To change the location of items from their default location, select the item in the features list and click Change. In Change Current Destination Folder, enter the path (or browse) to the custom item location. Enter the new path to where the item will be installed. Click OK.
Install for QuickBooks Options
You must have a desktop version of Intuit™ QuickBooks® installed to use the QuickBill Bundle, QuickScan, QuickLinks, or QuickSync connectors and a license key from Square 9 Fulfillment.
While QuickBill Bundle, QuickScan, and QuickLinks are designed to work with GlobalSearch, QuickSync may be run with GlobalSearch or with another line-of-business application. It can be run on multiple desktops, although it is not recommended to have users syncing to the same database at the same time. This may result in inconsistent data or duplicate data when syncing.
After installation, allow time for the initial data exchange to and from QuickBooks, which will vary depending upon your data. Once the initial data exchange has been done, QuickSync will only push the data which has been changed since the last sync command.
Choose Database
In Database Type, choose to either create or use an existing SQL database instance for GlobalSearch.
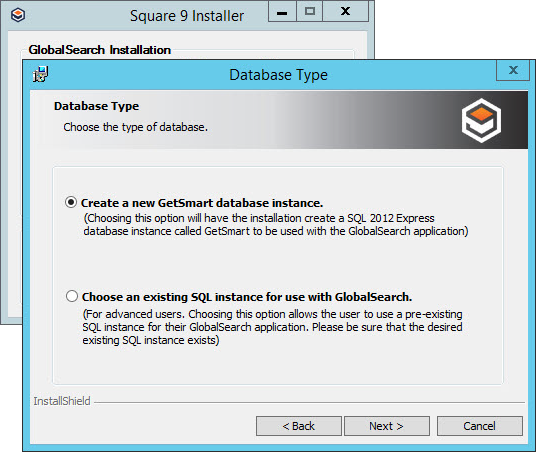
Create a New Database Instance
By default, GlobalSearch installs with Microsoft SQL 2012 Express® and creates a SQL instance called “GetSmart.”
- In Database Type, select Create a new GetSmart database instance and click Next.
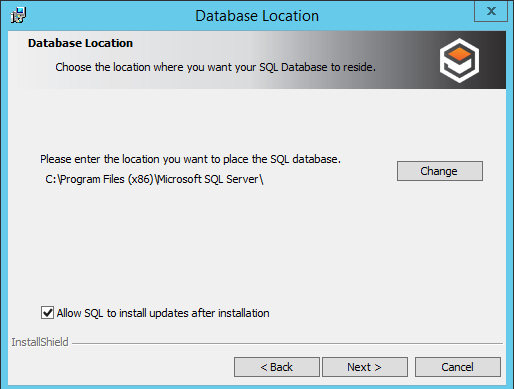
- To indicate an alternate installation location for SQL Server 2012 Express, in Database Location, click Change.
- If updates to SQL Server are desired, enable Allow SQL to install updates after installation and click Next.
Select an Existing Database Instance
You can use GlobalSearch with an existing SQL Server database instance (SQL Server 2008 R2 or above).
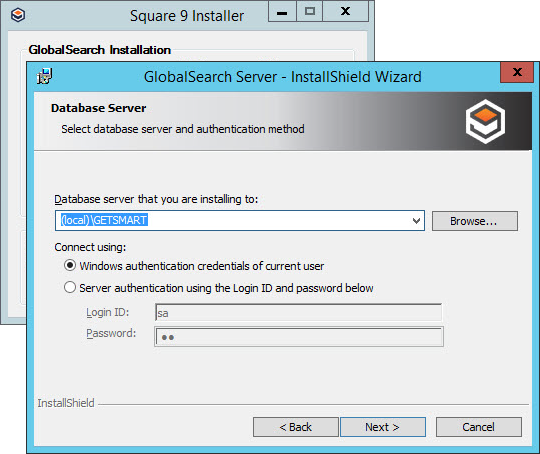
- In Database Type, select Choose an existing SQL instance for use with GlobalSearch and click Next.
- In Database Server, in Database server that you are installing to, expand the list and select from a SQL Server instances or browse to a SQL Server instance.
- Choose login credentials in the Connect Using section:
- Select Windows Authentication credentials of current user to use the login credentials of the currently logged in user to create databases in the specified SQL instance.
- Select Server authentication using the Login ID and password below to enter the System Administrator (SA) user credentials.
- Select Windows Authentication credentials of current user to use the login credentials of the currently logged in user to create databases in the specified SQL instance.
- Click Next.
Choose Web Service Location
By default, GlobalSearch is installed onto port 80. GlobalSearch must be the only application running on a specified port. The availability of the specified port is not validated by the installer; you must ensure the port’s availability prior to beginning the installation.
- If you plan on using SSL you shouldn't switch this port to port 443 on install. Use default port 80 then confirm you have a functioning system after install is finished. Then perform an SSL switch over.
- How To Perform A GlobalSearch SSL Switch-over
- Port 8080 is necessary for use with 6.1+ Identity Manager services. It is suggested you do not use this port as a custom port.
- Identity Manager
- Choose the default settings or change them in Web Service Location.
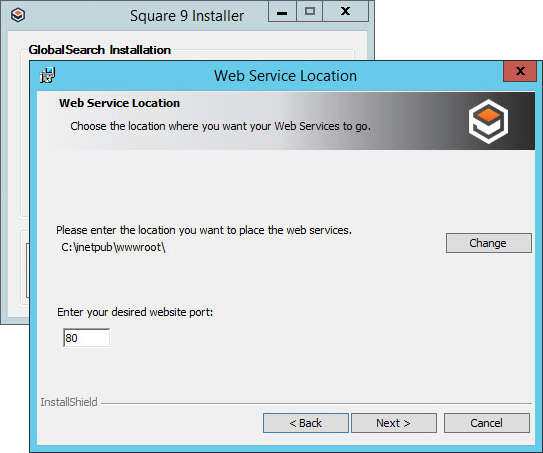
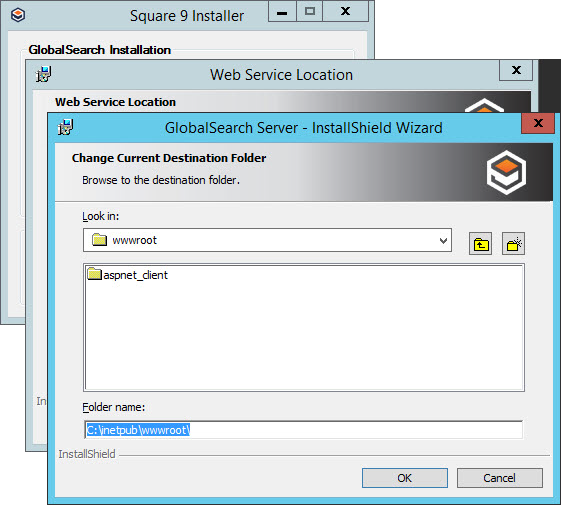
- To change the location in which web services will be installed, click Change. Enter the new location path in the Change Current Destination Folder dialog that appears and then click OK.
- To change the port, enter a port number in the Enter your desired web port text box.
- Click Next.
- In Setup Type, choose Custom and click Next.
- Complete Setup – To perform a complete installation, with all the default settings and file paths, choose Complete. This will include the installation of demonstration Inboxes and the demonstration databases in addition to the application.
- Click Next. The Installation Wizard will proceed to the Ready to Install window.
Install GlobalSearch Server
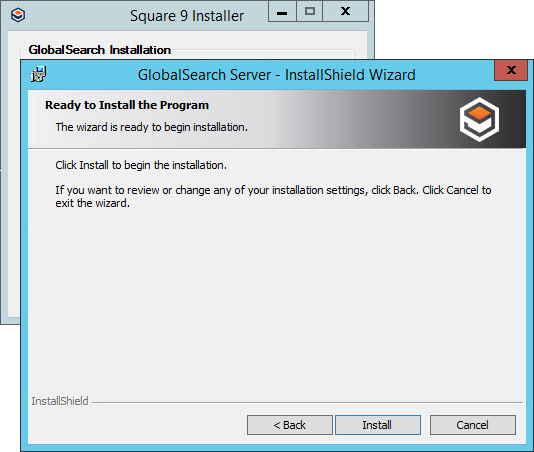
Once preparation is done, you are ready to install GlobalSearch.
- To install GlobalSearch, in Ready to Install the Program, click Install. There will be a pause while the installation is processing. If necessary, click Back to return to previous dialog boxes and make adjustments to the installation.
- The installation will run. When it is completed, you can choose the options to display a log or test the upgrade.
- To show the log, enable Show the Windows Installer Log.
- Click Validate the Installation to test the GlobalSearch Server upgrade.
- To show the log, enable Show the Windows Installer Log.
- Click Finish to exit the GlobalSearch Server installer.
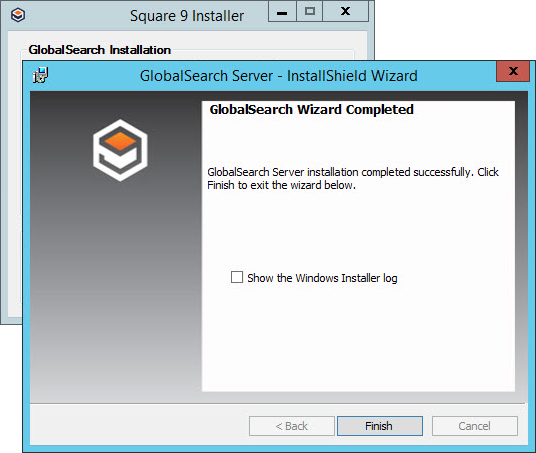
- Restart your system.
- Once the system has been restarted GlobalSearch will start automatically and the desktop shortcut will appear. At the login prompt, click Cancel and proceed to the GlobalCapture installation.
Install GlobalCapture
GlobalSearch requires GlobalCapture to run all of its features. Start the Installation Wizard and proceed to Install GlobalCapture. Note that If you already have the standalone version of GlobalCapture installed, you must uninstall it first, then install GlobalSearch, and then install this version of GlobalCapture.
With the GlobalCapture installation complete, the GlobalSearch and GlobalCapture shortcuts will appear on your Windows desktop.

Register Square 9 Products
Once GlobalSearch is installed you will need to register the product. Fulfillment has sent an email with a link to the media and a serial number. Use that serial number to register the copy of GlobalSearch.
If you do not register GlobalSearch, some features may be limited with the system and there is a maximum number of documents that can be stored into GlobalSearch.