Scan To File
The GlobalCapture MFP Connector pack allows for touch panel integration on multi-function devices from manufacturers like Konica Minolta, Sharp, and Xerox. This workflow provides a "Scan To File" interface from the device with the following features:
- Allow administrators to control the target destination(s) available for files.
- Allow the end user to name the file.
- Allow the end user to choose the output file format. GlobalCapture can convert documents to a variety of formats, including Word, Excel, and PDF.
Setup
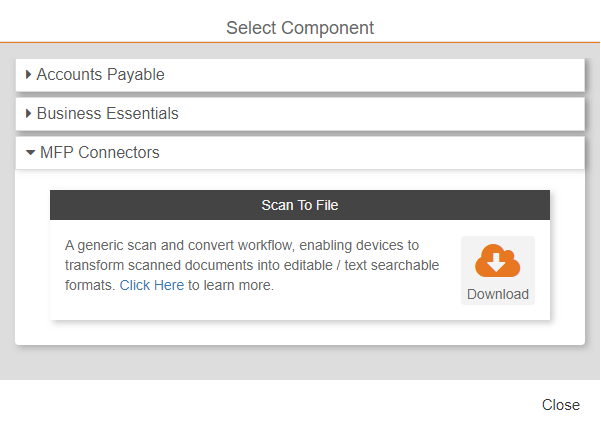
To add this workflow, from the Migration tab on the GlobalCapture Administration page, click the Cloud import source. Expand the MFP Connectors section and click the Download button to import the workflow.
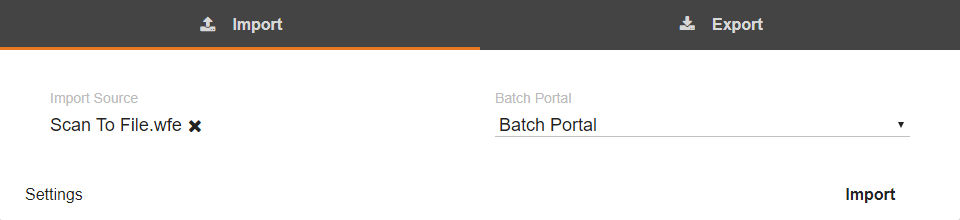
Once the package is downloaded, the import process begins automatically. With a Batch Portal selected, click Import.
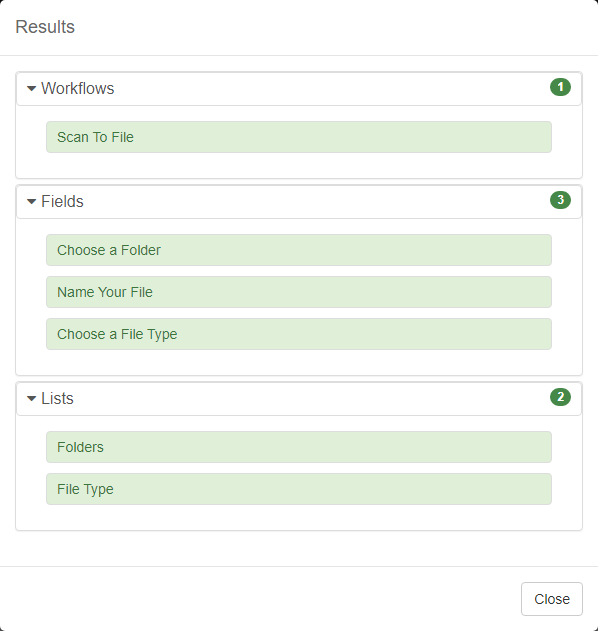
Assuming the workflow has not been previously imported and there are no other conflicts, the import should run and the Results summary should be all green. If there are any conflicts, follow the steps to resolve them and complete the import.
Configuration
The workflow contains three Process Fields. Each field is named in a way to help guide the user through the process from the MFP. The Fields are:
- Choose a Folder
This field is list bound to a List named Folders. To add or change folders, simply edit the Folders List.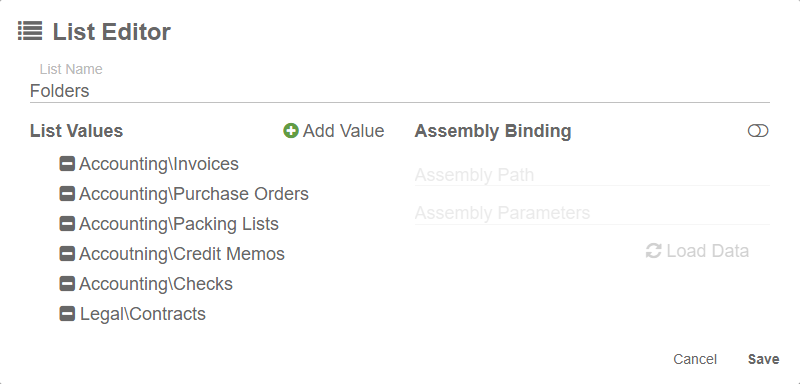
- Name Your File
This is a 50 character free form text field, allowing the user to specify a file name for the document being scanned. - Choose a File Type
This is a list bound field, tied to the List named File Type. The workflow uses the user selection here to determine how to output the scanned file. The workflow supports output to Tiff, PDF, Word, and Excel formats. Customers with specific format conversion needs beyond what is offered natively can extend the workflow with their own conversion assemblies if desired.
The workflow process is straightforward, and contains a condition for each file format option.
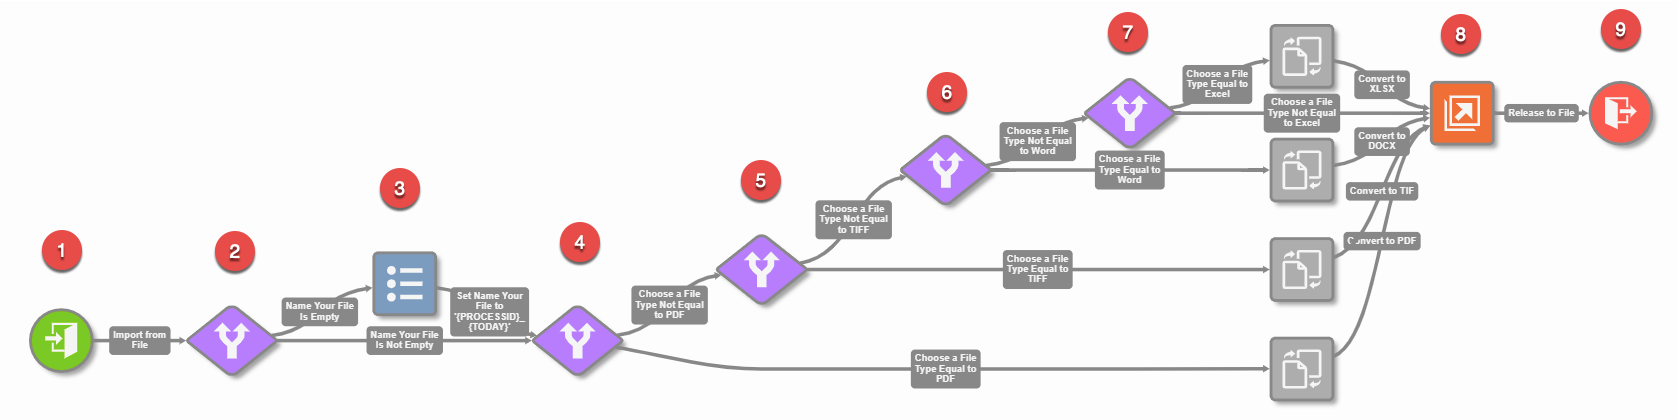
- Import the scan. Even for scan workflows, an import location must exist. By default, the workflow is set to c:\data\filerelease.
- Check to see if the user provided a file name.
- If no file name is provided, set the file name to the Process ID and Date.
- Check for the PDF output format.
- Check for the TIFF output format.
- Check for the WORD output format.
- Check for the EXCEL output format.
- Release the document to the selected location.
- End the workflow.